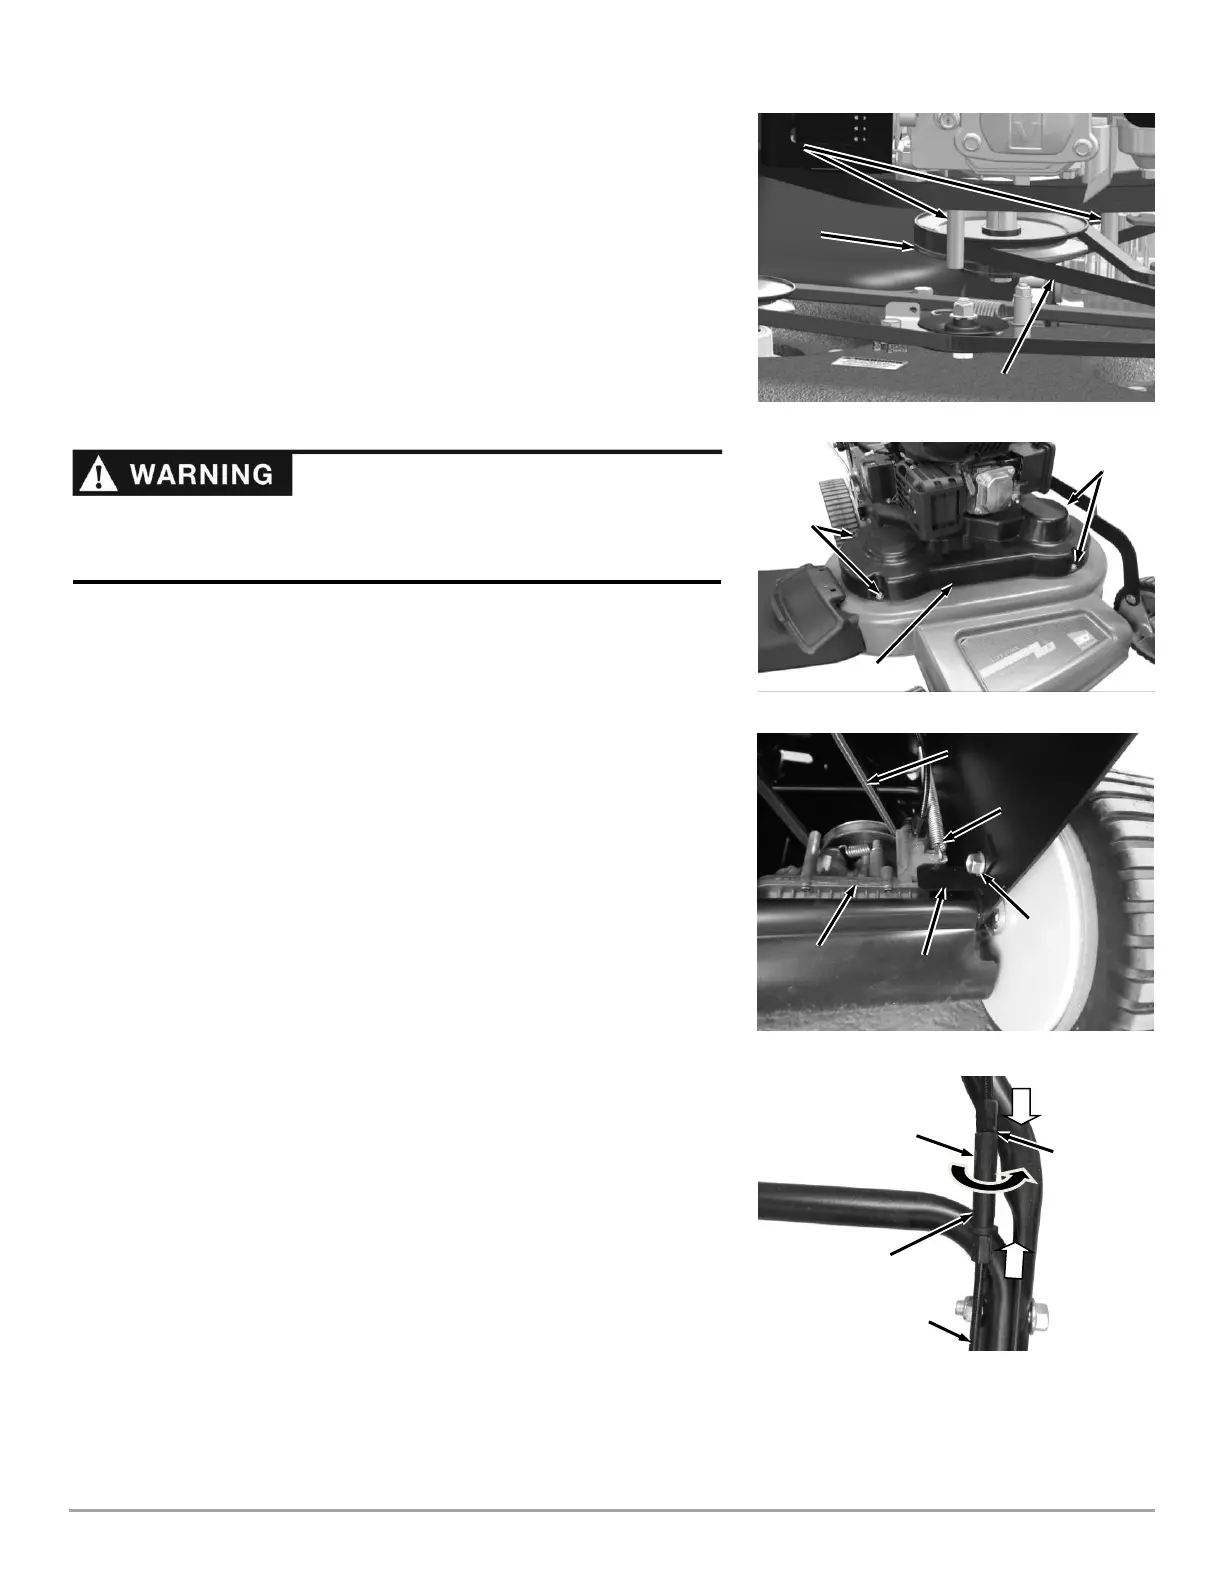
NOTICE! Make sure the Belt is on the inside of the Engine Pulley Belt Guide
Pins to prevent Belt damage (Figure 34).
7. Ensure the Belt stays on the Idler Pulley as you rotate the Belt onto the Deck
Pulley (Figure 33).
8. Reinstall the Belt Guide (Figure 32).
9. Reinstall the traction Drive Belt as described in the following "Replacing the
Traction Drive Belt" section (steps 5 thru 7).
10. Adjust the Blade Engage Cable as described in "Adjusting the Blade Engage
Cable" on this page.
11. Install the Belt Cover with the four Bolts using a 1/2″ Wrench (Figure 35).
Replacing the Traction Drive Belt
Tools and Supplies Needed:
• DR Belt #395651
• 9/16" Wrench
• Locking Pliers
1. Support the front of the Mower with Blocks or Jack Stands to gain access
under the Deck.
2. Remove the Bolt securing the Anti-Rotation Bracket and remove the Bracket
(Figure 36).
3. Remove the Spring end from the Transaxle using Locking Pliers.
4. Rotate the transaxle forward to remove the Belt from the Transaxle pulley
and Engine Pulley.
5. Install the new Belt onto the Pulleys.
6. Secure the Spring to the Transaxle using Locking Pliers.
7. Reinstall the Anti-Rotation Bracket.
Adjusting the Blade Engage Cable
The Blade Engage Belt will stretch slightly when new, then more over time. If
the Belt appears to be slipping when mowing, adjust the Blade Engage Cable to
tighten it. The Adjuster is located on the Cable itself. If adjusting the Cable
doesn’t stop the Belt from slipping, replace the Blade Engage Belt.
Tools and Supplies Needed:
• 1/2" Wrench
1. Remove the Belt Cover as described in “Idler Arm Lubrication” steps 1 thru 3
on page 18.
2. Reset the Cable In-Line Adjuster: Rotate the center section of the In-Line
Adjuster to bring the threaded ends of the Adjuster against the center
section (Figure 37). When fully adjusted, no threads will be visible, indicating
that the Cable is at its loosest adjustment.
Note: The Cable will be as loose as possible at the Handlebar and the Brake Pad
will have full contact with the Pulley when no threads are showing on the Adjuster.