20 DR
®
WIDE-CUT LAWN MOWER
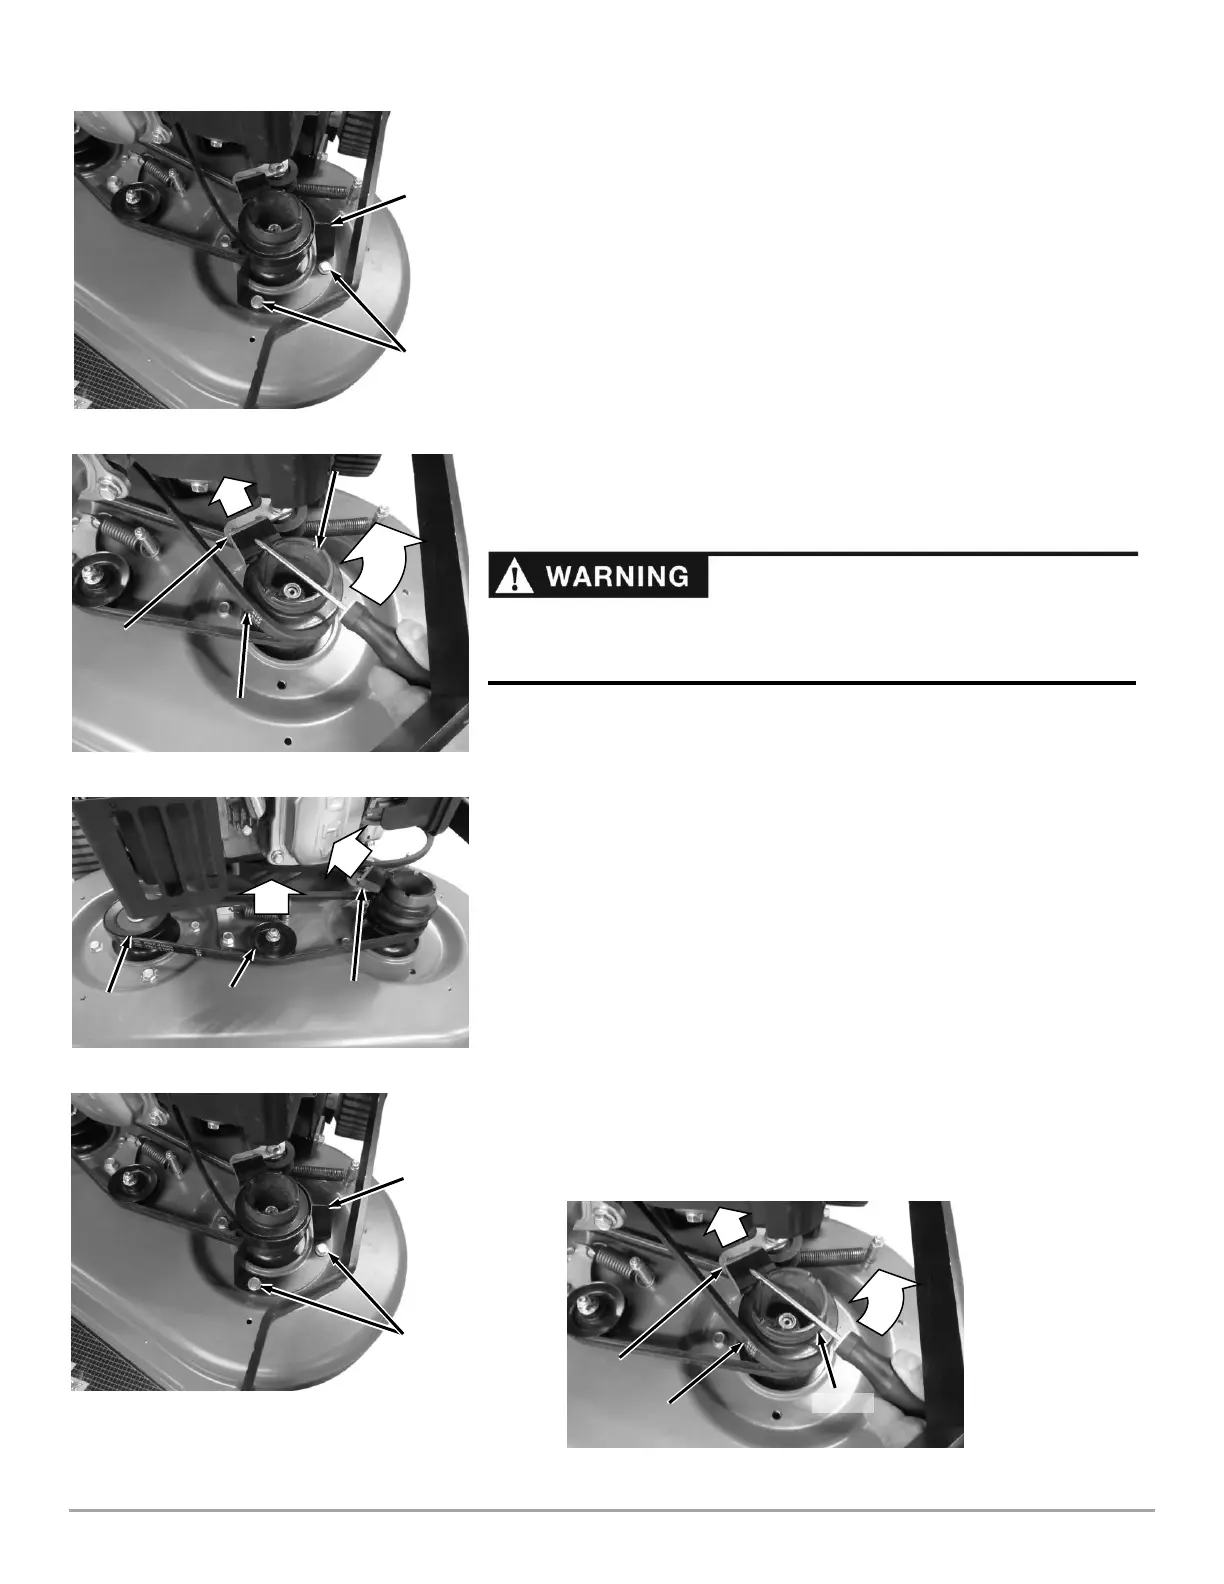
2. Remove the two Bolts securing the Blade Pulley Belt Guide (Figure 29).
3. Remove the Blade Brake Belt from the Blade Pulley by rotating the Pulley
with a Screwdriver (in slots) as you roll the Blade Brake Belt over the top of
the Pulley (Figure 30).
4. Move the Blade Brake Arm back and move the Blade Brake Belt out of the
way.
5. Move the Blade Belt Idler back and remove the Blade Belt from the right side
Pulley (Figure 31).
6. Move the Blade Brake Arm back and remove the Blade Belt from the
machine.
7. Install the new Blade Belt onto the Blade Pulleys.
8. Reinstall the Blade Brake Belt onto the Blade Brake Pulley.
9. Reinstall the Belt Guide and Belt Cover.
Replacing the Blade Brake Belt
Tools and Supplies Needed:
• DR Belt #395651
• 1/2" Wrench
• 9/16" Wrench
1. Remove the Belt Cover as described in “Idler Arm Lubrication” (steps 1 thru
3 on page 18).
2. Remove the Traction Drive Belt as described in “Replacing the Traction
Drive Belt” (steps 1 thru 4 on page 21).
3. Remove the two Bolts securing the Blade Pulley Belt Guide using a 9/16″
Wrench and remove the Guide (Figure 32).
4. Remove the Blade Brake Belt from the Blade Pulley by rotating the Pulley
with a Screwdriver (in slots) as you roll the Blade Brake Belt over the top of
the Pulley (Figure 33).
5. Push the Blade Brake Arm back and remove the Blade Brake Belt from the
Blade and Engine Pulleys.
6. Install the new Belt onto the Engine Pulley.
ONLY USE DR BELTS ON THE DR MOWER. The Belts have been tested and
are designed specifically to work with the Blade Braking system. Use of other
Belts could damage the machine and cause serious injury to the operator.