26 DR
®
POWERWAGON
PARKING BRAKE ADJUSTMENT:
You must ensure the Parking Brake Lock works properly whenever the Brakes are adjusted. If the Brakes are adjusted too tight the
Lever will not squeeze tight enough to the Handle and the lock will not engage or it will engage and is extremely difficult to
disengage.
Perform the previous BRAKE CABLE ADJUSTMENT and/or the BRAKE ARM ADJUSTMENT in the opposite direction than
described to loosen the Brake Cable.
Note: Turn the Adjustment Nuts only 1/4 turn at a time, and then test the Parking Brake Lock to see if the adjustment worked.
Changing the Parking Brake Pads
Note: If your DR POWERWAGON rolls on slopes when the Parking Brake is set,
and you have tried adjusting the Brakes, the Brake Pads may need replacement.
Tools and Supplies needed:
3/8" Socket with Ratchet and Extension
1/2" Socket with Ratchet and Extension
Lithium Grease
Clean Mat or container for loose parts
Note: You may want to remove the Wheel to provide easier access to the Brake
Caliper area. See “Removing and Replacing the Front Wheels” in this Chapter.
1. Find a clean level area to work. The Parking Brake should NOT be engaged.
Chock the Wheels so the machine cannot move.
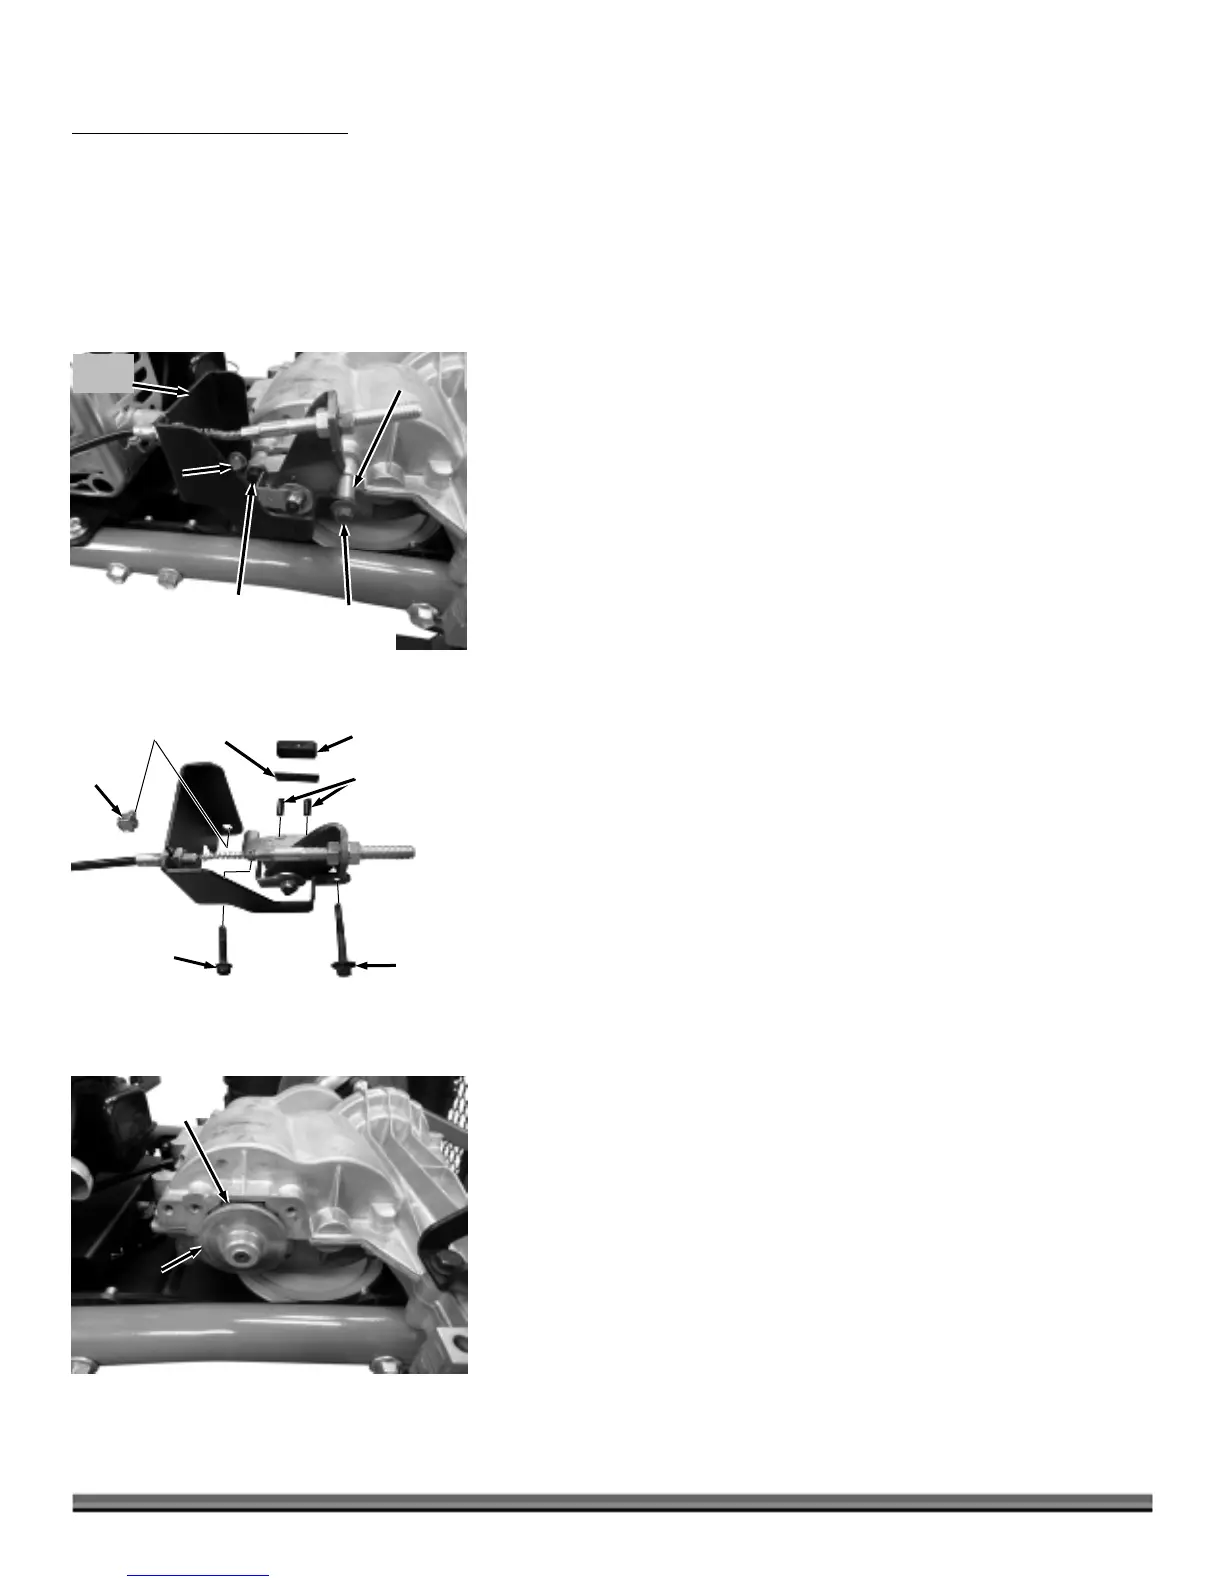
2. Locate the Brake Caliper at the right/front of the machine
(Figure 52).
3. Remove the Cable Bracket Bolt using a 1/2" Socket with a Ratchet and
Extension.
4. Remove the long Caliper Bolt with a 3/8" Wrench and remove the Spacer
from the Transaxle.
5. Remove the short Caliper Bolt with a 3/8" Wrench and remove the Caliper
from the Transaxle.
Note:
The inside of the Caliper contains four small parts: the Brake Pad, the
Backing Plate, and two small Actuator Pins (Figure 53). As you let the Caliper hang
from the Brake Cable, keep track of these parts as they will likely fall out. Clean
away any debris from these parts and the inside of the Caliper.
6. Pull the Brake Disc off the splined Shaft and remove the Brake Pad (Figure
54).
7. Insert a new Brake Pad into the cavity and hold in place as you reinstall the
Brake Disc.
8. Lightly grease the Actuator Pins with Lithium Grease and insert the Pins into
the Caliper (Figure 53).
9. Insert the Backing Plate with new Brake Pad and position the Caliper onto
the Transaxle.
10. Secure the Caliper and Cable Bracket in the reverse order of disassembly.
Note:
After new Brake Pads have been installed you will need to perform the
“Checking and Adjusting the Brakes” procedures to compensate for the thicker Pads.
Brake Disc
Figure 54
Brake
Pa
Figure 52
Caliper Bolt
(long)
Spacer
Caliper Bolt
(short)
Cable
Bracket
Bolt
Cable
Bracket
Bracket
Bolt
Figure 53
Caliper
Bolt
(long)
Caliper Bolt
(Short)
Brake Pa
Backing Plate
ctuator Pin
 Loading...
