CONTACT US AT www.DRpower.com 23
Removing and Replacing the Blade
Tools and Supplies needed:
15/16" Wrench
Torque Wrench
Gloves
Wood Block to brace the Blade*
*The Wood Block must be strong enough to safely secure the Blade and long
enough to rest against the Deck as shown.
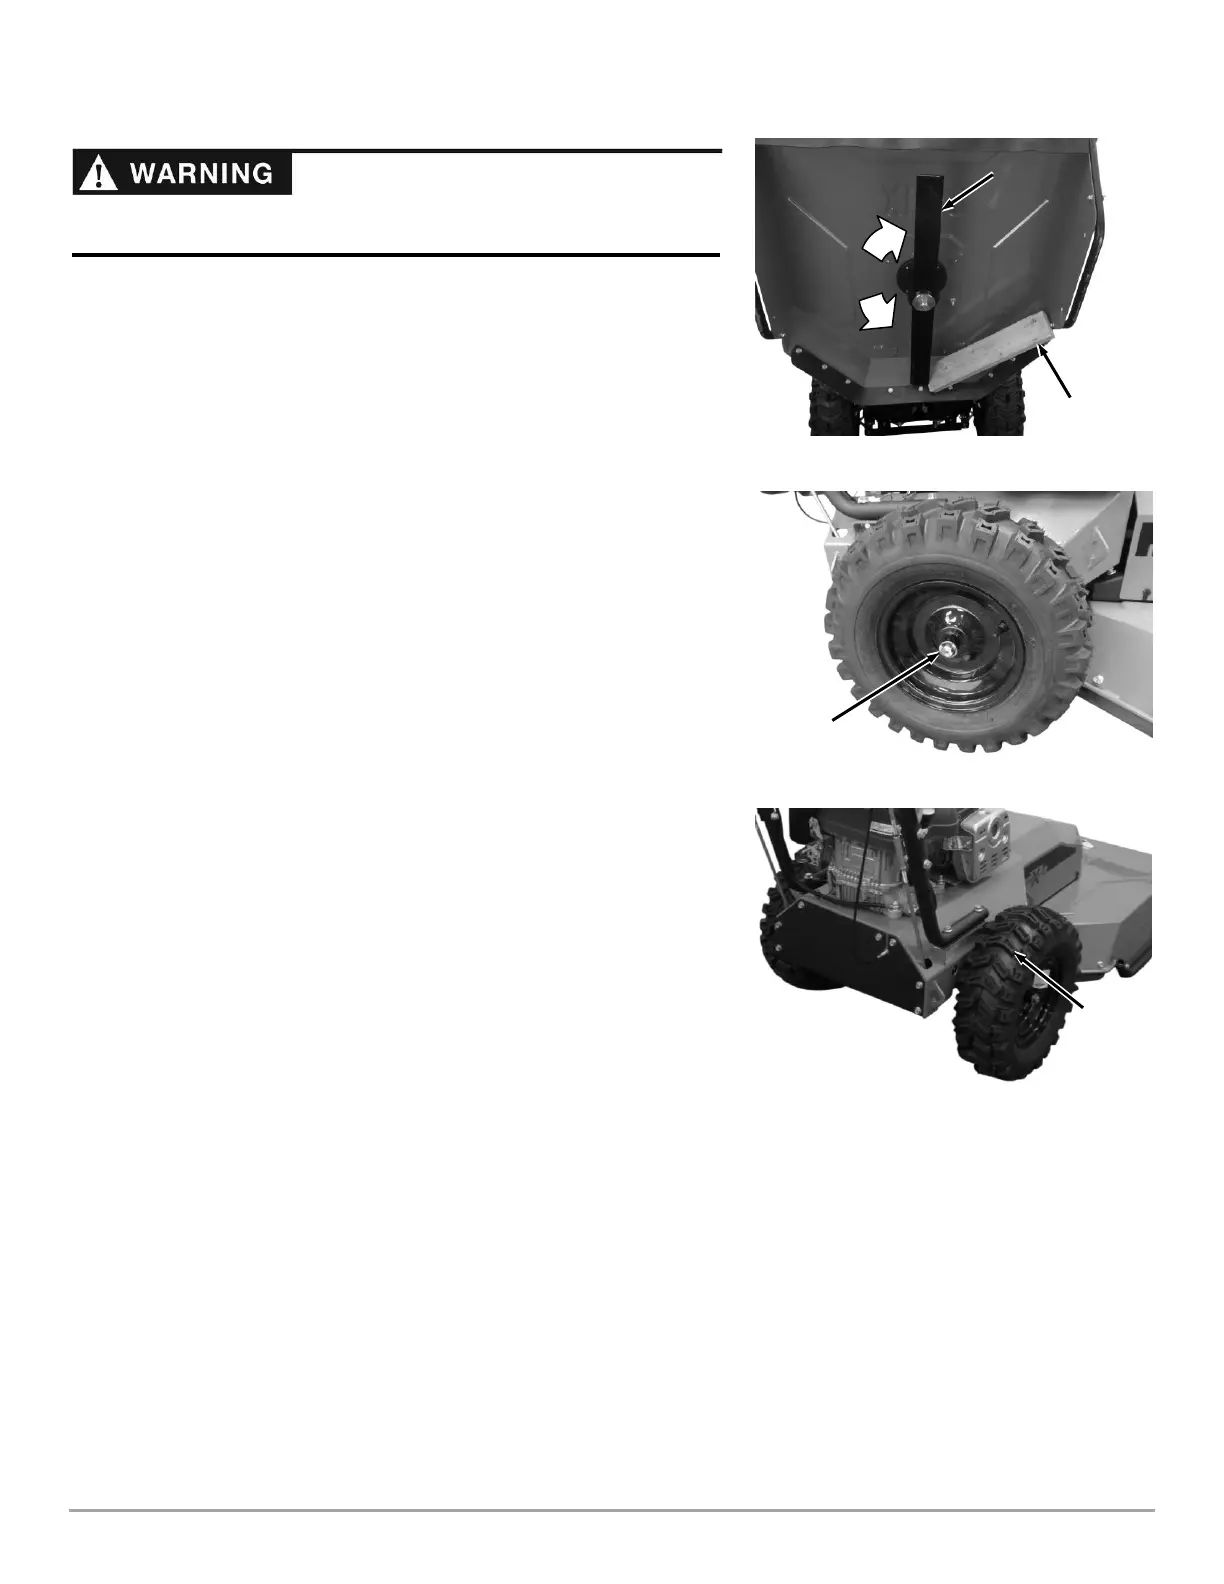
1. Insert a Wood Block between the Blade and the Deck to stop rotation (Figure
42).
2. Remove the Lock Nut (standard, right-hand thread) and Washer using a
15/16" Wrench.
3. Remove the Blade and the Anti-Wrap Guard.
Note: The Blade has two cutting edges on each end. It can be turned over to use the
other side. There is also the option to sharpen the dull cutting edge.
4. Mount the Anti-Wrap Guard, new Blade, Washer, and Lock Nut and tighten
securely (Torque to 100 ft-lbs.). If the Locknut is removed and installed
more than once, it should be replaced with a new one.
Note: Be sure to seat the Blade completely over the small ridge in the Spindle Hub
before tightening the Lock Nut.
Removing the Wheels
Tools and Supplies needed:
Floor Jack
E-Clip Removal Tool (Large Flat Head Screwdriver or Needle Nose Pliers will
work also)
Eye Protection
Rag
1. Jack up the machine so the Wheel is off the ground.
2. Wear eye protection as you remove the E-Clip and Shim from the Axle
(Figure 43). Slide the Wheel off the Axle ensuring that the Square Key stays
in the Axle Key slot.
3. Align the Key slot in the Wheel Hub to the Key in the Axle and install the
new/repaired Wheel with the “V” tread pointing forward (Figure 44). Secure
with the Washer and E-Clip.
4. Lower the machine to the ground.
Replace the Blade when worn or damaged to prevent serious injury to the
operator or possible machine damage.