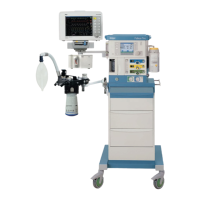
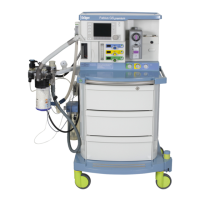
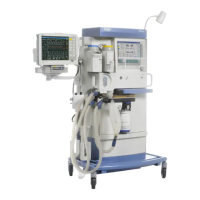
Fabius Tiro Quick Reference Guide
Start of Day
Run System Test – Checks System’s Diagnostics
Flow Sensor Calibration – While the Fabius Tiro is in “Standby” press “Calibrate Flow Sensor” soft key. The
screen will prompt you to remove the expiratory hose, assure all flow meters are off then confirm with the rotary
knob. This process typically takes about 15 seconds. Once complete, the screen will either prompt you to
replace expiratory limb or, if the flow sensor fails, it will read, “Flow Sensor Fail.” The flow sensors typically last 3
months so, if after several attempts to calibrate, replace and discard.
O2 Calibration – Remove O2 cell from post. Allow cell to expose itself to ambient air for at least two minuets.
After the proper time has passed, if in “Standby” depress the “Calibrate O2 Sensor” soft key and confirm with the
rotary knob. This process takes about 15 seconds as well. Once calibrated, the screen will read 21% O2.
Replace cell back on post. You can calibrate the O2 cell while ventilating as well by simply depressing the
“Setup” soft key. Once depressed, there will be an option to “Calibrate O2 Sensor.” Depress the soft key and
follow the directions.
Leak /Compliance Test – Press Leak/Compl soft key. Place patient wye connection on the base of the bag
mount. Remove sampling line. Set APL valve 40-50 cm. Ensure flow meters are off. Depress the flush button to
15-30 cmH2O in screen display. Leak and compliance will be displayed on screen.
Check the Scavenger – Assure the red float is between the two black lines. If adjustment is needed, simply turn
the black knob until desired setting is reached.
Check the Back up tanks – Turn each tank on and assure proper pressure which can be read on the gauges
below the vaporizers.
Manual Ventilation
Adjusting Flows – Turn on O2 flow meter to the left until desired setting is reached. This will activate the
monitor if it was in “Standby.” Once the flow meter is on, the monitor is automatically in the “Man/Spont” which
allows you to manually ventilate the patient.
Alarms – Once in “Man/Spont” the “Pressure Alarm” is automatically off. Depress the soft key below the “Volume
Alarm” to turn it off.
APL Valve - You can only assist the patient when the APL valve is in the “Man” position. Adjust the desired
pressure by turn right to tighten or left to loosen. The “Spont” position on the APL valve is open. Lift up on APL
to dump pressure off the patient or to flush the system.
Mechanical Ventilation
Volume Ventilation – Depress the “Volume” soft key. The default parameters for volume ventilation appear. To
change a setting, simply depress the soft key below the parameter, turn the rotary knob and confirm. Once the
desired settings are present, confirm the rotary knob once more to activate the ventilator.
Pressure Control Ventilation – Depress the “Pressure” soft key. The default parameters for pressure control
ventilation appear. To change a setting, simply depress the soft key below the parameter, turn the rotary knob
and confirm. Once the desired settings are present, confirm the rotary knob once more to activate the ventilator.
APL Valve – The APL Valve is out of the circuit in mechanical ventilation -no interaction is required.