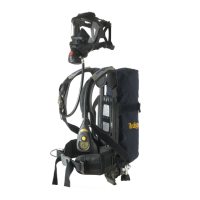
Plus and PSS Series - Lung Demand Valve
tm 1285.001 - August 2001
5:12
5.7 Replacing Injector Pipe - A, AE, and N
2
1
Type A - 1 - Black 2 - Black
Type AE - 1 - White 2- Black
Type N - 1 - Black 2 - White
Fig 9
1137
Tools required
Plate Spanner R26817
No. 2 Posi-Driv Screwdriver 3331245
AE and N
Assembly Tool – (Connector O ring) 3310664
Connector Tool 3310679
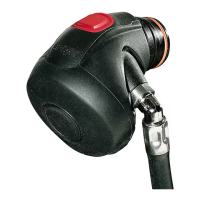
Important Note: The Injector Pipes are
pre-set units for use only with the
correct variant of lung demand
valve - A, AE or N. Do Not mix -
fit only the correct Injector Pipe
to the appropriate lung demand
valve. For the purpose of ease
of identification each type of
Injector Pipe is colour coded -
refer to Fig. 9.
Any attempts to rotate or adjust
the cone end (1) Fig. 9 of the
injector pipe assembly will
invalidate the Dräger warranty
and guarantee. If required to
replace the injector pipe always
replace with a new factory set
assembly.
2
3
4
Fig. 10
0584
1
1 Refer to Figure 10.
(Type A illustrated.)
2 Fold rubber cover (1) from front
of lung demand valve and
remove from lung demand valve.
Using plate spanner, inserted into
radial slots of bayonet cap, turn
bayonet cap (2) counter-
clockwise and remove from body
of demand valve.
Note:
Types A and AE - the positive
pressure spring remains attached
to the bayonet cap.
Do Not
remove spring. Take care not to
stretch or distort the spring.
3 Using the thumb and forefinger carefully grip the centre plate of the
diaphragm (3), tilt centre plate and lift the diaphragm from the body of
the lung demand valve. Remove slip ring (4).
 Loading...