Plus and PSS Series - Lung Demand Valve
tm 1285.001 - August 2001
5:13
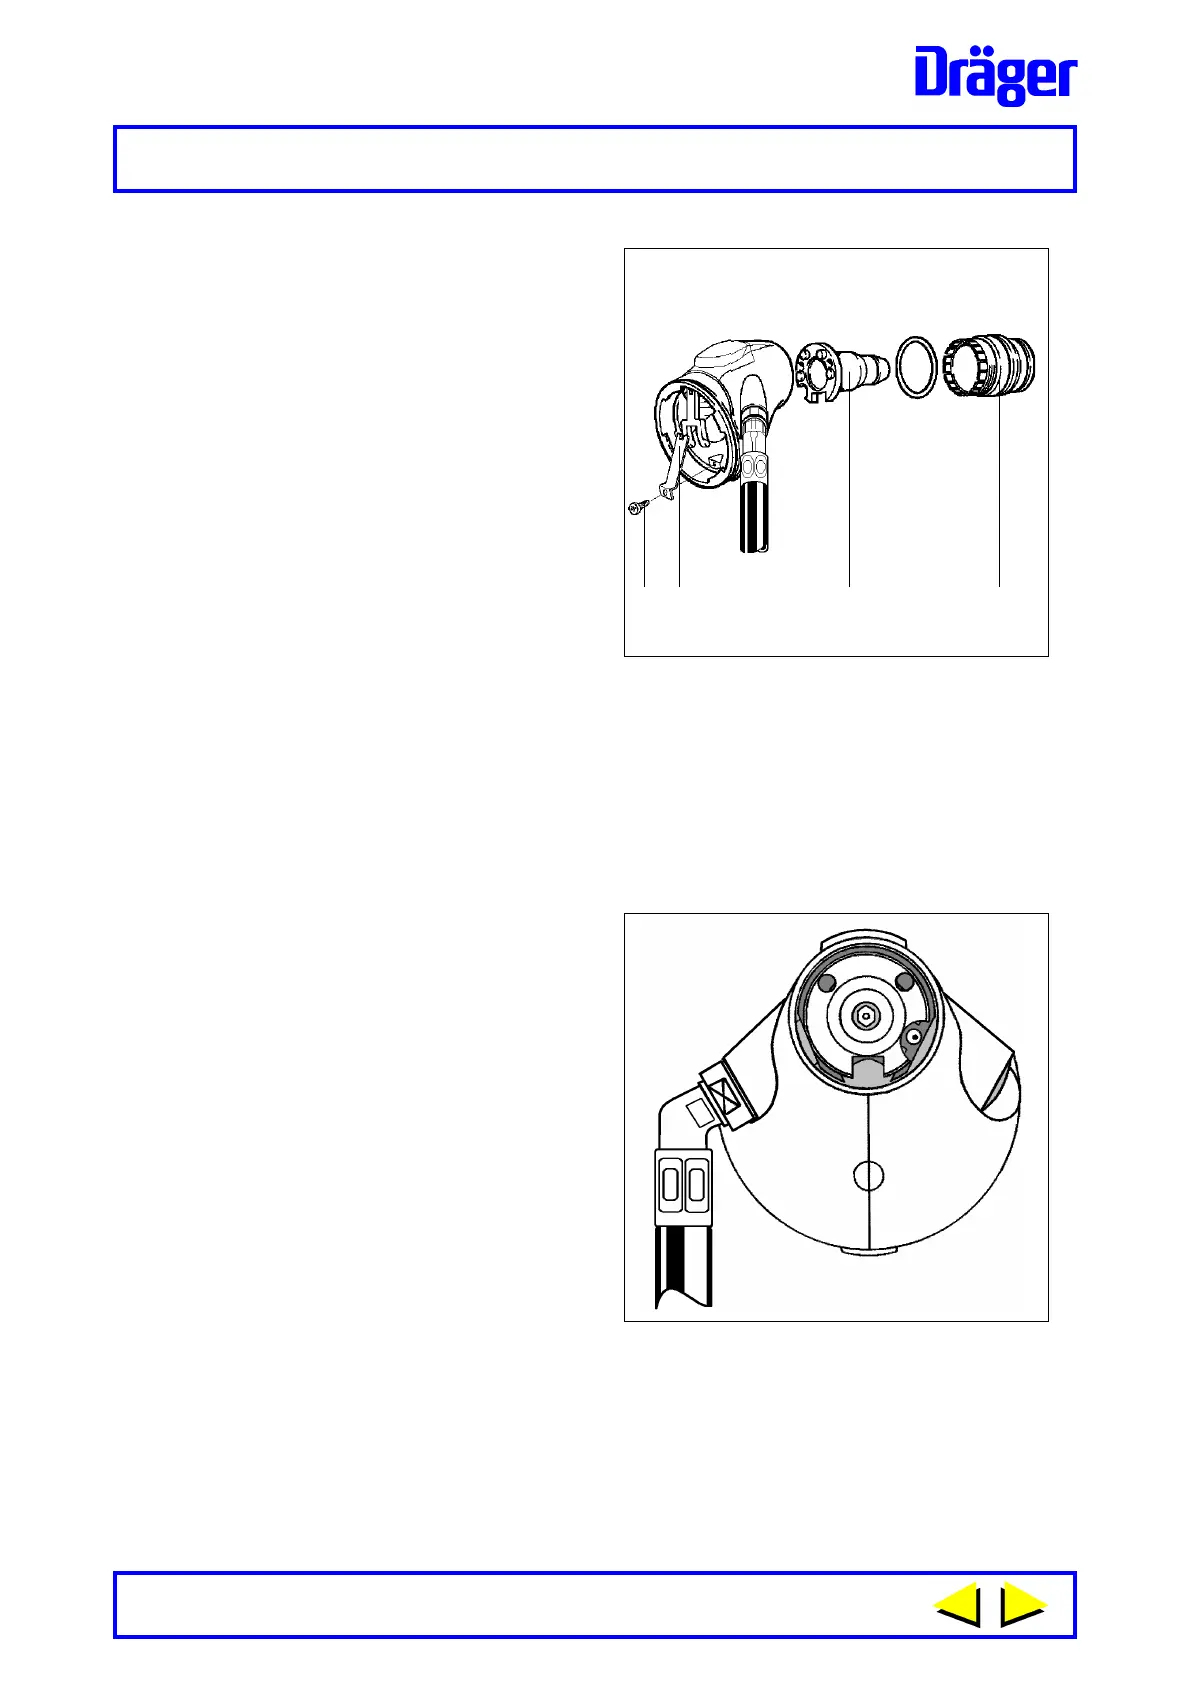
Refer to Fig. 11.
4 Using posi-driv screwdriver
unscrew retaining screw (1) until
the locking arm (2) is able to be
withdrawn from castellation of
connector (3).
5 Remove connector as follows.
Note: Do Not
attempt to remove push-
in or screw-in type connectors
with locking arm located in the
castellation of connector. Refer
to instruction 4.
Fig. 12
1139
2
Fig.11
1
1138
3
Push-in Type - A
Grip and unscrew push-in type connector (anti-clockwise) from demand
valve body. Remove injector pipe (4).
Screw-in Type - AE and N
Using connector tool (3310679) - insert pins of tool into swivel connector -
rotate to align slots of fixed end of connector and fully insert pins - unscrew
(anti-clockwise) to remove screw type connector and handwheel assembly
from demand valve body. Remove injector pipe (4).
6 Locate and correctly position
the new injector pipe as shown
in Fig. 12.
Important Note: Fit only the correct Injector
Pipe to the appropriate lung
demand valve.
7 Hold body of lung demand
valve with the injector pipe in
the vertical position then
assemble connector as follows.
Push-in Type - A
Inspect and if necessary fit new
O-ring to connector then screw
connector into demand valve
body. Tighten until flange of the
connector contacts the body of
the demand valve. Do Not
overtighten.
4
 Loading...