Plus and PSS Series - Lung Demand Valve
tm 1285.001 - August 2001
5:22
5.9 Lubrication of Connector Assemblies - M40 and M45
Important Note: Immersing of components will eventually remove lubricants.
Following cleaning, disinfecting and drying it is recommended that
functional tests be carried out. Re-lubricate as required. Refer to Page 5:3.
Tools required
Plate Spanner R26817
No. 2 Posi-Driv Screwdriver 3331245
Connector Tool 3310679
5.9.1 Removing Connector Assemblies from LDV- M40 and M45
1186
12
3
4
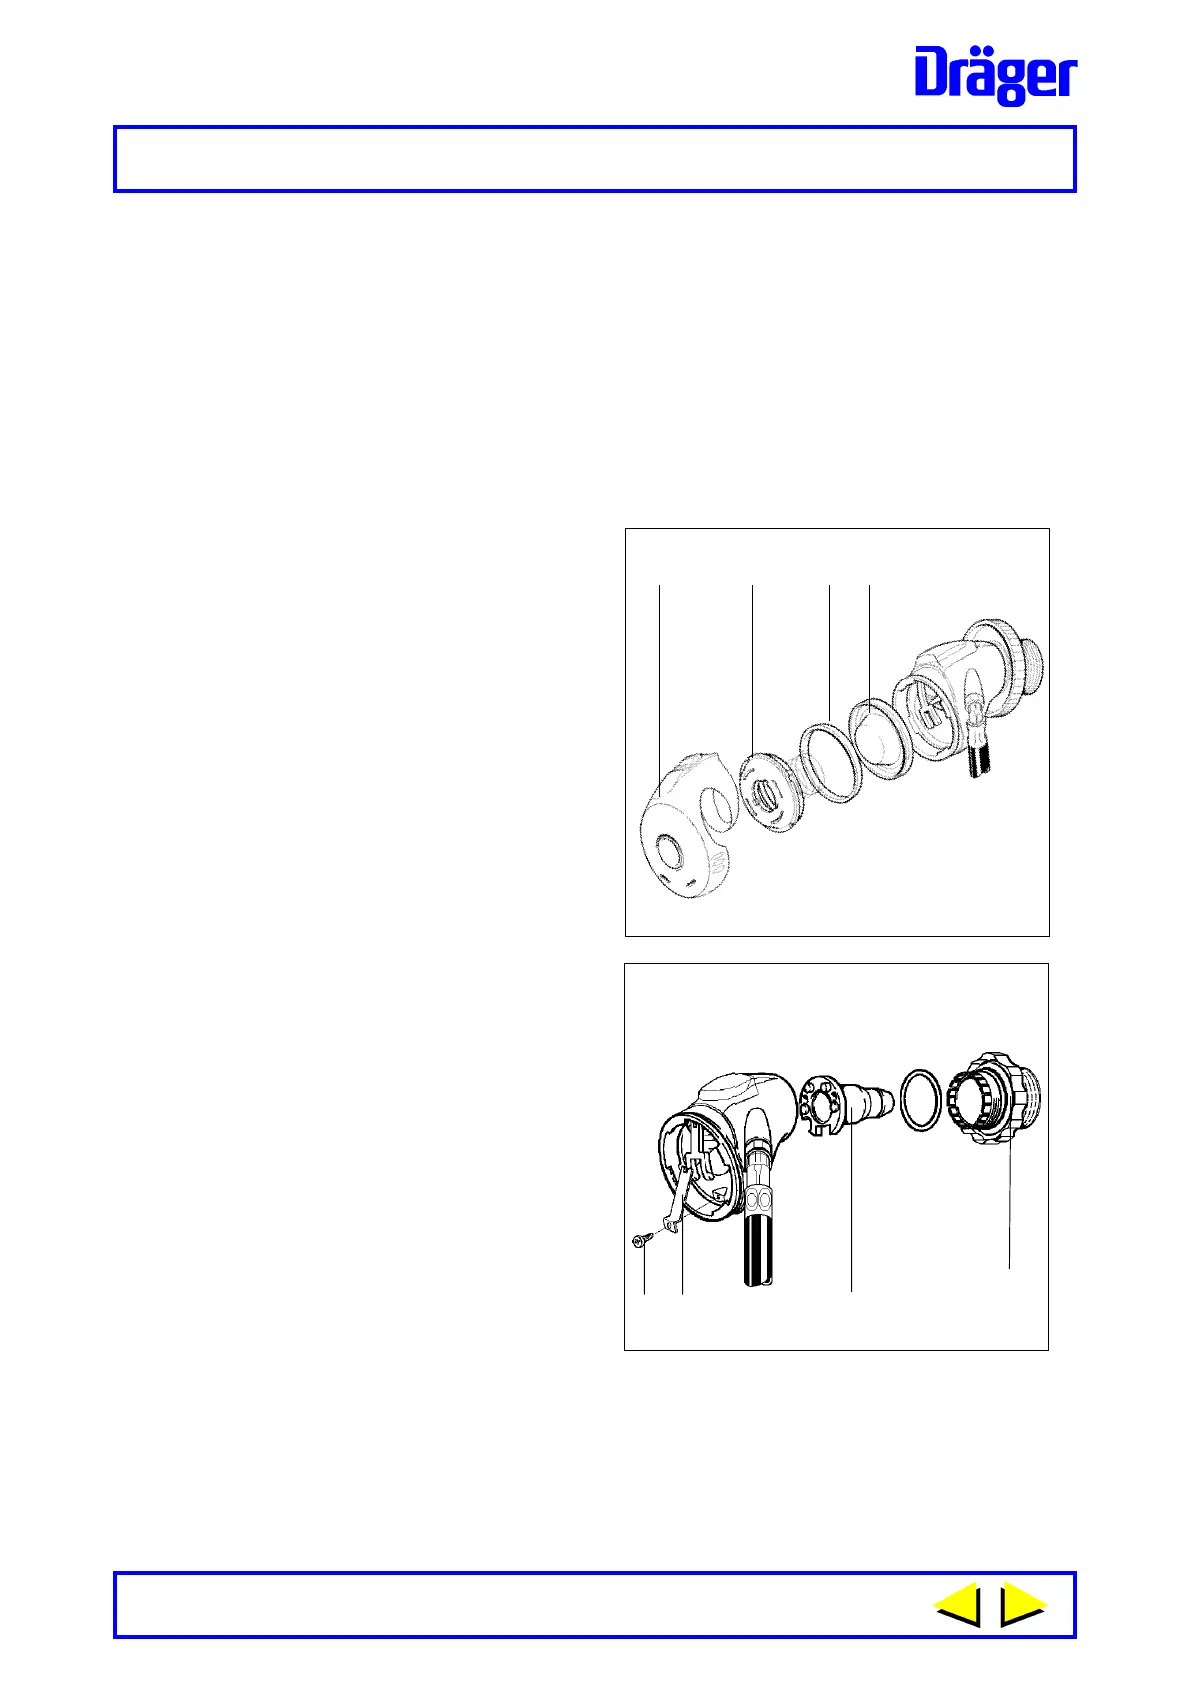
Fig. 26
Note: Do Not
attempt to remove connectors with the locking arm located in
the castellation of the connector.
Use connector tool (3310679) - insert pins of tool into the swivel connector
and rotate to align slots of fixed end of connector and insert pins - unscrew
(anti-clockwise) to remove screw type connector and handwheel assembly
from demand valve body. Remove injector pipe (4).
12 3
4
Fig. 25
0619
1 If required disconnect demand
valve from the female quick
release coupling of equipment.
Refer to Figure 25.
2 Fold back the rubber cover (1)
then using plate spanner inserted
into radial slots of bayonet cap,
turn bayonet cap (2) counter-
clockwise and remove from body
of demand valve. Using the
thumb and forefinger carefully
grip the centre plate of the
diaphragm (3), tilt centre plate
and lift the diaphragm from the
body of the lung demand valve.
Remove slip ring (4).
Note:
Type M45 - the positive pressure
spring remains attached to the
bayonet cap.
Do Not
remove
spring. Take care not to stretch
or distort the spring.
Refer to Fig. 26.
3 Using posi-driv screwdriver
unscrew retaining screw (1) until
the locking arm (2) is able to be
withdrawn from castellation of
connector (3).
4 Remove connector as follows.
 Loading...