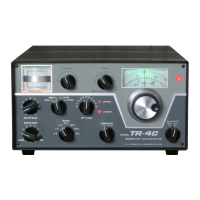
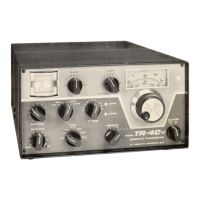
However, no attempt should be made to service the
TR-4C unless you are thoroughly familiar with
electronic circuitry and servicing technique. Care
should be taken not to disturb the lead dress in the
TR-4C
since several circuits are quite critical in
this regard.
5-6. TEST EQUIPMENT.
Alignment of TR-4C will require the following
equipment:
a. A general coverage receiver capable of receiving
wwv.
b. An 11 Megohm VTVM.
c. An alignment load consisting of a 1000 Ohm
non-inductive resistor in series with a
.OO5
uF
disc ceramic capacitor.
d. A52 Ohm dummy load.
WARNING
Before receiver alignment is attempted,
the plate and screen power leads of the
amplifier tubes should be disconnected
where they pass through the partition
under the chassis. Be sure the power is
disconnected before this is attempted, or
serious electrical shock may result.
5-7.
ALIGNMENT PROCEDURES.
5-8.
CRYSTAL CALIBRATOR. To align the crystal
calibrator perform the following steps:
a. Let the TR-4C warm up for 30 minutes.
b. Preset the XMTR GAIN control fully counter-
clockwise.
Set the Mode switch to CAL.
Tune in WWV on the general coverage receiver
with the BFO off.
Connect a wire from the receiver antenna termin-
al to
V5
of the TR-4C. Wrap the wire around
the tube a turn or two.
Adjust
C45,
located on top of the TR-4C
chassis. until the calibrator signal is zero beat
with the unmodulated WWV carrier.
5-9. 9.0 MHz OSCILLATOR.
a. Let the TR-4C warm up for 30 minutes.
b. Set the Mode switch in the SSB position.
c. Turn up the Audio Gain control until noise is
audible in the speaker.
d. While switching the SIDEBAND knob back and
forth, adjust Cl 30, located on top of the chassis
near the rear edge, until the pitch of the noise is
the same on both positions.
5-10. INJECTION CRYSTAL OSCILLATOR.
a.
b.
C
d
e.
f.
Set the
VTVM
to its lowest DC negative volt
scale and set the pointer to about center scale
with VTVM zero adjust control.
Connect the common lead of the VTVM to the
TR-4C chassis and the DC lead to the test point
which is connected to pin 9 of
V1.
Set BAND switch to 7.0 MHz and adjust
Ll
for
maximum negative DC voltage.
Switch to 21 .O MHz and adjust
L5
for maximum
as in Step c.
Switch to 29.1 MHz and adjust L2 for maximum
as in Step c.
The 28.0, the 28.5 and the 29.1 MHz positions
should have about the same negative voltage.
5-11. VFO ADJUSTMENT.
The permeability tuned VFO was carefully adjusted
at the factory and should require no further align-
ment. If it does not appear to track from one end
of its range to the other, it should be returned to
the factory for realignment. Maximum calibration
error is 1 kHz when calibrated to the nearest 100
kHz point.
5-12. INJECTION COUPLER.
“b:
c.
d
e.
Tune in a crystal calibrator signal at 7.3 MHz.
Connect the alignment load between pin 6 of
Vl B and ground and adjust T3 (top) for maxi-
mum S meter reading.
Connect the load from pin 9 of V3A and ground
and adjust T3 (bottom) for maximum S meter
reading.
Tune in a crystal calibrator signal at 2 1.300 MHz
and repeat the procedure for T2.
Tune in a crystal calibrator signal at 29.000 MHz
and repeat the above procedure for
Tl.
Note:
On Tl , adjust the bottom slug when the load is
on pin 6 of V 1 B and the top slug when the load
is on pin 9 on V3A.
5-2