Do you have a question about the Draper Cinefold and is the answer not in the manual?
Handle viewing surface with care, use provided cranks, ensure screen is level, and avoid writing on the surface.
Unfold and lock frame hinges, then snap the viewing surface onto the frame, starting at the corners.
Unfold leg assemblies, lock hinges, attach legs to frame using Handy Cranks, and adjust for desired screen position.
Unfold and lock all frame section hinges, and connect frame parts using Handy Cranks and stiffener bars.
Snap the screen surface onto the assembled frame and attach legs and heavy-duty legs using Handy Cranks.
Attach the Valance Bar to the frame and mount Draper Bars to the Valance Bar using bayonet-style fittings.
Secure the adjustable Skirt Bar to the frame or snap the skirt directly to the bottom of the viewing surface.
The Draper Cinefold Portable Projection Screen is a versatile and robust solution designed for various projection needs, offering both standard frame and truss-style configurations. This manual provides comprehensive instructions for assembly, usage, and maintenance, ensuring optimal performance and longevity of the screen.
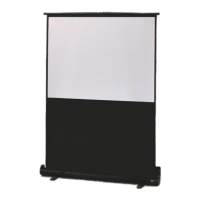
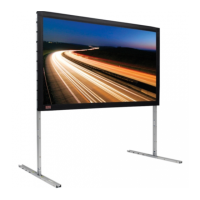
The Cinefold Portable Projection Screen serves as a high-quality display surface for projected images, suitable for presentations, events, and other applications where a large, clear image is required. Its portable design allows for easy transport and quick setup, making it ideal for temporary installations or situations requiring mobility. The screen is available in two primary frame styles: a standard frame and a more rigid truss-style frame, each offering different levels of stability and suitability for various screen sizes and environments.
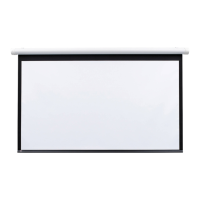
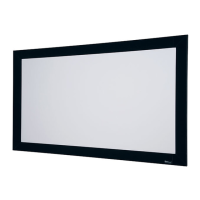
The standard frame version utilizes a straightforward hinged aluminum frame that unfolds to create the screen's perimeter. The viewing surface, made of a specialized fabric, attaches to this frame via snaps, ensuring a taut and flat display. Legs, which can be standard T-legs or optional heavy-duty legs, attach to the vertical sections of the frame, providing support and allowing for height adjustment. An adjustment knob on the legs facilitates keystone elimination, ensuring a perfectly rectangular image even if the projector is not perfectly aligned. Optional anti-sway stabilizers can be added to heavy-duty legs for enhanced stability.
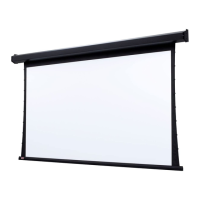
The truss-style Cinefold screen is designed for larger applications and offers superior rigidity. It features a more complex frame structure composed of multiple aluminum sections that assemble to form a robust truss. This design incorporates "stiffener bars" and angle braces, secured with handy cranks, to prevent flexing and maintain a perfectly flat viewing surface, especially for screens exceeding 25 feet in width. The viewing surface attaches to this truss frame with snaps, similar to the standard frame, ensuring a smooth and wrinkle-free display. Heavy-duty legs and anti-sway stabilizers are typically used with the truss-style frame to provide the necessary support for its larger size and weight.
Both versions of the Cinefold screen can be enhanced with a "Dress-Up Kit," which includes a valance bar, drapery bars, valance, drapes, and an adjustable skirt bar. This kit allows for a more professional and aesthetically pleasing presentation by concealing the frame and legs, creating a finished look suitable for formal events. The components of the dress-up kit are labeled and color-coded to simplify assembly.
The Cinefold screen is designed for user-friendly assembly and disassembly. For the standard frame, the process involves unfolding the hinged frame, attaching the viewing surface, locking corner braces, unfolding and attaching the leg assemblies with handy cranks, and then raising the screen to a vertical position. Height adjustments are possible in 6-inch increments, and the keystone adjustment knob helps fine-tune the image geometry.
The truss-style screen assembly is more involved due to its larger and more rigid structure. It requires assembling multiple frame sections, securing them with handy cranks, attaching stiffener bars and angle braces for enhanced rigidity, and then attaching the viewing surface. Legs and anti-sway stabilizers are then attached to provide robust support. Color-coded markings and numbered labels on components significantly aid in correct assembly for both screen types, minimizing errors and speeding up the setup process.
Handy cranks are a crucial tool for both screen types, used to secure various frame and leg components. These cranks ensure a tight and stable connection, which is essential for the screen's structural integrity and the flatness of the viewing surface. Users are explicitly cautioned to use the provided handy cranks to prevent screen damage.
When using the screen, it is important to ensure it is level to maintain optimal image quality. The screen surface should always face up during initial assembly steps while on the floor or a table, making it easier to attach the viewing surface and other components. Once fully assembled, the screen can be raised to its vertical position.
The optional dress-up kit integrates seamlessly with both screen types. The valance bar mounts to the frame using a bayonet-style mechanism, and the drapery bars attach to the valance bar in a similar fashion. The adjustable skirt bar can be secured to the frame at a desired level using a positive-locking plunger mechanism, or the skirt can be snapped directly to the bottom of the viewing surface if the skirt bar is not used. The valance, drapes, and skirt then snap onto their respective mounting bars, completing the professional appearance.
Proper maintenance is key to preserving the quality and longevity of the Cinefold Portable Projection Screen. The viewing surface is particularly delicate and requires careful handling. Users are instructed to never allow the screen fabric to come into contact with sharp or dirty objects, as this can cause damage or permanent marks. When folding the screen for storage, it is crucial to fold it with snaps face-to-face, ensuring that the screen fabric does not touch the border material or the snaps themselves. This prevents indentations or damage to the viewing surface.
After use, the viewing surface should be stored in its provided pouch, and a case divider should be used to separate the screen from the aluminum frame parts within the carrying case. This protective measure prevents abrasion and damage during transport and storage.
Cleaning the viewing surface is a straightforward process. When necessary, it should be cleaned with mild soap and water. Users are explicitly warned against using any solvents, as these can damage the screen material. After cleaning, the surface must be completely dry before folding and storing to prevent mildew or other moisture-related damage.
Throughout the handling and assembly process, users are advised to take care not to permit the Cinefold viewing surface to contact any dusty or dirty area, or any varnished or painted object. Such contact can lead to stains or damage that may be difficult or impossible to remove.
The instructions emphasize retaining the manual for future reference, highlighting the importance of following all guidelines for assembly, usage, and care. By adhering to these maintenance practices, users can ensure their Cinefold Portable Projection Screen remains in excellent condition, providing clear and vibrant projections for many years.
| Aspect Ratio | 16:9, 4:3, 2.35:1 |
|---|---|
| Screen Size | Various sizes available |
| Mounting | Floor-standing |
| Weight | Varies by size |
| Frame | Aluminum frame |
| Surface Options | Matte white, high contrast gray |
| Portability | Highly portable |
| Setup | Quick and easy setup |
| Tensioning | Snap-on screen surface provides even tension |