16 17
1
8
0
°
1
8
0
°
10
psi
0
1
2
3
4
bar
30
50
10
psi
0
1
2
3
4
bar
30
50
10
psi
0
1
2
3
4
bar
30
50
OK!
NO!
STORE THE KEGS AT
TEMPERATURES BELOW 35° C
9.1 9.2
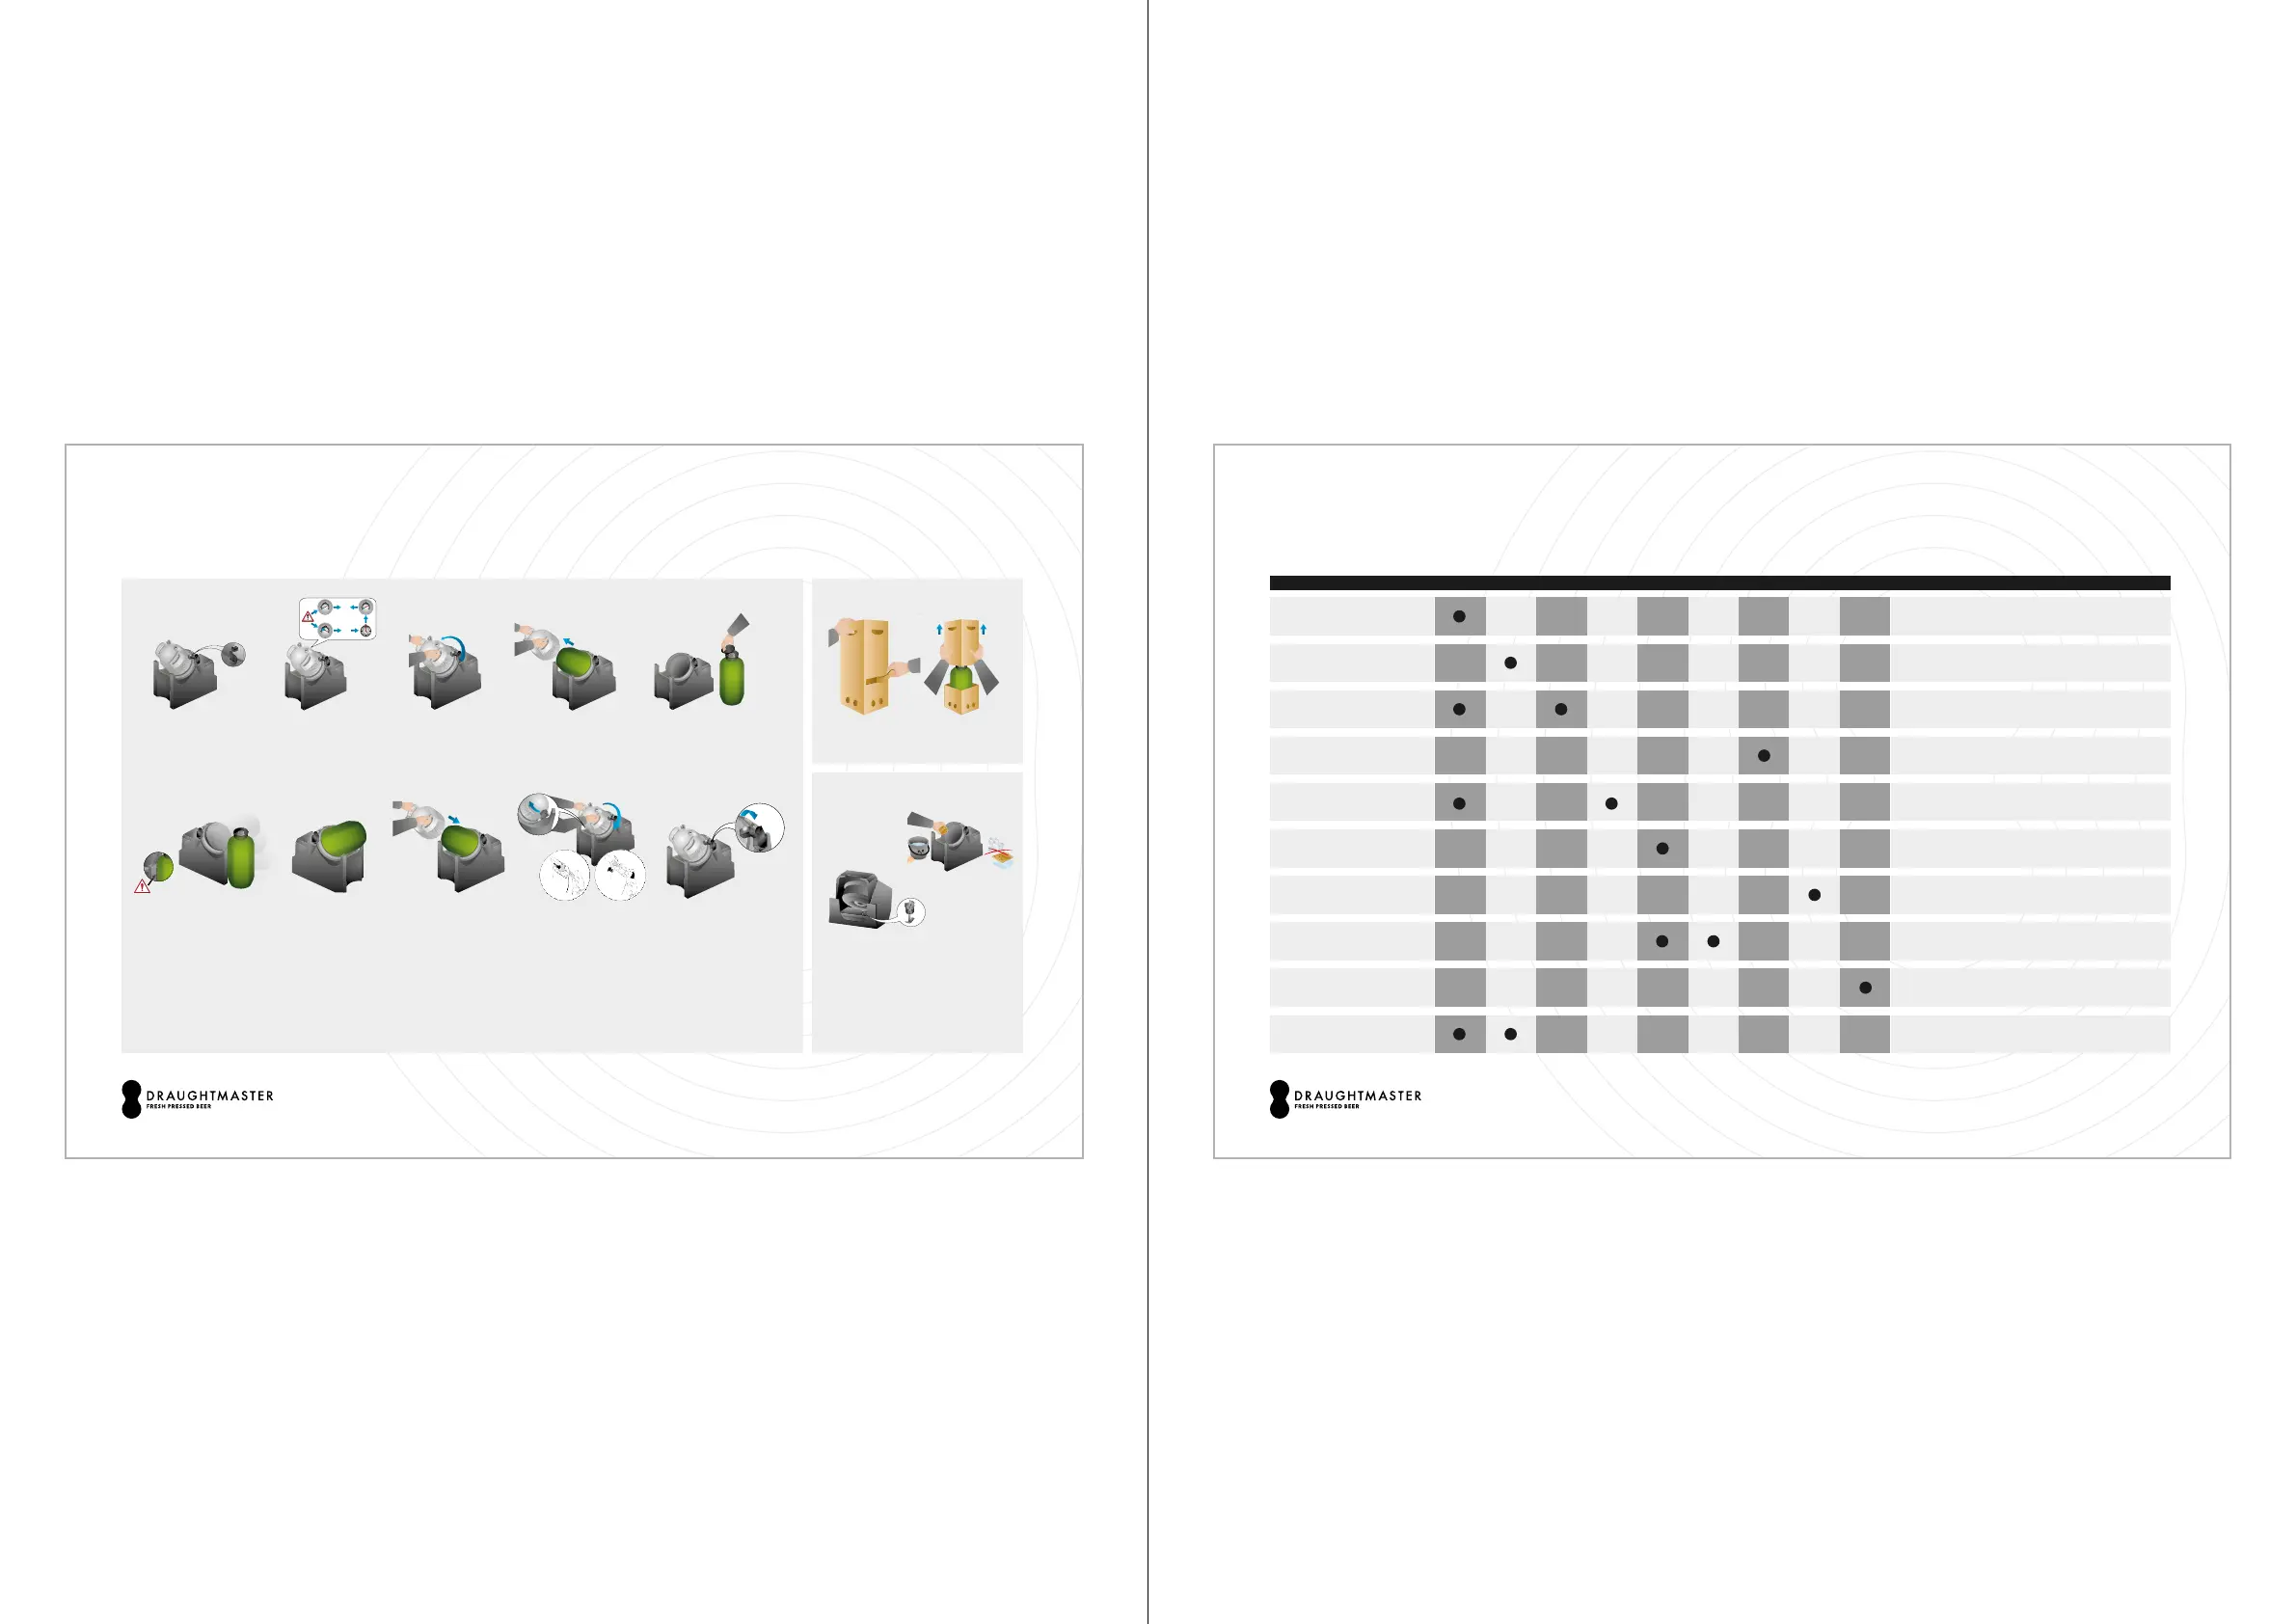
MODULAR 20 INSTRUCTIONS FOR CHANGING A KEG
01
Depressurise the keg by
pulling the pin upwards to
the automatic stop. Make
sure that the pin is in the
position shown in the image.
06
Lean the keg against the pres-
sure module as shown in the
image, raise it up and slide it
into the pressure module.
CAUTION! Do not force
to fix the keg in the module
and do not turn it.
02
Check the system
pressure before
opening the cover.
07
The new keg is now
correctly positioned.
03
When it is depressurised,
rotate the cover a half-turn
anticlockwise.
08
Return the cover
to its position.
04
Remove the cover
from its position.
09
Rotate the cover a half-turn
clockwise. When starting to
close the cover, pay attention
to the starting point
(detail in the image).
To close the cover, pull the pin
upwards and guide the cover
until it is closed (9.1 - 9.2).
05
Get a new keg and
remove the plastic
protection.
10
The cover is closed correctly if
you hear a click and the closing
pin is in the initial position. At this
point, the system automatically
reaches service pressure.
CAUTION! The beer will be ready
for dispensing when the gauge
reaches 3 bars. This will take
approx. 20 seconds.
HANDLING THE KEG
PREVENTIVE MAINTENANCE
If there is beer resi-
due in the pressure
module, clean it with
water and mild soap.
If there is stagnant
water, remove the
rubber stopper as
shown in the image.
Every month, remove the cover seal and clean it with
tap water. Replace it without drying it. To ensure
correct positioning, insert a finger into the seal and
position it correctly using circular movements.
CAUTION! Once the keg has been inserted into
the pressure module, it may not be removed. If it is
removed for any reason, a new keg must be inserted.
CHANGING KEG
Version 3.0
CAUSES PROBLEMS SOLUTIONS
No beer
comes out
of the tap
The pressure
module does
not reach ser-
vice pressure
The cover
does not
close
The beer
is pouring
slowly
The beer
is cloudy
The beer is
warm and/or
too frothy
The beer
quality has
been com-
promised
Beer is
leaking onto
the floor
The beer
has no
head
The keg is empty. Insert a new keg.
The cover seal is dirty or damaged.
The cover is not closed correctly.
The cover seal or the keg
is not positioned correctly.
Beer is leaking within
the pressure module.
The pressure is insucient or
the flow regulator is not open.
The beer is past its best before date.
The beer is not being
cooled correctly.
The cleaning cycle has not been
carried out frequently enough.
The glass was not cleaned correctly.
The air circuit is leaking.
The keg is empty. Insert a new keg.
Wait 30 seconds. If the system does not reach service pressure,
check the cover seal.
Remove the cover, check that the keg and the cover seal
are positioned correctly, close the cover again.
Empty the drip tray and reposition the keg. Contact Carlsberg
Technical Customer Services if the problem persists.
Check that the manometer is displaying the correct pressure
and that the flow regulator is open.
Check the beer’s expiry date. If it has expired, change the keg;
if not, carry out a cleaning cycle.
Check that the cooling system is working correctly (if it was not
active, it will take 3-4 hours for the beer to cool); if not, contact
Carlsberg Technical Customer Services.
Check the date of the last cleaning cycle; carry out a new
cleaning cycle and taste the beer.
Only use glasses that have been cleaned with detergents
designed for use with beer glasses; clean them separately
from other tableware.
Contact Carlsberg Technical Customer Services.
IF THE PROBLEM PERSISTS DESPITE THE ABOVE INSTRUCTIONS,
PLEASE CONTACT CARLSBERG TECHNICAL CUSTOMER SERVICES.
Version 3.0
MODULAR 20 SOLVING TECHNICAL PROBLEMS
6.4 APPENDIX D
INSTRUCTION FOR CHANGING A KEG