Do you have a question about the Dreamline AQUA UNO and is the answer not in the manual?
Lists all included parts with quantities for easy verification.
Attaches hinges to the glass door using predrilled holes and bolts.
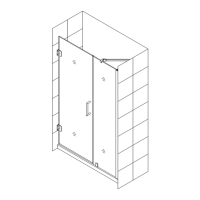
Positions the door on a timber support and aligns it against the wall.
Marks wall for drilling using the glass door as a guide, then drills and inserts anchors.
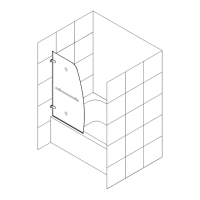
Secures the hinges to the wall with screws and snaps covers back on.
Attaches anti-water strips to the glass door edges and installs the handle.
Recommends cleaning acrylic back walls with soft cloth and non-abrasive cleaners.
Advises cleaning glass shower products with soft cloth or squeegee.
Guides on cleaning metal parts, avoiding abrasives, and cleaning stainless steel.
Details warranty coverage, limitations, and exclusions for household use.
Explains DreamLine's process for handling warranty claims and customer responsibilities.
Lists conditions that void the warranty, including improper maintenance and cleaning.
Specifies the 5-year warranty for shower doors, enclosures, and bases.
Warns against supporting the bath by its rim, which can cause property damage.
Emphasizes the importance of adhering to all local plumbing and building codes.
Advises careful planning for moving the bath, noting it may not fit through doorways easily.
Discusses support for the basin area and using shims for uneven subfloors.
Highlights the need to plan for faucet mounting and connection space.
Advises verifying faucet support, cautioning against using deck-mount faucets as support.
Recommends RTV silicone sealant for applying between the bath rim and wall.
Stresses the importance of providing properly dimensioned framing for the installation.
States compliance with ANSI standard Z124.1.2 for the bath.
Prompts the user to write down the model number for customer service.
Advises saving the manual for future reference.
Covers rough plumbing, framing requirements, subfloor checks, and surface protection.
Details alcove installation, wall thickness, drain hole needs, and drain attachment.
Warns of lifting risks and outlines cement/mortar and adhesive securing methods.
Ensures subfloor levelness and verifies bath stability and plumbness.
Details specific steps for applying cement/mortar or adhesive, and drain connection.
Drills pilot holes and installs furring strips for alignment with the nailing flange.
Secures the nailing flange to the studs using appropriate nails or screws.
| Brand | Dreamline |
|---|---|
| Model | AQUA UNO |
| Category | Bathroom Fixtures |
| Language | English |