11PRISM PLUS manual Ver 1 Rev 2 11/2016
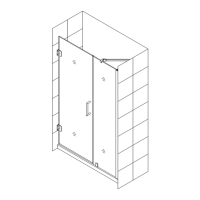
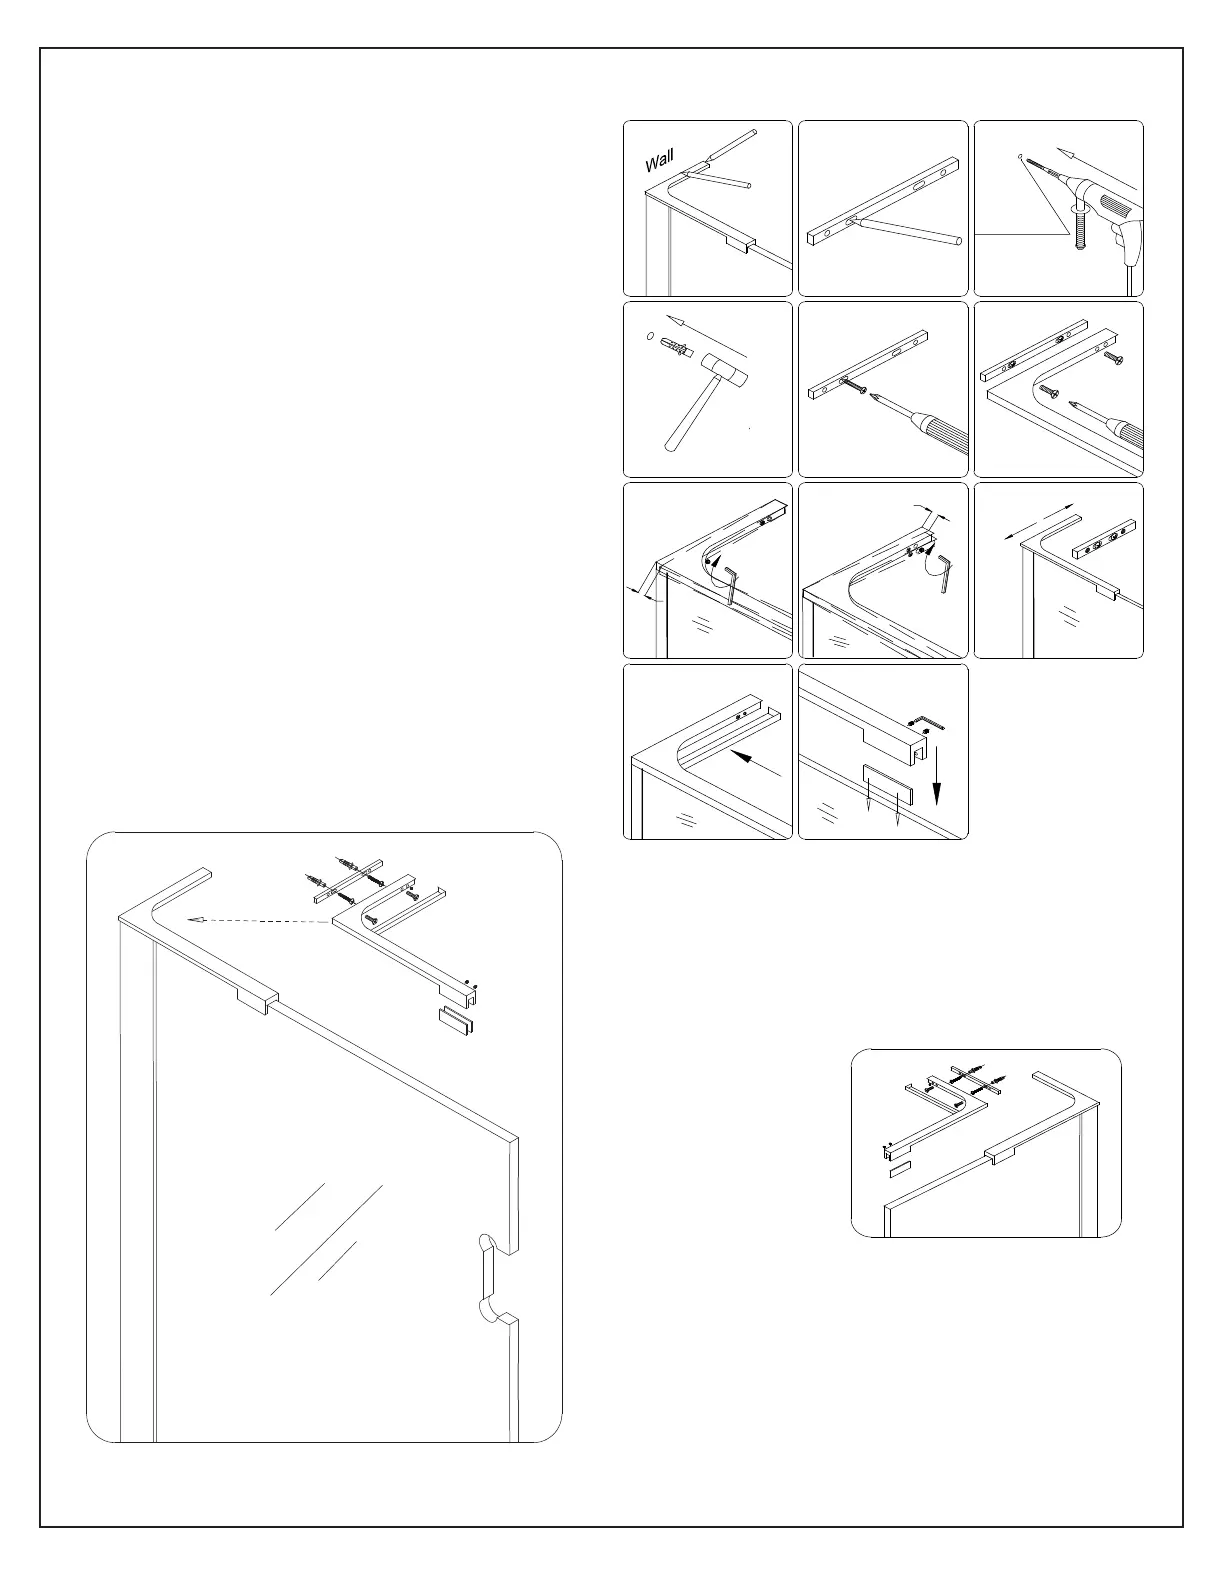
NOTE: The left hand L-bracket installation is
shown. Follow the same steps to install the
right-hand L-bracket.
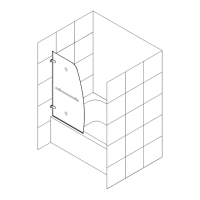
Fig 10
2
3
4
5 6
1
9
10 11
8
7
Max4mm
Max4mm
Ø8(5/16")
0-1/16”(2mm)
Left hand bracket installation
Left hand L-Bracket installation shown
Fig 11
Right hand L-bracket
10. Position the L-bracket assembly (#04) onto
the Stationary Glass (#01) as shown and mark
the position on the wall.
Remove the Wall Plate (#4.6) and mark the
holes for drilling. Drill Ø5/16”(8mm) holes and
insert the wall anchors.
Attach the Wall Plate (#4.6) using ST4.2 x 40
(#4.7) screws.
Re-attach the L-Bracket (#4.3) to the Wall Plate
(#4.6) and adjust the angle if necessary using the
set screws (Fig 10.7& 10.8).
Adjust the Stationary Glass (#01) to plumb and
tighten the screws.
Attach the Decorative Cover (#4.4).
Secure the L-Bracket (#05) to the top of the
Stationary Glass (#01) using the clear gasket
and rubber tipped set screws.
Do not over tighten the set screws
See Fig 10, 11 & 12 for details