3
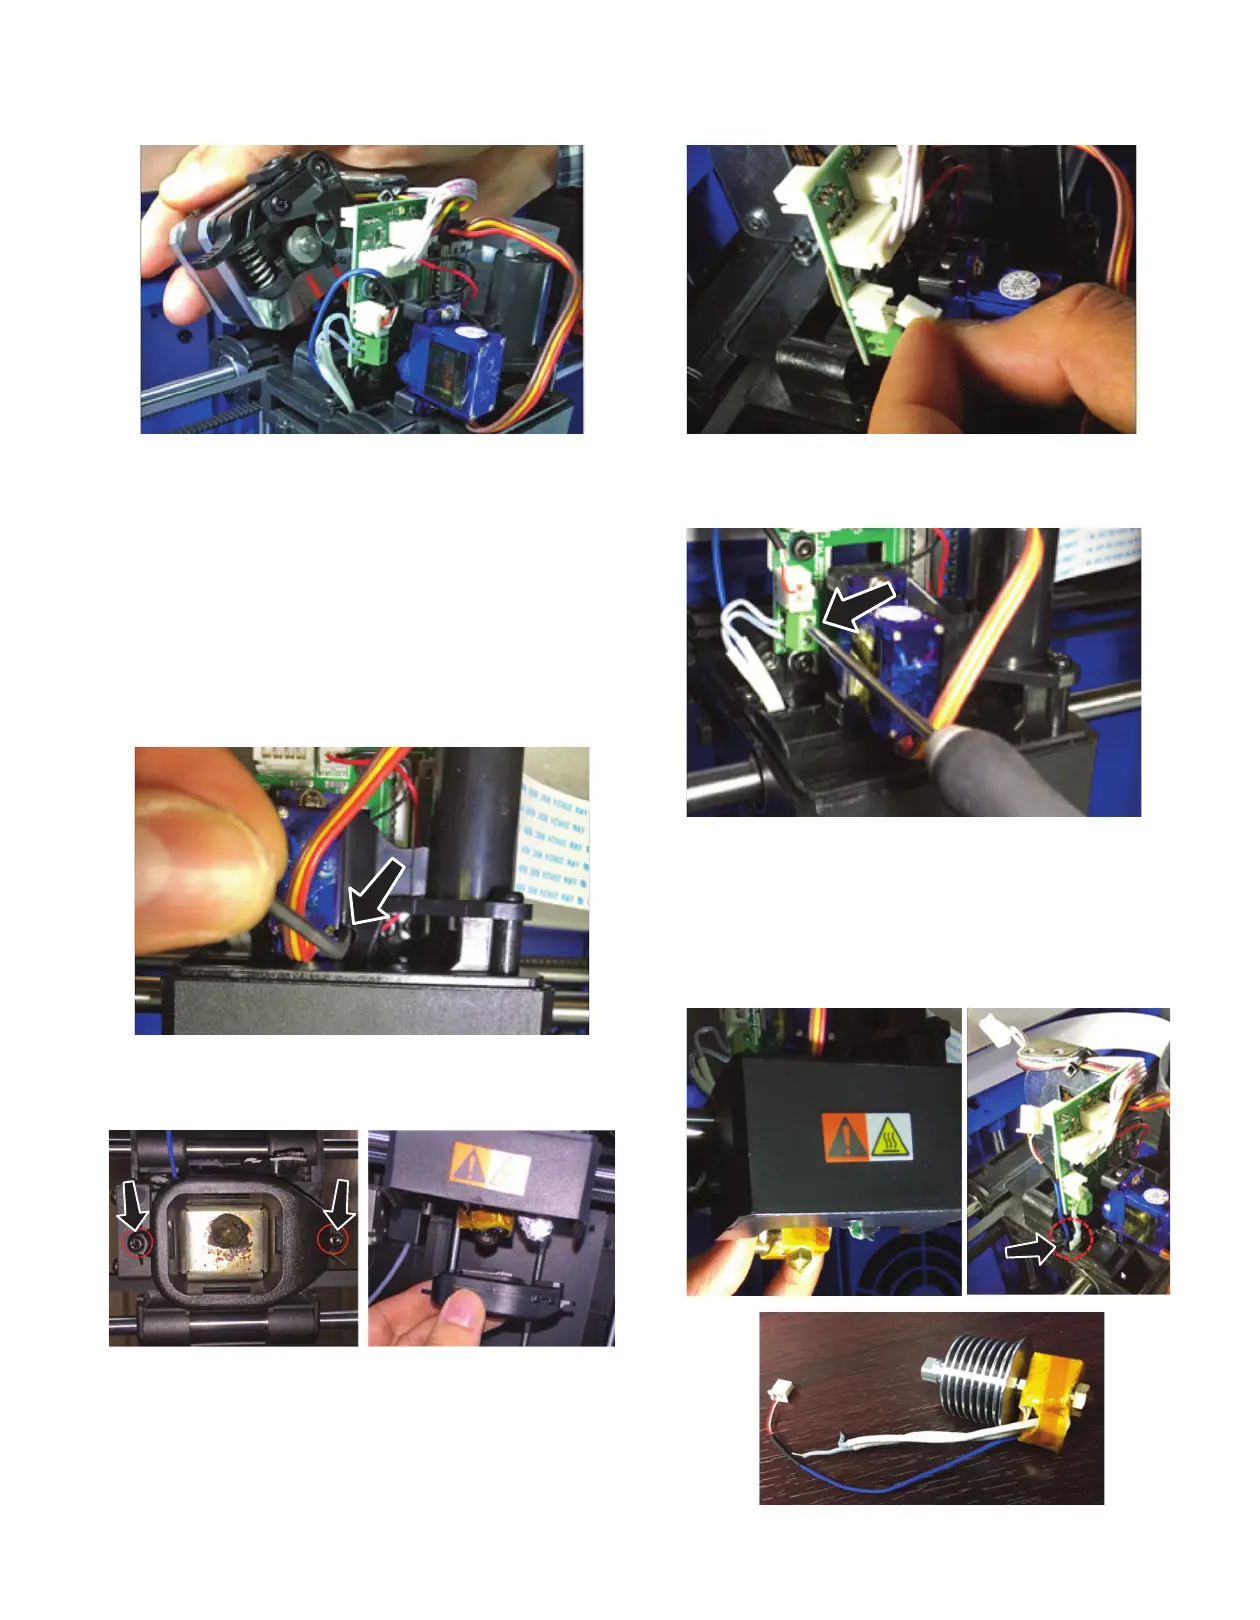
c. Pull the extruder motor assembly away from the printer
(vertically) as shown in the picture below.
d. Cut the filament as close to the nozzle tube top as
possible and dispose of that piece of filament.
Step 4: Nozzle Assembly Removal
a. Unscrew the nozzle assembly screw with 2mm Hex
wrench as shown in the picture below, there is an
access pass-through for this screw located just to the
right of the blue level sensor motor. Please ensure that
the screw once fully unscrewed, should still be left
inserted in the hole. The leveling arm may need to be
moved to access the set screw.
b. Unscrew the Torx screws that hold the fan baffle
assembly and pull down the assembly as shown in the
picture below.
c. Unplug the thermocouple connector (white) from the
extruder circuit board as shown in picture below.
d. Use flathead screw driver to disconnect heater wires
from extruder circuit board. Gently pull the wires out of
the green terminal block.
e. Push down nozzle tube and pull from bottom. (Note:
Ensure that sufficient time has been given for the nozzle
to cool). Grab the block heater as shown in the picture
to pull the nozzle assembly gently. Then, use your
fingers to straighten any bent wires and pull straight
down through the (encircled) cavity to remove the
nozzle assembly as shown below.



 To Next Page