b
. Look at rectangles A, B, and C to determine which offset has the best layer adhesion. Follow the instructions
below for each scenario.
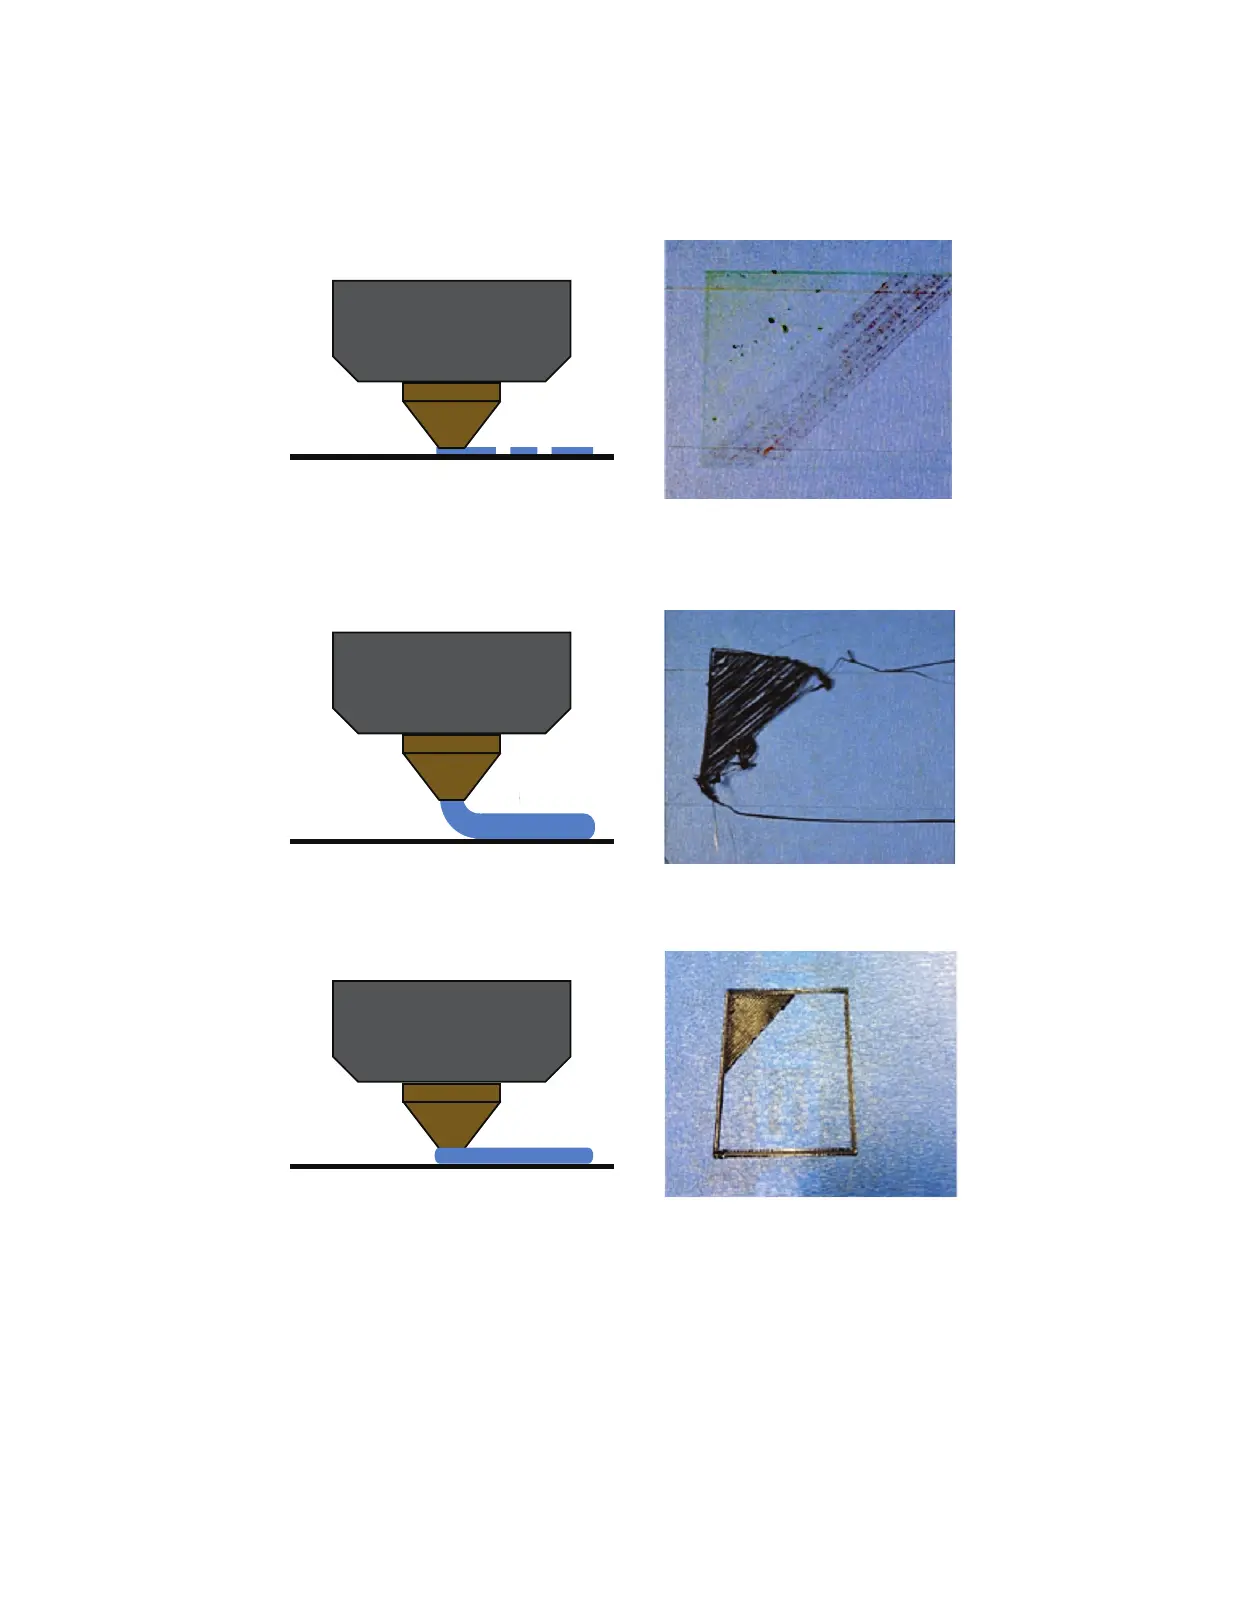
• If you see little or no filament: If the nozzle is too close to the build platform, the first layer will print too
t
ight to the build plate. Increase the Nozzle Gap +0.1mm. Repeat the Assisted Nozzle Calibration Process
until an optimum nozzle gap has been achieved.
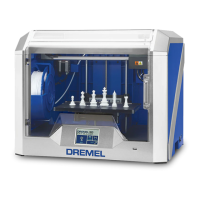
• If the first layer is not adhering or gaps between the lines: If the nozzle is too far from the build plate, the
first layer will not adhere well. Decrease the Nozzle Gap -0.1mm. Repeat the Assisted Nozzle Calibration
Process until an optimum nozzle gap has been achieved.
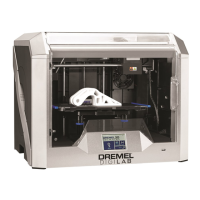
• Ideal nozzle gap distance: First layer will be adhering and be visible. Lines should not look like they were
pressed against the build platform.
Congratulations!
You are now ready to build. Build On.