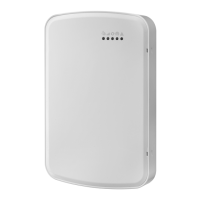
The DSC PowerSeries Neo Alarm Panel, including models HS2016, HS2016-4, HS2032, HS2064, HS2064 E, HS2128, and HS2128 E, is a comprehensive security system designed to provide flexible and convenient protection for your premises. This user guide outlines the general operation, setting/arming procedures, emergency functions, access code management, and maintenance aspects of the system.
Function Description
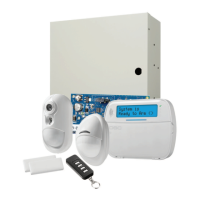
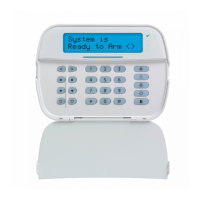
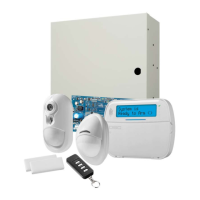
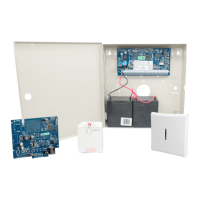
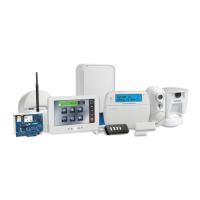
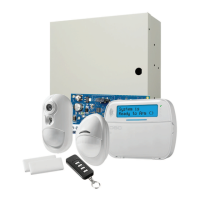
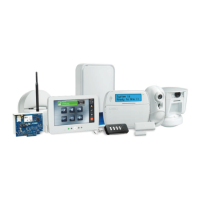
The PowerSeries Neo Alarm System serves as a central hub for various security components, including control panels, keypads, and a range of sensors and detectors. The control panel, typically mounted in a utility closet or basement, houses the system's electronics, fuses, and standby battery. Keypads, available in LCD, LED, and Icon versions, are strategically placed near entry/exit doors to facilitate user interaction. These keypads feature audible indicators, command entry keys, and status lights (LEDs) or alphanumeric liquid crystal displays (LCDs) to communicate system status and allow users to send commands.
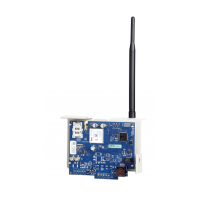
The system supports both wireless and hardwired connections for its sensors, which can include motion detectors, glassbreak detectors, and door contacts. Each sensor is assigned to a specific zone, and any activation or alarm in a zone is indicated on the keypad through flashing zone lights (LED keypads) or messages (LCD keypads). The PowerSeries Neo system incorporates specific false alarm reduction features, designed in accordance with ANSI/SIA CP-01-2010 Control Panel Standard.
Usage Features
The PowerSeries Neo system offers a variety of features for arming, disarming, and managing your security.
- Quick Reference and Navigation: The system utilizes shortcut keys for quick access to features across all keypad models. LCD keypads offer a menu-based navigation system using scroll keys to browse options.
- Status Lights and Indicators: Keypads are equipped with status lights to provide immediate visual feedback.
- The "Ready" light indicates the system is normal and ready to arm, meaning all zones are secured or bypassed and the system is disarmed.
- The "Armed" light signifies that the system is armed. If both "Ready" and "Armed" lights are on, an Exit Delay is in progress.
- The "Trouble" light indicates a system malfunction or tamper. A flashing "Trouble" light suggests a low battery condition. Users can press
[*][2] to view specific trouble conditions.
- The "AC Power" light confirms that AC power is present. It turns off when AC is absent.
- The "Memory" icon indicates alarms in memory.
- The "Bypass" icon shows that zones are bypassed.
- The "Program" icon indicates the system is in Installer or User's programming mode or is busy. If an Access Code is required, this LED is solid ON.
- The "Away" icon indicates the panel is armed in Away Mode.
- The "Fire" icon indicates fire and/or CO alarms in memory.
- The "Stay" icon indicates the panel is armed in Stay Mode.
- The "Chime" icon turns on when the Chime function key is pressed to enable Door Chime and turns off when pressed again to disable it.
- The "OPEN" icon, used with clock digits 1 and 2, indicates activated zones (not alarm). When zones are opened, this icon turns on, and clock digits 1 and 2 scroll through violated zones.
- The "Night" icon indicates the panel is armed in Night Mode.
- A solid blue LED bar on all keypads is always on, except when a proximity tag is successfully read.
- Arming and Disarming:
- Away Arming: Press and hold the "Away Arm" button for 2 seconds, then enter your Access Code.
- Stay Arming: Press and hold the "Stay Arm" button for 2 seconds, then enter your Access Code.
- Night Arming: While armed in Stay mode, press
[*][1], then enter your Access Code.
- Disarming: Enter your Access Code.
- No-Entry Arming: Press
[*][9], then enter your Access Code.
- Quick Arm/Quick Exit: Press
[*][0].
- Abort Arming Sequence: Enter your Access Code.
- Exit Delay Time Restart: This feature allows you to restart the exit delay if needed.
- Alarm Cancel Window: The system includes a window during which an alarm can be canceled.
- Wireless Keys and Proximity Tags:
- Arming with a 2-Way Wireless Key: These keys can be used to arm the system.
- Arming with a Proximity Tag: Presenting a proximity tag to the keypad can arm the system.
- Disarming with a Proximity Tag: Similarly, a proximity tag can be used to disarm the system.
- Bypassing Zones: All bypass commands begin with
[*][1] followed by an Access Code.
- Bypass Individual Zones: Enter the 3-digit zone number.
- Bypass All Open Zones: Press
[9][9][8].
- Recall Last Bypass: Press
[9][9][9].
- Clear Bypass: Press
[0][0][0] or use scroll keys to navigate to "Bypass Options," press [*], then "Clear Bypasses," and [*].
- Program Bypass Group: Enter 3-digit zone numbers, then
[9][9][5] or use scroll keys to navigate to "Bypass Options," press [*], then "Prg Bypass Group," and [*].
- Load Bypass Group: Press
[9][9][1] or use scroll keys to navigate to "Bypass Options," press [*], then "Bypass Group," and [*].
- Note: Bypass Groups are not permitted in UL listed installations. For UL listed installations, zones can only be bypassed manually.
- Emergency Keys: Dedicated keys for "Fire," "Medical," and "Panic" emergencies are available.
- Access Code Management:
- Opening the Access Code Menu: This menu allows for the management of user access codes.
- Adding, Changing, and Deleting Access Codes: Users can add new codes, modify existing ones, or remove them.
- User Labels (LCD Keypads Only): LCD keypads allow for custom labels for users.
- System Functions:
- Set Time and Date: Press
[*][6], enter Master Code, then [0][1].
- Turn Chime ON/OFF: Press
[*][4], then enter Access Code, or use the dedicated chime button.
- Add/Delete User: Press
[*][5], enter Master Code, then Access Code, then [1].
- Reset Smoke Detectors: Use the dedicated reset button or press
[*][7][2].
- View Troubles: Press
[*][2], then enter Access Code, and use scroll keys.
- View Alarms: Press
[*][3], then enter Access Code, and use scroll keys.
- Buzzer Volume: Press
[*][6], enter Master Code, then [1][4], and use scroll keys.
- Safety Features:
- Burglary Verification: The system includes features to verify burglary alarms.
- Swinger Shutdown: This feature prevents repeated alarms from a faulty zone.
- Call Waiting: The system can manage call waiting during alarm transmissions.
- Fire Alarm Verification: Features to verify fire alarms are integrated.
- Silence Fire or CO Alarm: Users can silence active fire or carbon monoxide alarms.
- System Lockout due to Invalid Attempts: The system can lock out access after too many invalid access code attempts.
- Smoke Detectors, Fire Escape Planning, and Carbon Monoxide Detectors: The manual provides guidance on these critical safety components and planning for emergencies.
Maintenance Features
Regular maintenance is crucial for ensuring the continued reliability of your PowerSeries Neo security system.
- System Testing:
- Weekly System Test: It is recommended to test your system weekly. To perform a keypad and siren test, from the Ready state, press
[*][6], enter your Master Code to access User Functions. Then, press [04] or use the scroll keys to navigate to "System Test" and press [*]. The system will activate all keypad sounders, bells/sirens, and keypad LEDs for two seconds.
- UL HOME HEALTH CARE Applications: For these specific applications, the system must be tested weekly without AC power. This involves temporarily removing AC power from the control unit, performing the test using only the battery backup, and then securely reconnecting AC power.
- Smoke Detector Testing: All smoke detectors must be tested by your smoke detector installer once per year.
- PIR Camera Testing: If PIR cameras are enrolled, two images from each camera are sent to the monitoring station during a system test.
- Troubleshooting: The system provides indications for trouble conditions. Users can view troubles by pressing
[*][2] and entering their Access Code.
- Cleaning and Maintenance: The manual includes guidelines for cleaning and maintaining the system components to ensure optimal performance.
- Change Brightness and Contrast: Users can adjust the brightness and contrast of LCD keypads for better visibility. To change brightness, press
[*][6], enter Master Code, then [1][2], and use scroll keys. To change contrast, press [*][6], enter Master Code, then [1][3], and use scroll keys.
- Service Contact Information: The manual provides sections for recording system information and service contact details, which are essential for support and repairs.
- Manufacturer Liability: The manual contains important information regarding limitations on product use, function, and the manufacturer's liability, emphasizing the importance of reading the entire manual carefully.
The PowerSeries Neo Alarm Panel is designed to be a robust and user-friendly security solution, offering peace of mind through its comprehensive features and straightforward operation.