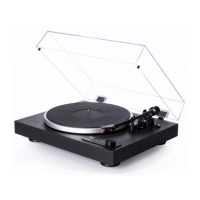
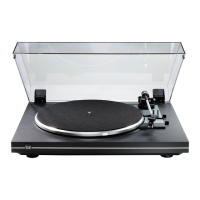
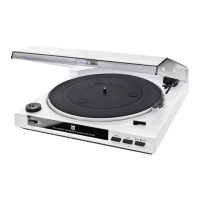
Features
@
Top/mount spring screw
@
Adjustment for tonearm cueing
height
@
Adiustment knob lor
tonearm balance
@
Direct-dial tracking
lorce adjustmenl
@
Speed selector
@
Auto/manual cueing system
@
Tonearm rest
@
Tonearm lock
@
Cartridge
@
Tonearm lilt
@
Adapter for large-hole records
Operating
instructions
With the Dual 420 all microgroove and
siereo records can be
played.
With the
push
button set next the neces-
sary turntable speed on 33 or 45 rpm.
Now
place
the record on the turntable
platter
and release the tonearm.
The Dual is now ready for
play.
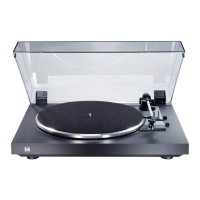
Fig.
6
1. Operation
The movement
of the tonearm toward
the
record will start
the
platter
rotating.
To lower down
over the
lead-in
groove
or the desiqld
position
on the
record,
a light touch
on the
cueing lever
is all
that's necessary
and
will bring
it to the
position
!
.
gy
this
means
the
cueing
control will
lower
and the needle
sets
down
perfect
with
absolute accuracy
on
the
record.
The height
of the stylus
over the
record
in
position
V
can be
varied over
a
t/t"
range
by turning
adjustment
screw
@.
2.
To
interrupt
play
Move cueing
lever to
position
V
.
6
Fig.
7
3.
To resume
play
Move cueing
lever to
position
!
.
(n
tignt
touch
is all that's necessary.)
4.
Switcfi off
When
the record has finished
playing,
the
record
player
turns
off
automatically
at
the
same time the tonearm lifts
itself off
from
the record and the
cueing lever
goes
into
position
V
Please set the
tonearm back on the tonearm
rest.
We
recommend that after using
the record
player,
the tonearm
should be locked
(Fis.
6).
Changing
the
Pick-uP
cartridge
To
take
out
the
pick-up
cartridge,
unlock
the
tonearm
and
hold it
with
the
left
hand.
With
the
right
hand
thomb,
pull
down
the
pick-up
cartridge
until
it snaps
out.
Mounting
the
pick-up
cartridge,
Hold the
pick-up
cartridge
between the
thomb and the index finger of the
right
hand and slanting it inside the
pick-up
head so that the
guide
bar
of the
pick-up
cartridge sets into the wide
cut-out.
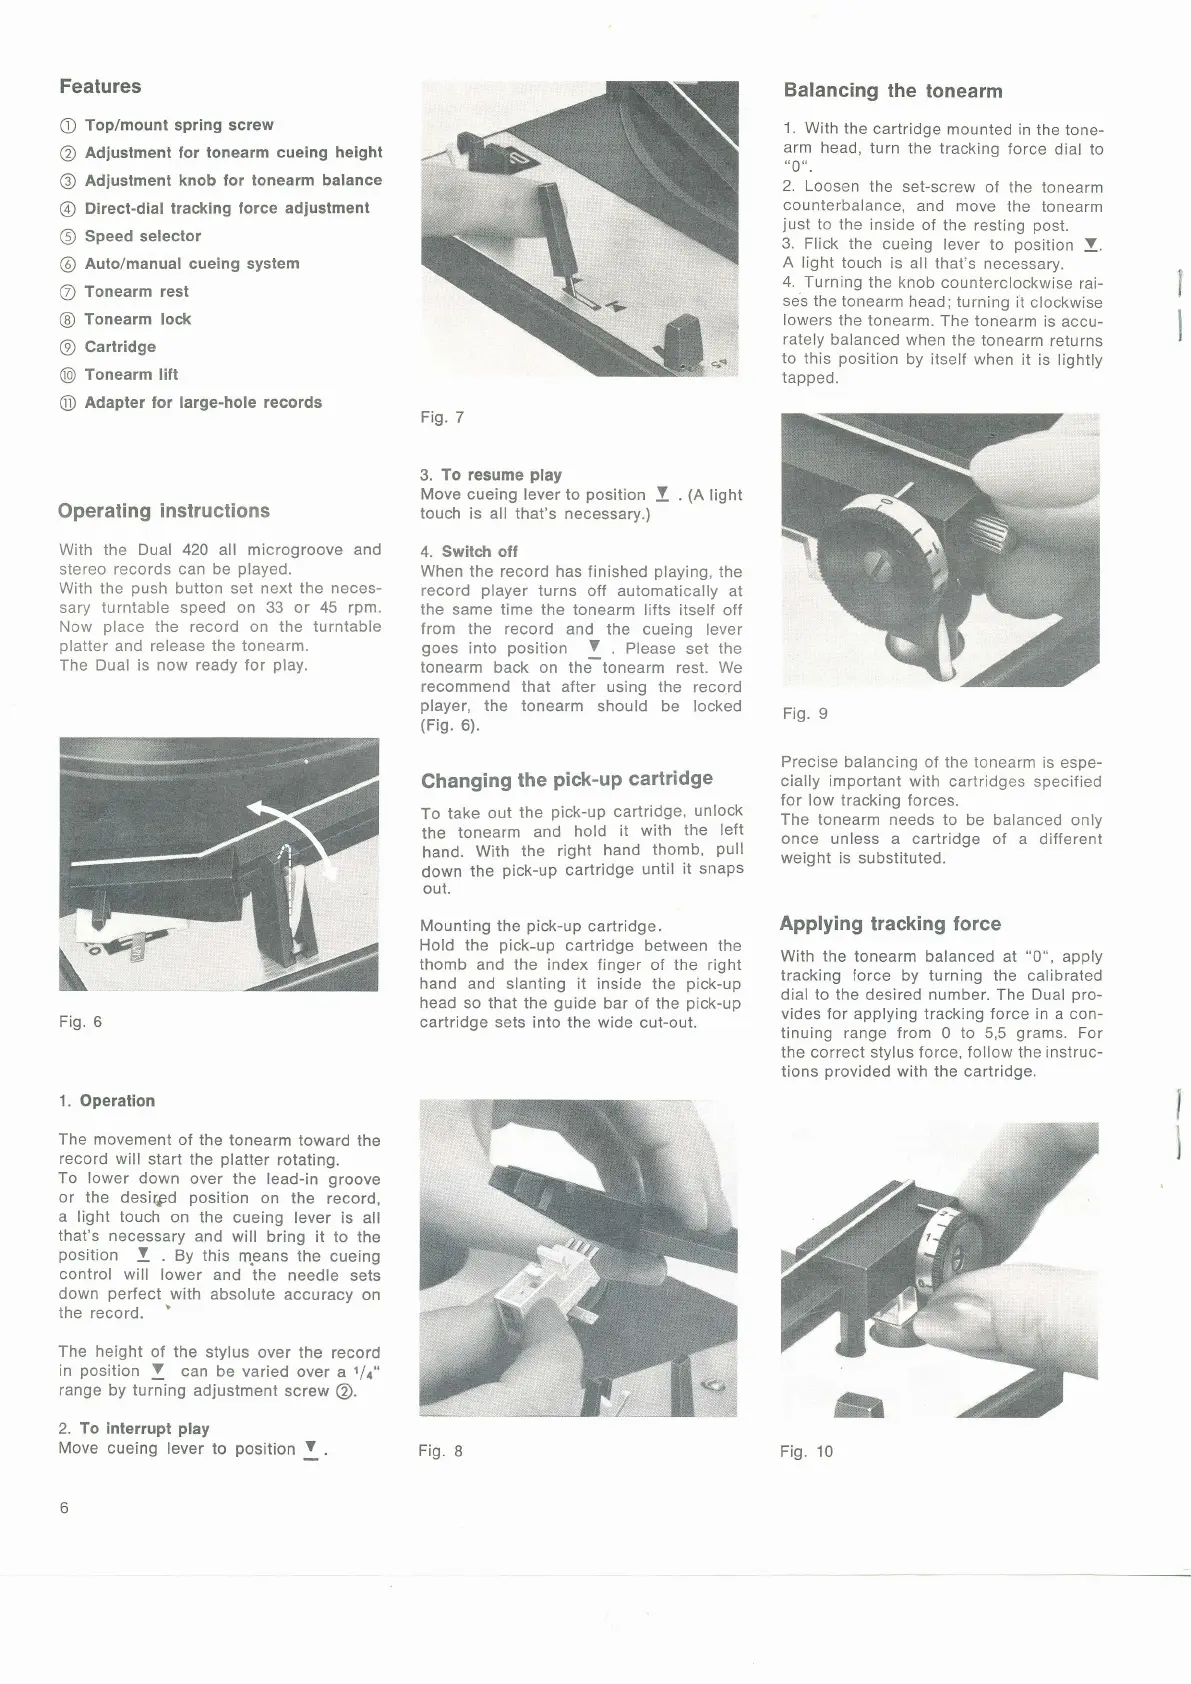
Balancing
the
tonearm
1. With
the
cartridge
mounted in
the
tone-
arm
head,
turn the tracking
force dial to
"0".
2.
Loosen
the
set-screw of
the tonearm
counterbalance,
and
move the
tonearm
iust
to the
inside
of the resting
post.
3.
Flick the
cueing lever
to
position
V.
A
light touch
is all that's
necessary.
4.
Turning the
knob
counterclockwise
rai-
ses the
tonearm
head; turning
it clockwise
lowers
the tonearm.
The
tonearm is
accu-
rately
balanced
when the
tonearm
returns
to this
position
by itself when
it is
lightly
tapped.
Fig. 9
Precise
balancing of the tonearm
is espe-
cially important with cartridges
specified
lor low tracking forces.
The tonearm needs to
be balanced only
once unless a cartridge
of
a
different
weight is substituted.
Applying
tracking force
With the
tonearm balanced at
"0",
apply
tracking
force by turning the calibrated
dial to the desired number. The Dual
pro-
vides for
applying
tracking force in
a con-
tinuing range
from
0
to
5,5
grams.
For
the correct stylus
force, follow the instruc-
tions
provided
with the cartridge.
Fig.
I
Fig. 10
 Loading...