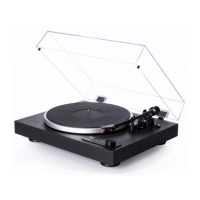
Dear music lover
Please read
lhese instructions
carefully
before
you
slart
using
your
Dual
so that
you
will not
encounter
any
problems
resulting
from laulty
connections
or hand-
ling.
Move
page
2
oulward.
Unpack
Remove
all
parts
used
for
packing.
Notice
whether a cartridge
is mounted
in
the tonearm
head and remove
the
pro-
tective cap
that may be over
the stylus.
lnstructions
for mounting
the cartridge
as
well as technical
data on
factory-mounted
cartridges
can
be found
on a separate
sheet
enclosed
with this
instruction
ma-
nual.
Control
now
the tonearm
balance:
By
turning
the tracking
force dial
from
"0",
the tonearm
must remain
in the
horizon-
tal
position.
To balance
the tonearm,
turn the calibra-
ted dial
until the
tonearm remains
in
a
horizontal
position.
Then adjust
the ne-
cessary
tracking force.
To understand
the
elevation
of
the tracking
force,
please
see
the technical information
in regard
to the
cartridge.
(Balancing
thetonearm
and
app-
lying
tracking force,
please
see
page
6,
where instructions
are explained
in
de-
tail).
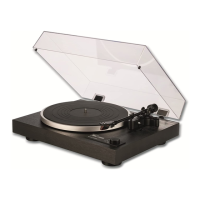
lnstallation
The installation
instruction
is only importanl
if
the
phonograph
is bought
without base.
Fig.
1
Position the chassis
over the base
(or
mounting board) so
that the three cupped
spring-mounted
footings
will fit into
their
cut-outs
(A).
Tilt both
mounting screws
to let
them slip
past
the
notches as
you
lower the
chassis. Then
turn each screw
clockwise
qntil
it is firmly seated
into the
top of the lhassis
(B).
This simple
procedure
solves
three
pro-
blems. The screws hold the chassis
on its
base, secure it when it has
to
be
moved
any distance, and allow the chassis
to be
installed entirely from the
top.
To transport the Dual on its base,
turn
the screws counterclockwise, depress
the
chassis
against the base, then continue
to
turn
each screw counterclockwise
until
it holds
the chassis securely
against the
base
(C).
For reinstallation, loosen
the
screws and
proceed
again as described
above.
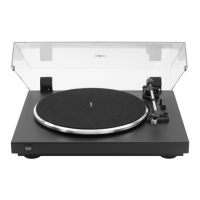
Connection
to
power
supply
The
operating instructions of the
record
player
component are
to
be
used for record changers
installed into consoles.
The
Dual operates on
110 or 220
VAC,
50 or 60
Hz, and is
usually set
for 220
volts 50
Hz.
Fig.
3
The
voltage can be seen on
the voltage
selector,
the frequency is
shown on the
type
plate.
Both voltage selector
and type
plate
can be reached
after the
turntable
platter
is removed.
Changing
the frequency
To change frequency,
it is necessary
to
ohange
the motor
pulley (A)
which
is
secured
to
the motor shaft by a screw.
For
access to the
motor
pulley
the
platter
must be
removed.
Extreme
care is
necessary when
changing
the motor
pulley,
as a bent
motor
pulley
will cause
rumble.
Part numbers
for motor
pulleys:
50 Hz:220
418
6O Hz:22O
419
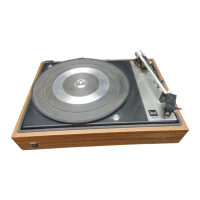
Removing
the
platter
The
platter
is supported
by means
of a
spring disc
secured by
a nut that
sits
on the
platter
cover.
To remove the
plat-
ter, first
remove the
platter
cover,
then
the
spring clip can
be removed.
lmportant:
When handling
the
platter
avoid touching
the inner
surfaces with
your
fingers
as skin oils can
cause slippage
(and
resulting
pitch
deviation) between the
idler wheel and
the driving rim of the
platter.
Connection
to amplilier
The operating instructions of
the record
player
component are to be used for record
changerg
installed
into consoles.
The record
player
cable can be
plugged
on standard design with miniature con-
nectors.
253
\l/
2:L
3:leltchannet
5
:
right channel
Fig. 5
lf
your
amplifier has different connections
than those of the Dual, adapters can
be
obtained from
your
dealer.
This unit corresponds to the international
safety standards for radio sets and similar
units
(lEC
65) and is approved by the cor-
responding
national authorities.
Service
All lubrication
points
of the Dual are
supplied with sufficient oil to
permit years
of operation under normal conditions. Do
not add oil at any
point,
as special lubri-
cants
are
used.
lf
your
Dual
should
ever
need
maintenance,
please
take it to
your
dealer or ask him
for the name of the
nearest authorized
Dual
Service
Station.
This will assure
that only
proper
Dual
parts
are used.
When shipping
your
Dual,
use
the original
packing
in order
to
pre-
vent damage
in transit. lf the
original
packing
has been
discarded,
write for
special shipping
instructions.
@@@
Fig.2
Fig.4
 Loading...