Burner Shutter Adjustments
The gas burner shutters are adjusted at the factory for
your convenience. The adjustments are:
(1) full open for natural gas models
(2) half open for liquid propane units
If further adjustment is desired, please follow
this procedure.
1. Always judge a flame with LA-VA-GRATE
®
, briquettes
and SEAR GRID
®
in place.
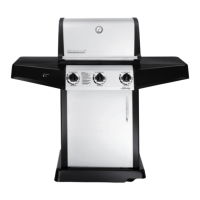
2. Loosen shutter locking screw (See Fig. 20) and close
shutter until yellow tip appears in the flame.
NOTE: It is sometimes necessary to back the burner off
the orifice to adjust the shutter. See Page 34 on releasing
burner from supports.
3. Open shutter until desired blue flame appears.
4. Tighten locking screw enough to hold shutter securely
in place (do not over tighten and strip
the threads).
NOTE: Reinstall burner over orifice (See Page 37)
if removed.
Shutter Locations
Shutters are all located underneath control box.
(See Fig. 20)
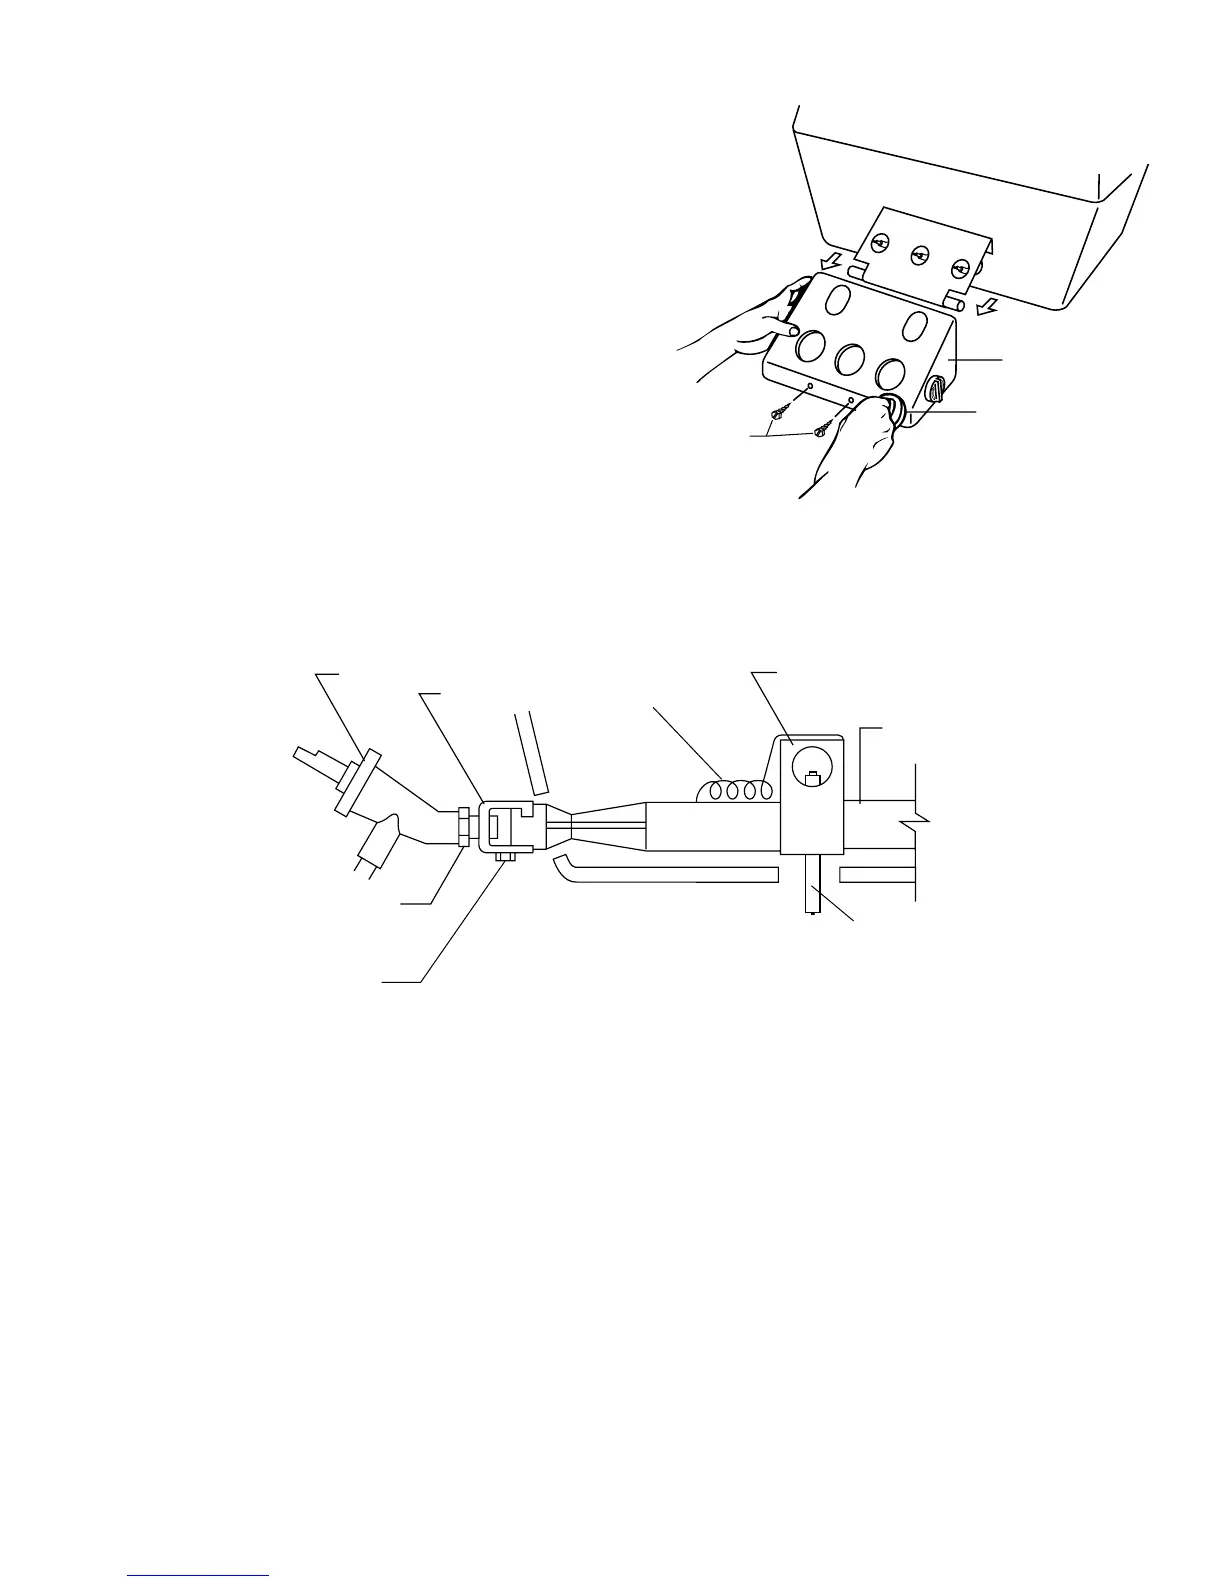
1. Remove control knob(s).
2. Remove two (2) mounting screws holding control
box to manifold bracket. (See Fig. 19)
3. Carefully remove control box by lifting over
valve stems.
CAUTION:
Electrode wires are attached to ignitor.
Do not pull control box away from grill.
4. Slowly rotate control box to the right, exposing
ignitor and electrode leads.
5. Remove the electrode wires from the ignitor studs.
This will free the control box and expose the
burner shutter. (See Fig. 20)
BURNER
ELECTRODE
COLLECTOR BOX
SHUTTER
NICHROME
GLOW WIRE
VALVE
ORIFICE
SHUTTER
LOCKING
SCREW
FIG. 19
REMOVAL OF UPFRONT CONTROL BOX
CONTROL BOX
CONTROL KNOBS
MOUNTING
SCREWS
26
02/33
FIG. 20
MAIN GRILLING BURNER AND ROTIS-A-GRATE
®
BURNER SHOWS PROPER BURNER ORIFICE
ALIGNMENT AND LOCATION OF SHUTTER