02/33
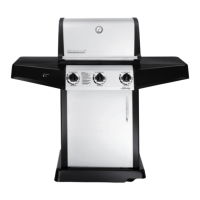
Main Grilling Burners
Rotary Ignition
CAUTION:
Always turn the gas supply off (if
portable – at the tank, if permanent installation –
at the main gas cut off) before proceeding with
any troubleshooting procedures.
If, for any reason, the rotary ignition fails to ignite the
main grilling burner(s), repeat the lighting procedures
described on the grill control box.
WARNING:
The hood must be in the full open
position any time you attempt to light your grill.
Failure to open the hood could lead to delayed
ignition resulting in bodily harm.
IMPORTANT: If the main burner(s) still fails to
ignite, make sure that there is gas flowing to
the burner(s) by attempting to match light the
burner(s). (See Page 21 for match lighting
procedures.) If the burners will match light,
then proceed with the ignition checkout.
After shutting off the main gas supply, remove the
SEAR GRID
®
, briquettes and LA-VA-GRATE
®
. Insert
a small mirror or piece of stainless steel behind the
collector box (See Fig. 22) and check for a spark at the
electrode. The spark should travel from the tip of the
electrode to the top surface of the burner. (See Fig. 23
and 25) If there is no spark, then:
1. Remove the control knobs and the control box.
The electrode wires are attached to the rotary
ignitor on the right side of the control box — do
not pull or drop the control box.
2. Rotate the control box to expose the electrode
wire/ignitor pin connections.
3. Be sure all the wires are connected to the
ignitor studs.
4. Remove each electrode wire (one at a time and
then reattach) and place the tip of a screwdriver
1/8" away from the now exposed ignitor pin.
Rotate the ignitor knob and look for a spark at the
screwdriver. If a spark occurs, reattach and proceed
to the next stud. If any stud does not spark, a
replacement ignitor should solve the problem.
HINT: Short term solution: For rotis model grills,
if one main burner is not lighting due to an ignitor
problem, switch the rotis electrode wire to the bad
stud and put the main burner electrode wire on the
good stud. This will transfer the ignition problem to
the rotis burner which, in most cases, is used less
and is easier to match light.
5. If the ignitor is verified to be operational, check
the electrode wires for shorts. This could occur if
the electrode wires are crimped or the insulation
has been cut. If the wires are crimped, free them
and, if a cut in the insulation is found, use
electrical tape to repair the insulation. Re-light
using the rotary ignitor to verify repairs.
6. Check to make sure that the electrode ceramic(s)
has not been cracked or broken. Check with your
dealer for replacement electrode.
7. If all connections are found to be correct and
burner(s) still will not light, tilt collector box
downward one (1) or two (2) degrees. This may
be done by loosening the screw on the glow wire
side of collector box and tilting the glow wire side
of collector box downward. (See Fig. 24)
8. The dimension from the tip of the electrode to
the top surface of the burner is important. It
should be approximately 1/8". This is difficult
to measure but in viewing with a mirror (Fig. 22)
if it appears that this dimension is far too close
(1/16" or less) or much too large (3/16" or more)
then some adjustment would be necessary. This
would require disconnecting from the ignitor
the appropriate electrode wire and removing the
burner. (See Maintenance section — Page 33.)
The electrode tip can then be bent down or
pushed up as required.
30