GLOSTER GLADIATOR MK1
DURAFLY 1100MM PLUG AND FLY
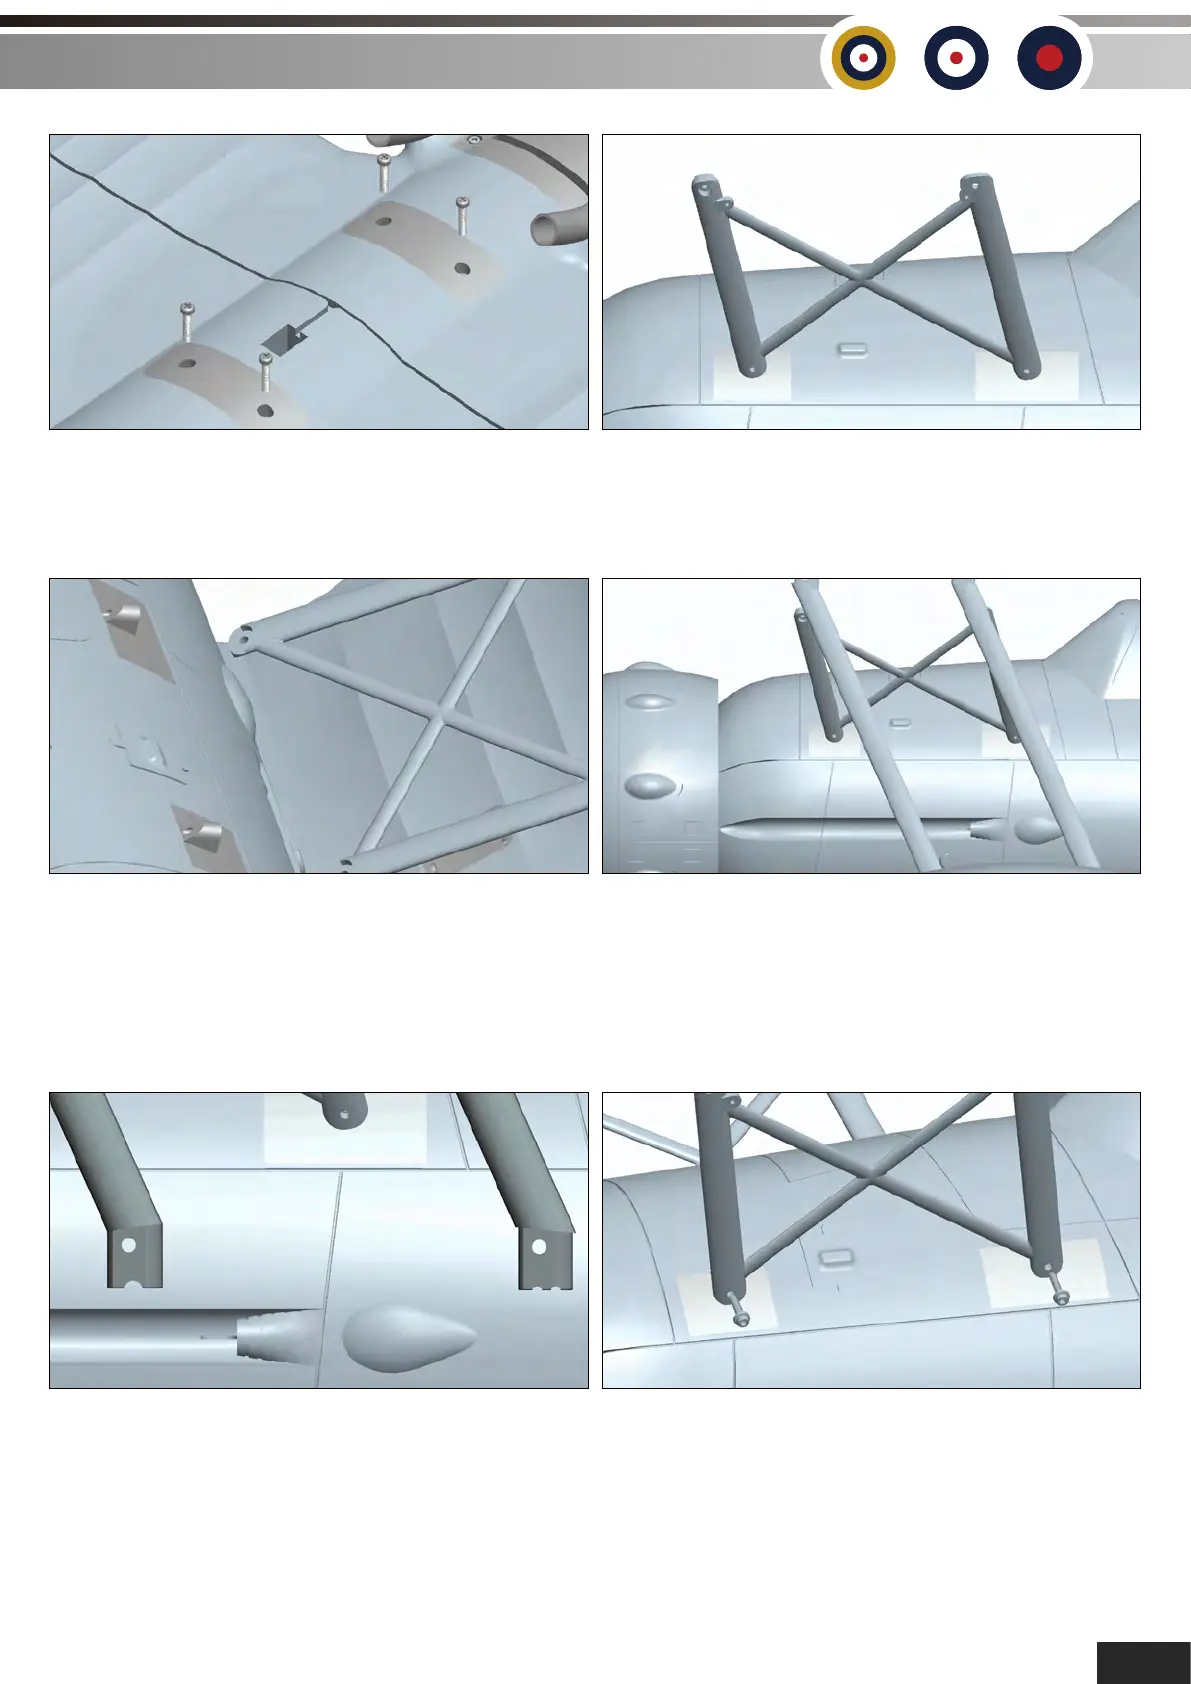
20. Secure the bottom wing to the fuselage
using the 4 supplied M3 x 20mm machine
screws.
21. The next step is to attach one of the
cabane struts to the fuselage.
22. Carefully identify which strut goes where
and which way around. The brackets for the
flying wires go towards the top wing, and the
top fixing hole that is countersunk goes to the
front. Secure the cabane with 2 off 2.3mm x
8mm hex screws with molded on washers.
23. The interplane struts can now be added.
Once again, very carefully identify which is
which. They need to rake forwards when
placed in the bottom wing, and the aerofoil
shape needs to face the correct way, into the
airflow.
24. The interplane struts push into the wings,
and the special fasteners that are factory
installed hold them in place. Push them in until
you hear a click, they are then secure. If you
need to remove them then carefully push the
locking tab away and pull out the strut.
25. Attach the second cabane strut, once
again use the supplied 2.3mm x 8mm hex
screws with the molded on washers.
7