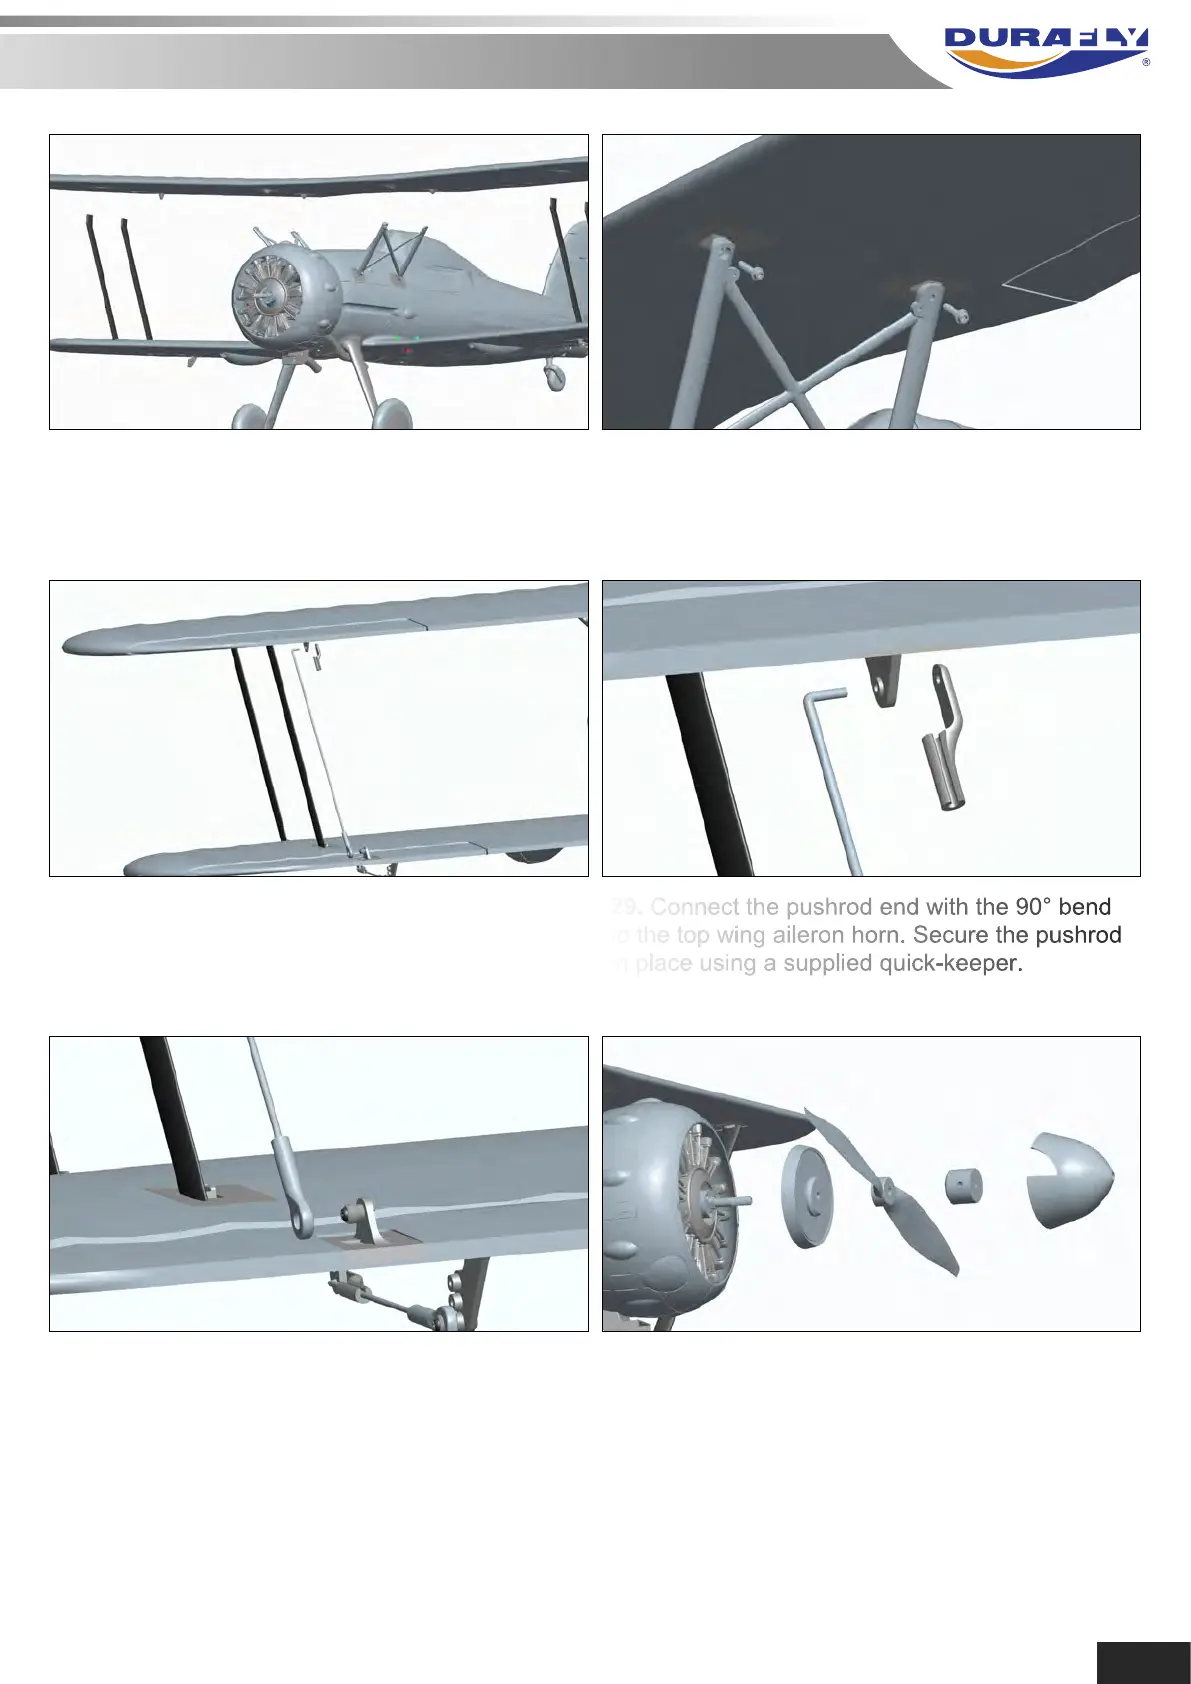
26. Next step is to attach the top wing. It is best
to start with one set of interplane struts and
firmly locate them, then locate the other side.
27. With the interplane struts firmly located, line
up the cabane struts to the top wing fixings.
Secure once again with the 2.3mm x 8mm hex
screws with the molded on washers.
28. Use the long pushrods to connect the top
and bottom ailerons. It is best to have the
aileron servos connected to your radio or a
servo tester and set the servos at neutral.
29. Connect the pushrod end with the 90° bend
to the top wing aileron horn. Secure the pushrod
in place using a supplied quick-keeper.
30. Adjust the length of the pushrod by screwing
the ball-link clockwise or anti-clockwise until it
perfectly aligns with the ball on the bottom wing
aileron. Ensure the bottom aileron is still set at
neutral, snap the ball-link into place. Repeat for
the other wing. Once again, clean off any silver
paint that may be on the ball.
31. Slide the spinner backplate onto the motor
shaft and locate it onto the hex driver. Next fit
the propeller, then the heavy prop nut, tighten
with a tommy-bar or similar. Then fit the
spinner cone, ensure this locates correctly into
the backplate, secure using the supplied M3 x
25mm machine screw. Note: Do not fit the prop
if you haven't yet set up your radio and the
ESC, ensure you do this before fitting the prop.
8