This document is the owner's manual for Durastar Single and Multi-Zone Outdoor Units, specifically split-style air conditioners. The manual covers models DRA1U09S1A, DRA1U12S1A, DRA1U18S1A, DRA1U24S1A, DRA2U18M1A, DRA3U28M1A, DRA4U36M1A, and DRA5U48M1A. It provides essential information for the safe and effective operation, maintenance, and troubleshooting of these units.
Function Description
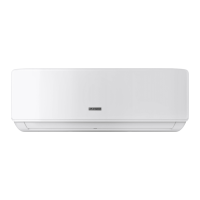
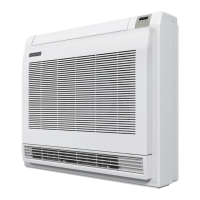
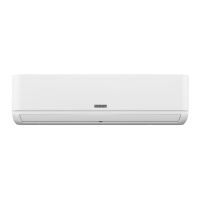
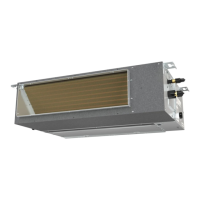
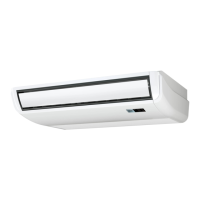
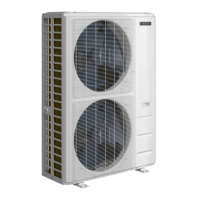
The Durastar outdoor units are components of a split-style air conditioning system designed for both single and multi-zone applications. These units are responsible for rejecting heat to the outside environment during cooling operations and absorbing heat from the outside during heating operations, facilitating temperature control within a building. The system utilizes refrigerant pipes, a signal cable, and a drain hose to connect to indoor units.
Important Technical Specifications
The operating temperatures for the air conditioner are crucial for its optimal performance and to prevent damage.
Temperature Ranges:
- COOL Mode:
- Indoor Air Temperature: 62°F - 90°F (17°C - 32°C)
- Outdoor Air Temperature: -13°F - 122°F (-25°C - 50°C)
- HEAT Mode:
- Indoor Air Temperature: 32°F - 86°F (0°C - 30°C)
- Outdoor Air Temperature: -13°F - 86°F (-25°C - 30°C)
- DRY Mode:
- Indoor Air Temperature: 50°F - 90°F (10°C - 32°C)
- Outdoor Air Temperature: 32°F - 122°F (0°C - 50°C)
The outdoor unit is equipped with a base pan heater, enabling operation at freezing temperatures as low as -13°F (-25°C). It is recommended to keep the unit plugged in at all times when outdoor temperatures are at or below 32°F (0°C) to ensure smooth ongoing performance.
The air conditioner's circuit board (PCB) includes a fuse for overcurrent protection, with specifications printed directly on the board.
Usage Features
The manual emphasizes safe and optimal usage practices.
General Usage:
- Optimal Performance: To optimize performance, users should keep doors and windows closed, limit energy usage with TIMER ON and TIMER OFF features, avoid blocking air inlets or outlets, and regularly inspect and clean air filters.
- Condensation Prevention: To prevent condensation from forming and dripping when relative humidity exceeds 80%, users should set the vertical airflow louver to its maximum angle (vertically to the floor) and set the fan to HIGH.
- Emergency Operation: When turning the unit on or off via the emergency operation switch, an insulated object (non-metal) should be used.
- Power Disconnection: The unit should be turned off and unplugged during storms or when not in use for a long period.
- Intended Use: The device should only be used for its intended purpose as an air conditioner.
- Safety Precautions: Users should never stick fingers or other body parts into openings, avoid touching fins after filter removal, and not operate the unit with wet hands. Flammable materials, fire, or hair dryers should not be used near the unit or filters. The unit should not be washed with water.
Troubleshooting Common Issues (Not Malfunctions):
- Unit does not turn on when pressing ON/OFF button: This is due to a 3-minute protection feature to prevent overloading. The unit cannot be restarted within three minutes of being turned off.
- Unit changes from COOL/HEAT mode to FAN mode: This occurs to prevent frost formation. Operation resumes in the previously selected mode once the temperature increases.
- Compressor turns off: This happens when the set temperature is reached. The unit will resume operation when the temperature fluctuates again.
- White mist emitted: In HEAT mode after defrosting, moisture generated during the defrosting process can cause white mist.
- Hissing sound: Normal sound caused by refrigerant gas flow or changes in direction during operation or defrosting.
- Squeaking sound: Normal expansion and contraction of plastic and metal parts due to temperature changes.
- Dust emitted: Accumulated dust during non-use periods will be emitted when the unit is turned on. This can be mitigated by covering the unit during long periods of inactivity.
- Bad odor: The unit may absorb odors from the environment (furniture, cooking, cigarettes) and emit them. Cleaning moldy filters is recommended.
- Outdoor unit fan not operating: Fan speed is controlled to optimize product operation.
- Erratic operation/unresponsive unit: Interference from cell phone towers and remote boosters can cause this. Solutions include disconnecting and reconnecting power, or pressing the ON/OFF button on the remote to restart.
Maintenance Features
The manual outlines specific maintenance procedures for both long periods of non-use and pre-season inspection.
Maintenance: Long Periods of Non-Use:
- Clean all filters.
- Turn on the FAN until the unit dries out completely.
- Turn off the unit and disconnect the power.
- Remove batteries from the remote control.
Maintenance: Pre-Season Inspection:
- Inspect for damaged wires.
- Clean all filters.
- Check for leaks.
- Replace batteries.
- Ensure nothing is blocking any air inlets or outlets.
Safety Precautions for Maintenance:
- Maintenance must be performed by qualified professionals to prevent personal injury or damage.
- Do not attempt to repair the air conditioner yourself; contact a qualified service representative.
- Disconnect the power supply at the circuit breaker when cleaning the air conditioner to avoid electric shock.
- Cleaning and user maintenance should not be performed by children without supervision.
Electrical Safety:
- Only use the specified power cord. A damaged power cord must be replaced by the manufacturer, service agent, or similarly qualified persons.
- Keep the power plug clean to prevent fire or electric shock.
- Pull the plug firmly from the outlet, not the cord, to prevent damage.
- Do not connect to a multi-purpose socket.
- Do not modify the power supply cord length or use an extension cord.
- Do not share the electrical outlet with other appliances.
- The product must be properly grounded during installation.
- All electrical work must follow local and national wiring standards and regulations. Cables must be connected tightly and clamped securely.
- All electrical connections must follow the Electrical Connection Diagram on the indoor and outdoor units.
- Wiring must be arranged to allow the control board cover to close properly, preventing corrosion, overheating, fire, or electric shock.
Installation Safety:
- Installation must be performed by an authorized dealer or specialist in accordance with NEC and CEC requirements (North America) and national/local wiring regulations. Improper installation can cause water leakage, electrical shock, or fire.
- Only use included accessories, parts, and specified parts for installation.
- Install the unit in a firm location that can support its weight.
- Install drainage piping according to the installation manual to prevent water damage.
- For units with an auxiliary electric heater, do not install within 1 meter (3 feet) of combustible materials.
- Do not install in locations exposed to combustible gas leaks.
- Do not turn on power until all installation work is complete.
- Consult experienced service technicians for disconnection and re-installation when moving or relocating the unit.
Warranty Information:
The product comes with a TEN (10) YEARS PARTS Limited Warranty for the original owner of mini-split equipment used in a residential single-family home, provided it is properly installed by a licensed HVAC contractor following all local and state laws. Replacement parts carry the balance of the original 10-year warranty.
The effective date of warranty coverage is determined by the installer's invoice or, if unavailable, the product's manufacture date plus ninety (90) days.
NO LABOR component is provided with this warranty, and shipping costs for warranty replacement parts are the responsibility of the owner.
Exclusions include damages from improper installation, operation, or maintenance; misuse, accidents, environmental factors (e.g., corrosive atmosphere, vandalism, freight damage, fire, flood, freeze, lightning, acts of war/God); normal maintenance parts (filters, refrigerant, thermostats, tubing, concrete pads); units sold via the Internet or auction website and not installed by a qualified professional; units not part of a properly matched system (AHRI specified); and units not installed in the United States.
Commercial installations carry a ONE (1) YEAR PARTS warranty.
To obtain warranty service, contact the licensed contractor who installed the system or a licensed contractor, dealer, or distributor. Durastar Customer Support can assist with troubleshooting, requiring model number, serial number, and proof of purchase.