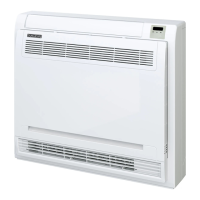
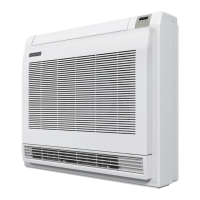
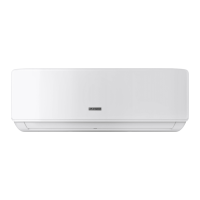
The Durastar Floor Mounted Indoor Unit Split-Style Air Conditioner, model DRAS12F1A, is designed to provide efficient cooling, heating, and dehumidification for residential spaces. This owner's manual outlines the device's functions, usage features, and maintenance procedures to ensure optimal performance and user safety.
Function Description
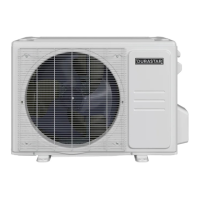
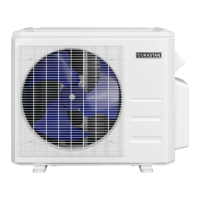
The Durastar DRAS12F1A operates as a split-style air conditioner, meaning it consists of an indoor unit and an outdoor unit that work together to regulate indoor temperature and humidity. The indoor unit, designed for floor mounting, draws in room air, processes it, and then redistributes conditioned air. The outdoor unit handles the heat exchange with the external environment. The system offers multiple operating modes: COOL, HEAT, DRY (dehumidify), and FAN, allowing users to select the most suitable mode for their comfort needs. In AUTO mode, the unit intelligently selects the appropriate operating mode to maintain a set temperature. The system is designed to operate within specific indoor and outdoor temperature ranges, with built-in safety features that may temporarily shut down the unit if these ranges are exceeded to prevent damage. The outdoor unit is equipped with a base pan heater, enabling it to operate effectively in freezing temperatures as low as -13°F (-25°C).
Usage Features
The air conditioner is primarily controlled via a remote control, offering a comprehensive set of features for user convenience.
- ON/OFF Button: Turns the air conditioner on or off.
- MODE Button: Allows selection between AUTO, COOL, DRY, HEAT, and FAN modes.
- FAN Button: Adjusts the fan speed to AUTO, LOW, MED, or HIGH, except in AUTO or DRY modes where fan speed is automatically regulated.
- TEMP UP/DOWN Buttons: Increases or decreases the set temperature in 1°F / 1°C increments. Users can switch between Fahrenheit and Celsius by pressing and holding these buttons simultaneously for 3 seconds. The unit can be set between 62°F and 86°F (17°C and 30°C) in COOL, HEAT, and DRY modes.
- SWING Button: Initiates or stops the automatic up and down movement of the top louver, directing airflow.
- DIRECT Button: Adjusts the fixed angle of the top louver in 6° increments, allowing precise control over airflow direction. The bottom louver requires manual adjustment.
- TIMER ON/OFF Buttons: Enables scheduling the unit to automatically turn on or off after a set period. The timer can be adjusted in 30-minute increments up to 10 hours, and then in 60-minute increments beyond 10 hours. The timer setting refers to hours after the current time.
- SLEEP Button: Activates a power-saving mode designed for nighttime operation. In COOL mode, the temperature gradually increases by 2°F (1°C) over two hours. In HEAT mode, the temperature gradually decreases by 2°F (1°C) over two hours. This feature automatically deactivates after 8 hours. The SLEEP feature is not available in FAN or DRY modes.
- TURBO Button: Maximizes fan speed to quickly reach the set temperature in COOL and HEAT modes.
- SILENCE / FP Button: The SILENCE feature reduces operational noise by slowing the compressor and setting the indoor fan to low speed, though this may slightly reduce cooling/heating capacity. The FP (Freeze Protection) feature, activated by holding the button for 2 seconds, sets the indoor temperature to 46°F (8°C) in HEAT mode to prevent freezing of indoor pipes and household items during extended periods of absence.
- FOLLOW ME Button: Utilizes a temperature sensor in the remote control to optimize the temperature around the user, rather than at the indoor unit's location, enhancing comfort. The remote displays the temperature at its location when this feature is active.
- AUTO-RESTART: In the event of a power interruption, the unit automatically resumes its previous settings once power is restored, eliminating the need for manual reset.
For emergency or testing purposes, the unit also features a manual override button on the control panel. Pressing it once activates FORCED AUTO mode, a second press activates FORCED COOLING mode, and a third press turns the unit off. It is important to turn off the unit before using the manual operation.
Maintenance Features
Regular maintenance is crucial for the longevity and efficient operation of the Durastar air conditioner.
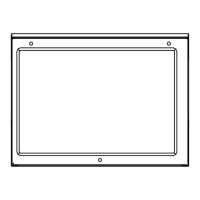
- Cleaning the Air Filter: The air filter should be cleaned every two weeks to maintain cooling efficiency and air quality. This involves unlocking and opening the grille, removing the filter, and cleaning it by gently vacuuming or washing with warm water and a mild detergent. The filter should be rinsed with clean water and air-dried away from direct sunlight before reinstallation.
- Cleaning the Indoor Unit: The indoor unit's exterior should be wiped clean with a soft, dry cloth. For stubborn dirt, a cloth soaked in warm water can be used. Harsh chemicals, benzene, paint thinner, polishing powder, or water hotter than 104°F (40°C) should be avoided as they can damage the plastic surface or cause discoloration. Water should not be sprayed directly onto the indoor unit to prevent electric shock or malfunction.
- Long Periods of Non-Use: If the unit will not be used for an extended time, users should clean all filters, run the unit in FAN mode until it is completely dry, disconnect power, and remove batteries from the remote control.
- Pre-Season Inspection: Before periods of frequent use, it is recommended to inspect for damaged wires, clean all filters, check for leaks, replace remote control batteries, and ensure no obstructions block air inlets or outlets.
Safety Precautions:
The manual emphasizes several safety precautions, including:
- Never sticking fingers or objects into unit openings.
- Avoiding contact with fins after filter removal.
- Ensuring maintenance is performed by qualified professionals.
- Not attempting self-repairs.
- Not blocking air outlets or inlets.
- Disconnecting power immediately if abnormal conditions (e.g., overheating cord, abnormal sounds, burning smell, frequent circuit breaker trips, indoor unit leakage) occur and contacting a qualified professional.
- Using an insulated object to press the emergency operation switch.
- Not stepping or placing heavy objects on the outdoor unit.
- Not spraying water on the indoor unit.
- Avoiding flammable materials near the unit.
- Not operating near combustible gases.
- Not using fire or a hairdryer to dry the filter.
- Disconnecting power before cleaning.
- Ensuring proper grounding and electrical connections during installation.
- Not modifying the power cord or using extension cords.
- Having installation performed by an authorized dealer or specialist in accordance with local and national wiring regulations.
- Installing the unit in a firm location that can support its weight.
- Ensuring proper drainage piping installation.
- Not installing units with auxiliary electric heaters within 1 meter (3 feet) of combustible materials.
- Not turning on power until all installation work is complete.
- Consulting service technicians for disconnection and reinstallation.
- Turning off and unplugging the unit during storms.
- Ensuring water condensation can drain freely.
- Not operating with wet hands.
- Not using the device for unintended purposes.
- Not allowing the unit to operate for long periods with open doors/windows or high humidity.
- Not moving louvers manually, as this can cause desynchronization. If this occurs, the unit should be turned off, the breaker shut off for 30 seconds, and then restarted to reset the louver.
- Not putting fingers near the blower and suction side of the unit due to the high-speed fan.
- Not touching metal parts inside the unit when removing filters due to sharp edges.
- Not exposing filters to direct sunlight when drying to prevent shrinkage.
The manual also provides a troubleshooting guide for common issues, distinguishing between malfunctions and normal operating conditions, and advising when to contact customer service.