14
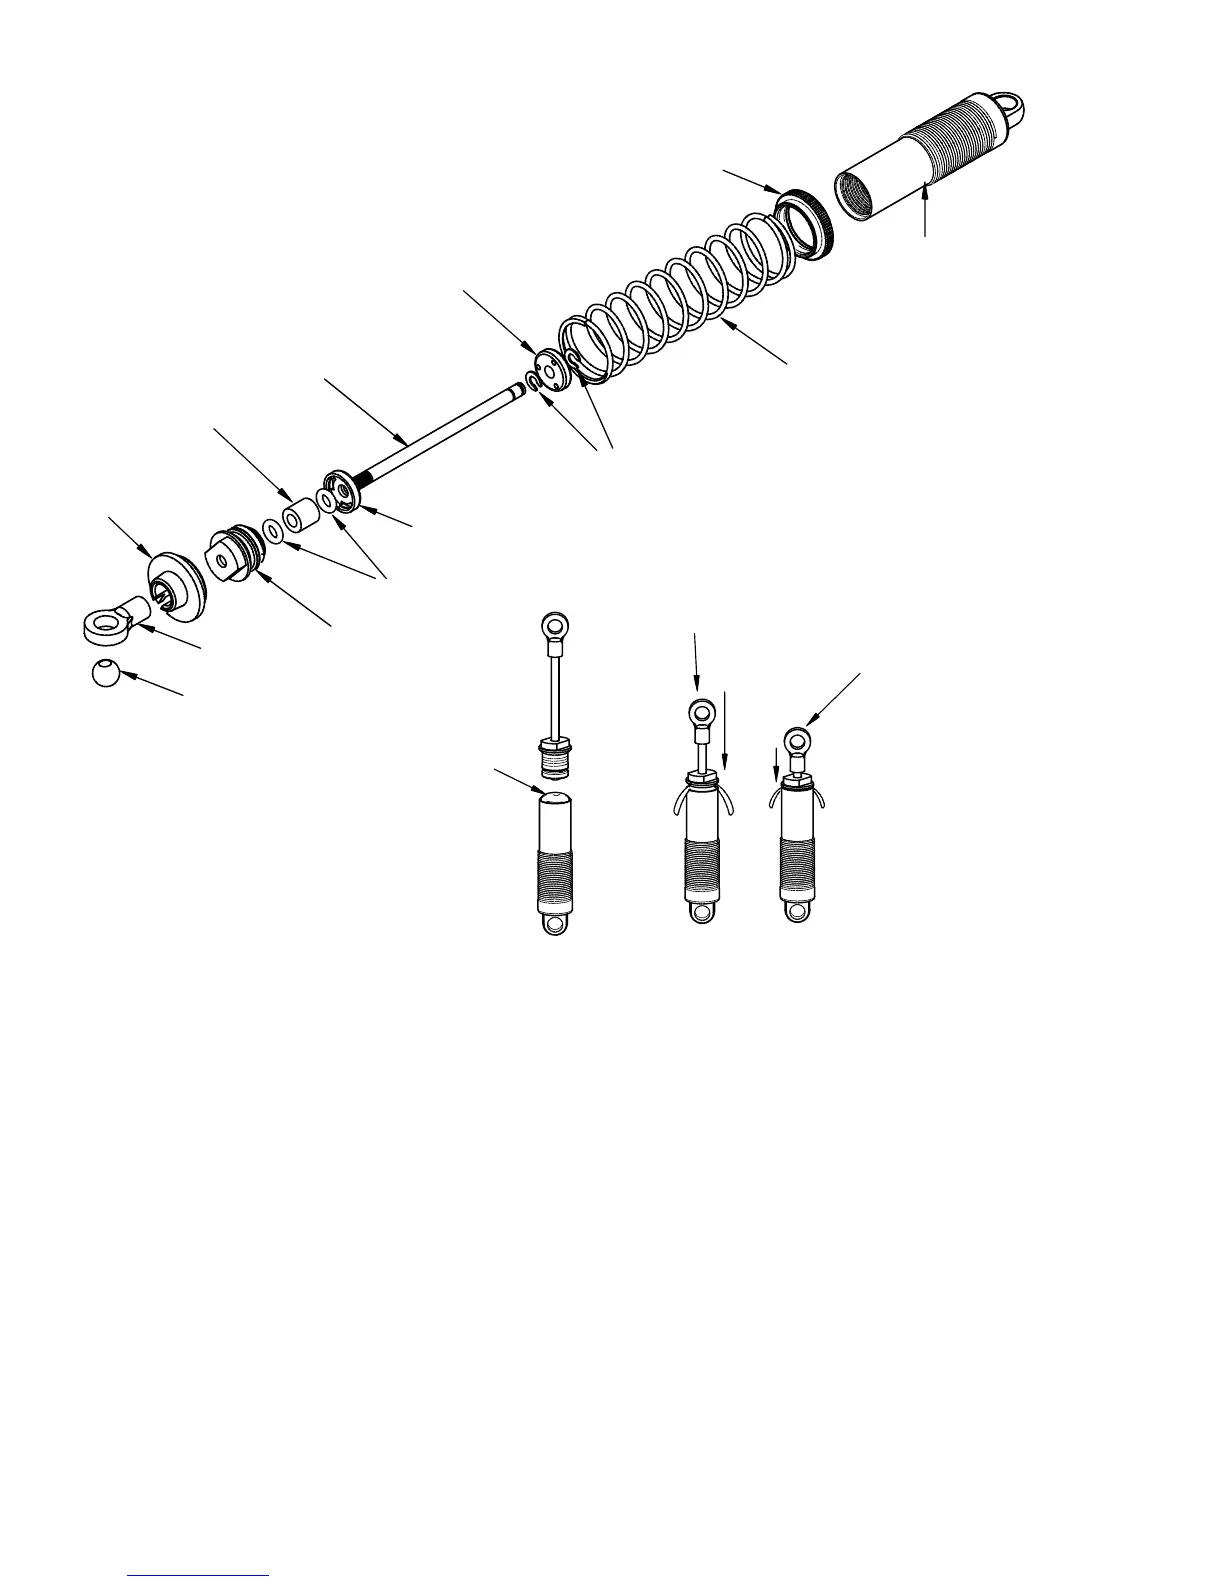
Shocks
1. Install a 2.5mm e-clip (S) onto the lower groove on the shock shaft (77 or 78). Install the e-clip into the groove closest to
the center of the shaft.
2. Place the shock piston (4) on top of the 2.5mm e-clip.
3. Secure the shock piston (4) in place with a 2.5mm e-clip (S) in the groove towards the end of the shaft.
4. Install a shock o-ring (114), then the plastic spacer (35), and then another shock o-ring (114) into the shock seal holder (33).
Secure all of the parts in the shock seal holder using the shock seal cap (34).
5. Install the shock shaft assembly into the shock seal assembly.
6. Fill the shock with fluid. Then install the shock seal assembly into the shock.
7. While tightening the shock seal assembly down, work the shock shaft and piston up and down to help remove any air
and excess oil that may be trapped in the shock.
8. Thread the shock shaft end (31) onto the end of the shock shaft (77 or 78). Note: To hold the shock shaft, use needle
nose pliers with a piece of cloth (to protect the shaft).
9. Install the shock ball (106) in the shock end (31).
10. Install the shock spring (70 or 71) onto the shock body (75 or 76).
11. Secure the shock spring in place with the shock retainer (32).
1. Fill to the top
with oil. Let all air
2. Slowly screw the cap
3. Tighten the cap a little
4. Finally, tighten the cap
and will then rebound about 3/8".