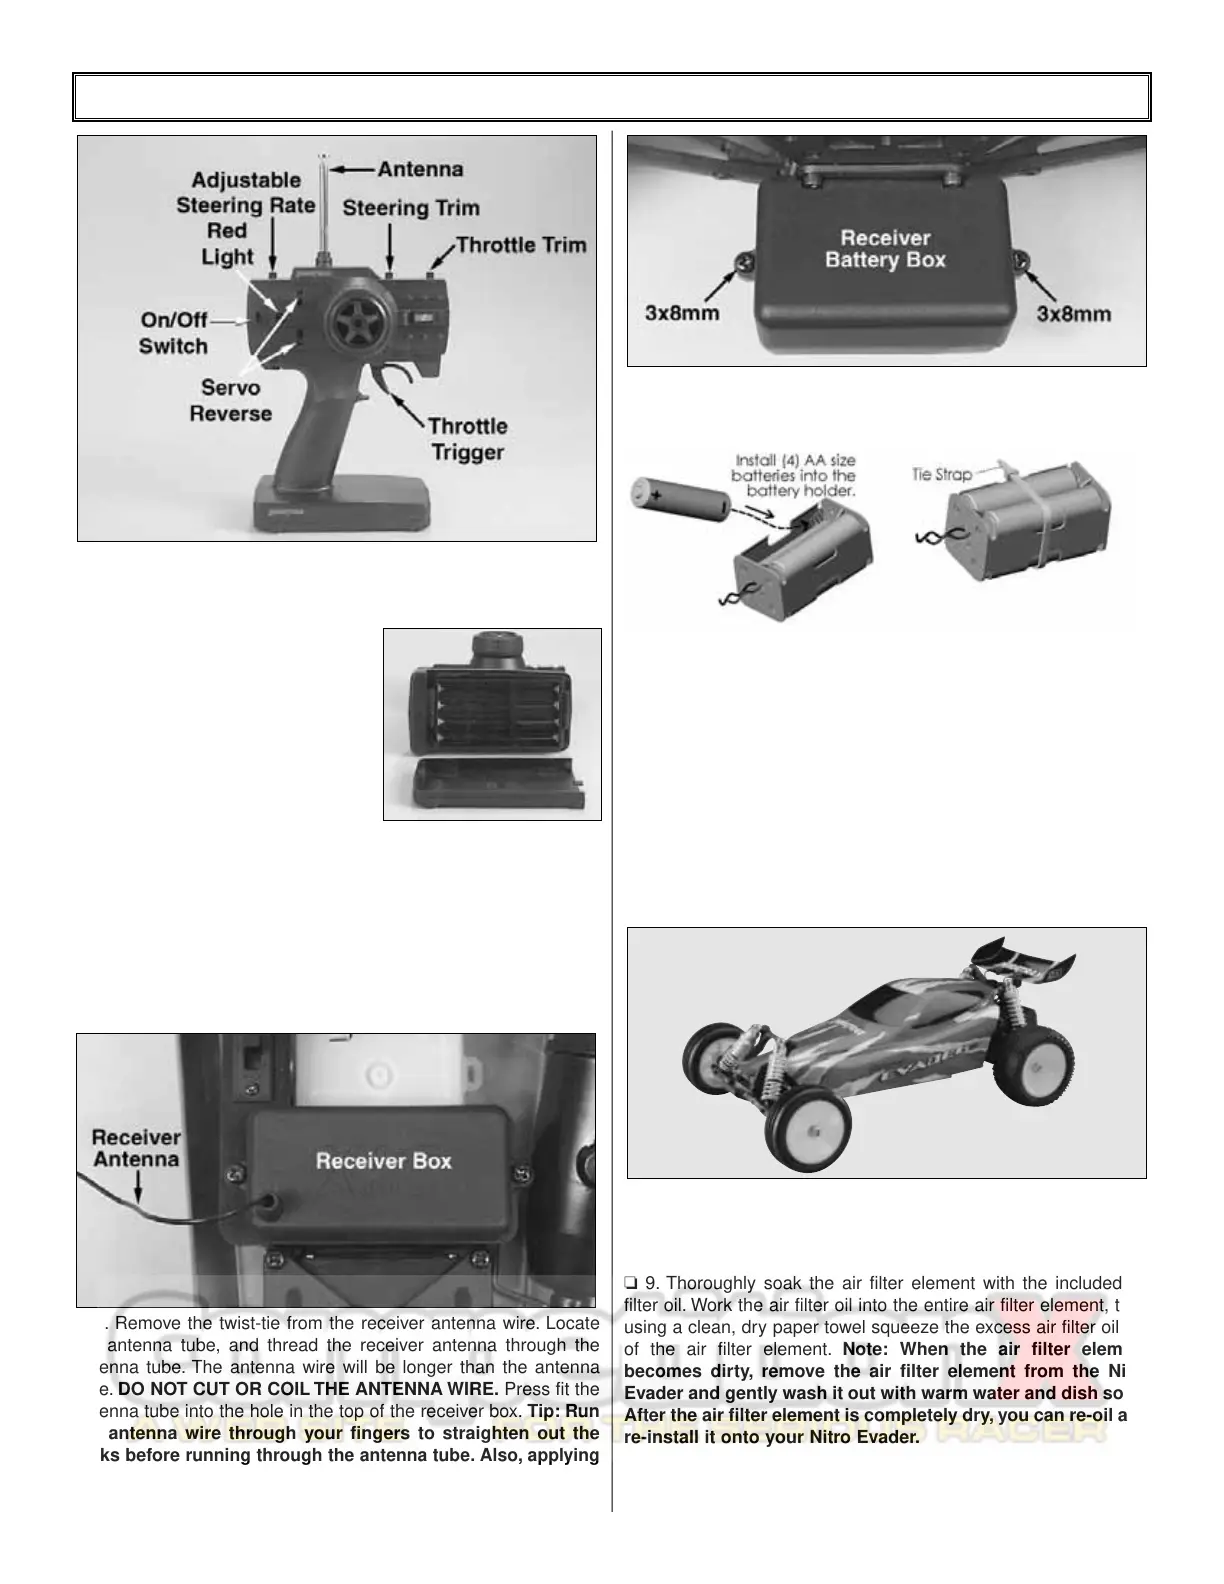
❏ 1. Install the transmitter antenna by screwing it into the hole on
the top of the transmitter. Give the antenna a mild tug to make sure
that it is properly secured in the transmitter.
❏ 2. Slide open the battery door on the
bottom of the transmitter. Install
eight
(8) “AA” batteries
into the transmitter in
the configuration molded into the
plastic on the battery holder. Reinstall
the battery door.
❏ 3. Warning: Always extend the
transmitter antenna before operating
your vehicle. Turn on the transmitter using the switch on the side.
The red light on the side of the transmitter should light up. If there
is no light on, turn the transmitter off and check to ensure that the
batteries are making contact with the metal contacts in the battery
holder. Make sure the batteries are installed correctly. Turn the
transmitter on and check for the red light. If the red light appears,
turn off the transmitter. If the red light blinks, the batteries are low
and should be replaced.
❏ 4. Remove the twist-tie from the receiver antenna wire. Locate
the antenna tube, and thread the receiver antenna through the
antenna tube. The antenna wire will be longer than the antenna
tube. DO NOT CUT OR COIL THE ANTENNA WIRE. Press fit the
antenna tube into the hole in the top of the receiver box. Tip: Run
the antenna wire through your fingers to straighten out the
kinks before
running through the antenna tube. Also, applying
a
small amount of soap and water to the antenna wire will help
lubricate the wire for threading into the antenna tube.
❏ 5. Remove the (2) 3x8mm pan head self tapping screws (L) from
the receiver battery box (65).Remove the receiver battery box lid
(66).
❏ 6. Remove the 4 cell receiver battery box from the radio box and
install (4) “AA” included batteries into the battery holder. Follow the
configuration molded into the battery holder. Use tie straps to
secure the batteries in the holder. Reinstall the receiver battery
holder back into the radio box.Tuck the wires into the groove in the
radio box so that they do not get crimped under the radio box lid.
Re-install the radio box lid and secure it in place with the (2) 3x8
pan head self tapping screws.
❏ 7.Turn the transmitter and receiver on and check that the servos
are properly centered. Move the throttle and steering back and
forth to check that they are functioning properly.
❏ 8. Decal the body as desired and install on the chassis. Install
the wing into the holes in the rear shock tower. Note: If the wing
fits loosely, bend the end of the wires a bit.
❏ 9. Thoroughly soak the air filter element with the included air
filter oil. Work the air filter oil into the entire air filter element, then
using a clean, dry paper towel squeeze the excess air filter oil out
of the air filter element. Note: When the air filter element
becomes dirty, remove the air filter element from the Nitro
Evader and gently wash it out with warm water and dish soap.
After the air filter element is completely dry, you can re-oil and
re-install it onto your Nitro Evader.
❏ 10. To continue, turn to page 9, “Carburetor Settings,” and
then “Breaking In the Engine.”
4
FINISHING THE NITRO EVADER BX RTR VERSION (DTXD67**)