20 21
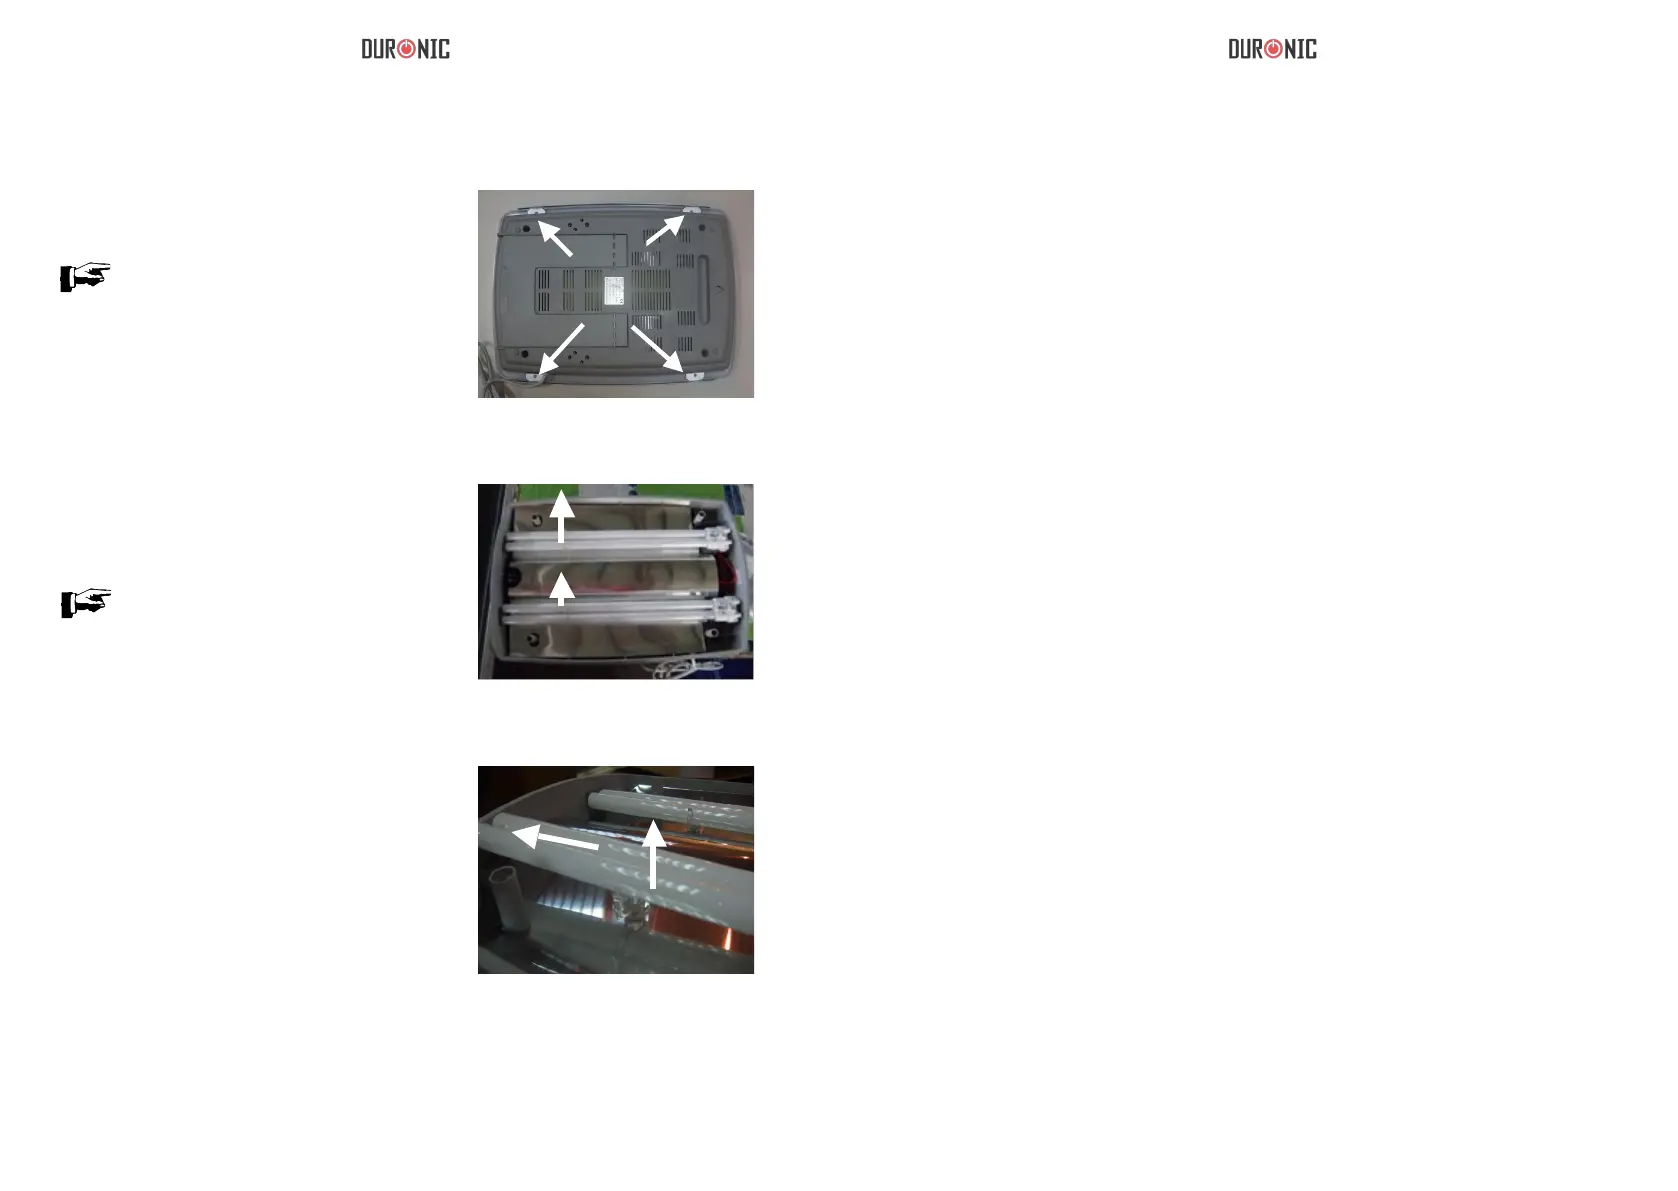
1. Slacken the retaining screws on
the back using a screwdriver, lay the
apparatus on its back and remove the
screen.
Note
The two brackets on the front of the
screen will become loose when the
screws are slackened. Take care not
to lose them, or the screen cannot be
rettedcorrectly.
2. Cut the cable ties and bend the
tube’stwotransparentretainingclips
by pulling them gently upwards.
Note
Cable ties are used for transport
protection only.
3. Carefully pull the tube up over the
housing rim (1) and out of the housing,
then sideways out of the frame (2).
4. When inserting the tube, following
these instructions in reverse order.
The light tubes contain a small amount of mercury sealed within the glass
tubing, when a tube breaks in your home, some of this mercury is released as
mercury vapor. To minimize exposure to mercury vapor, we recommend that
users follow the cleanup and disposal steps as follows:
Before Cleanup:
- have people and pets leave the room and air out the room for 5-10 minutes
by opening a window or door to the outdoor environment.
- Shut off the central forced air heating/ air-conditioning system, if you have
one.
- Collect material needed to clean up broken tube, just like: stiff paper or
cardboard, sticky tape, damp paper towels or disposable wet wipes.
During Cleanup:
- Vacuuming is not recommended unless broken glass remains after all other
cleanup steps have been taken. Vacuuming could spread mercury-containing
powder or mercury vapor.
- Be thorough in collecting broken glass and visible powder.
- Place cleanup materials in a sealable container.
After Cleanup:
- Promptly place all bulb debris and cleanup materials outdoors in a trash
container or protected area until materials can be disposed of properly. Avoid
leaving any bulb fragments or cleanup materials indoors.
- If practical, continue to air out the room where the bulb was broken and leave
the heating/air conditioning system shut off for several hours.
Cleaning Up a Broken Tube
 Loading...