16 17
Unit Description 8. Preparing the appliance for use
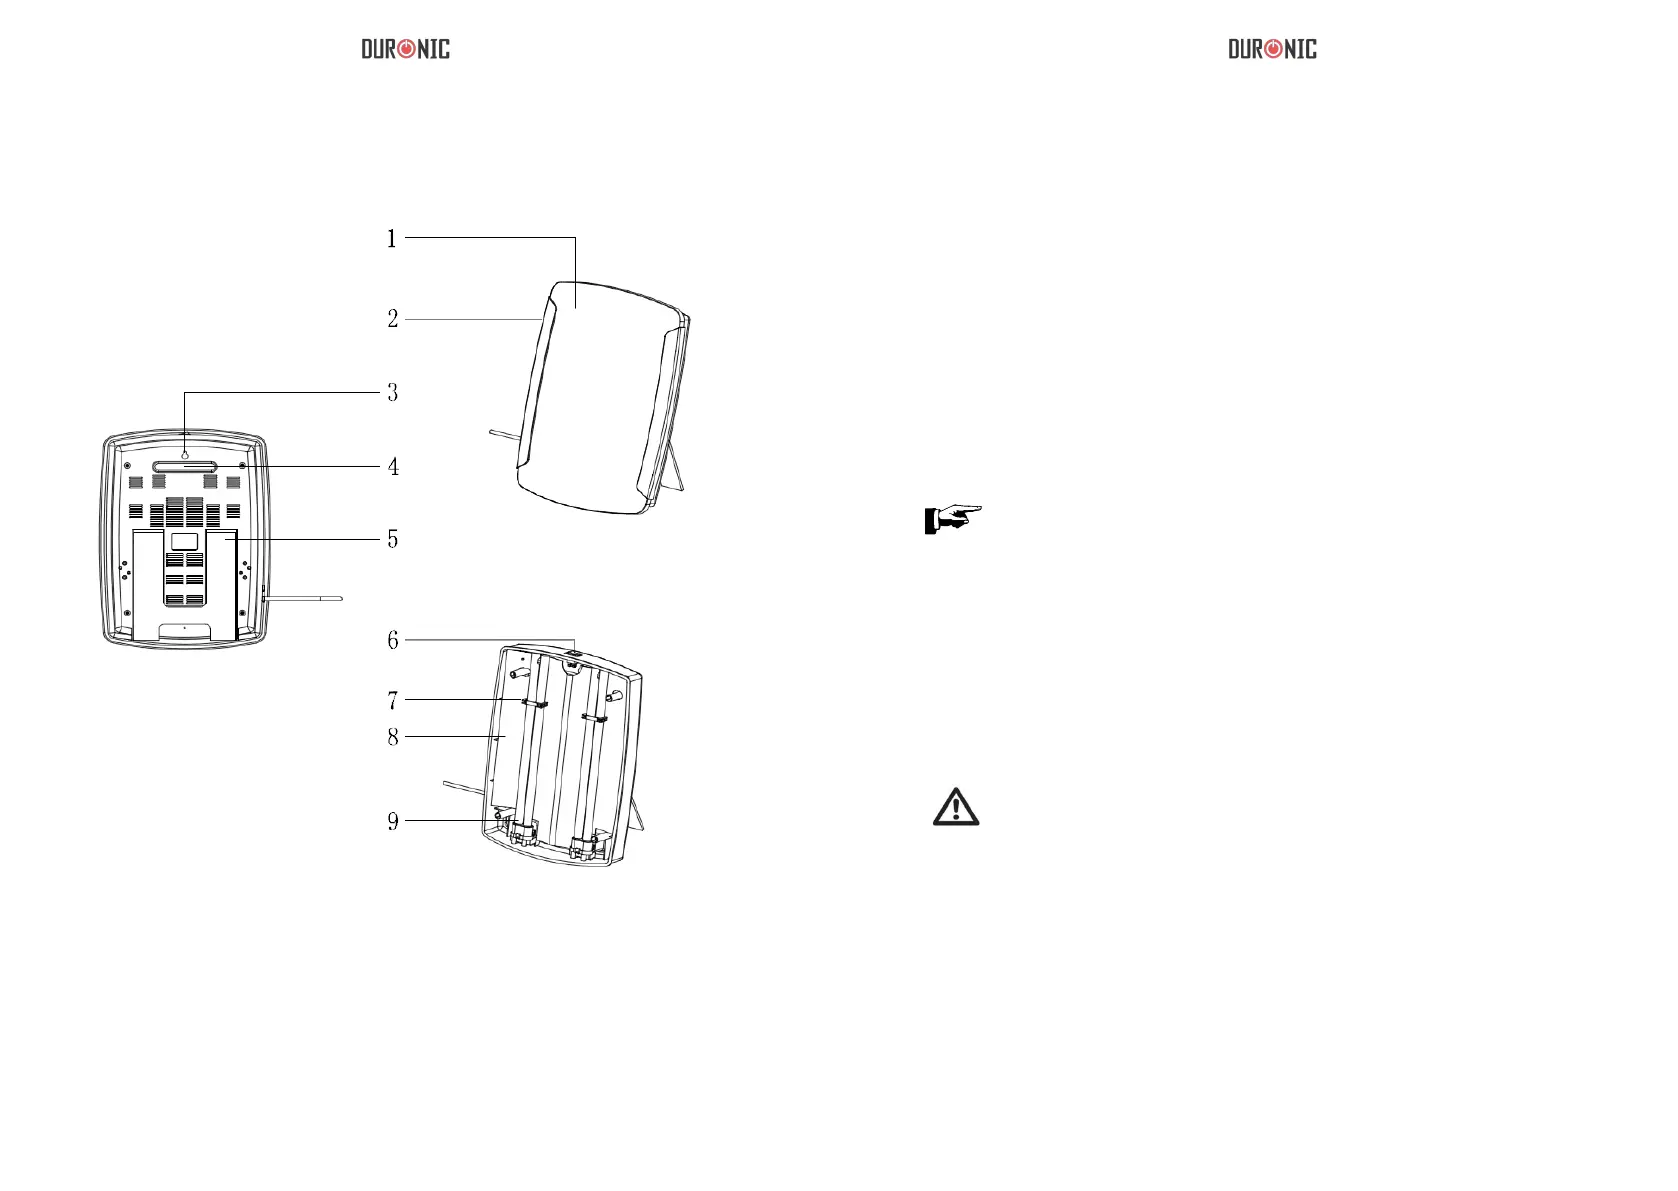
1. Screen
2. Brackets
3. Mounting hole
4. Carrying handle
5. Fold-out stand
6. On/off switch
7. Retaining clips
8. Reector
9. Tubes, 2 x 36W
Setup
1. Remove the unit from the packaging.
2. Place the unit on a solid surface, such as a table, and adjust the folding
tripod.
3. It is recommended that you keep your face 20 - 50 cm away from the light
during use.
Mains connection
Connect the unit only to the mains voltage listed on the type plate.
- Push the plug completely into the mains socket.
Note
- Ensure that there is a socket near the place where the lamp will stand.
- Lay the mains cable in such a way that no one can trip over it.
Fastening of Daylight on the wall
There is a mounting hole on the back side of the Daylight. At this mounting
holetheunitcanbexedonthewellwithscrew.Dependingonthetypeof
wall, an appropriate screw must be used, may be with pegs. E.g. for concrete
wall, M4, 25mm long Stainless Steel Self-Tapping Screw which is screwed into
a anchor. The screw and the anchor are not included in the scope of delivery.
Important
- Ifthemountingholeorbackenclosureiscrackedordamaged.Donotx
the Daylight on the wall. Please contact customer service or the dealer for
assistance.