with the opening
ledge
(14)
facing
upwards, into the
enlarger
head.
3.0.0. Features
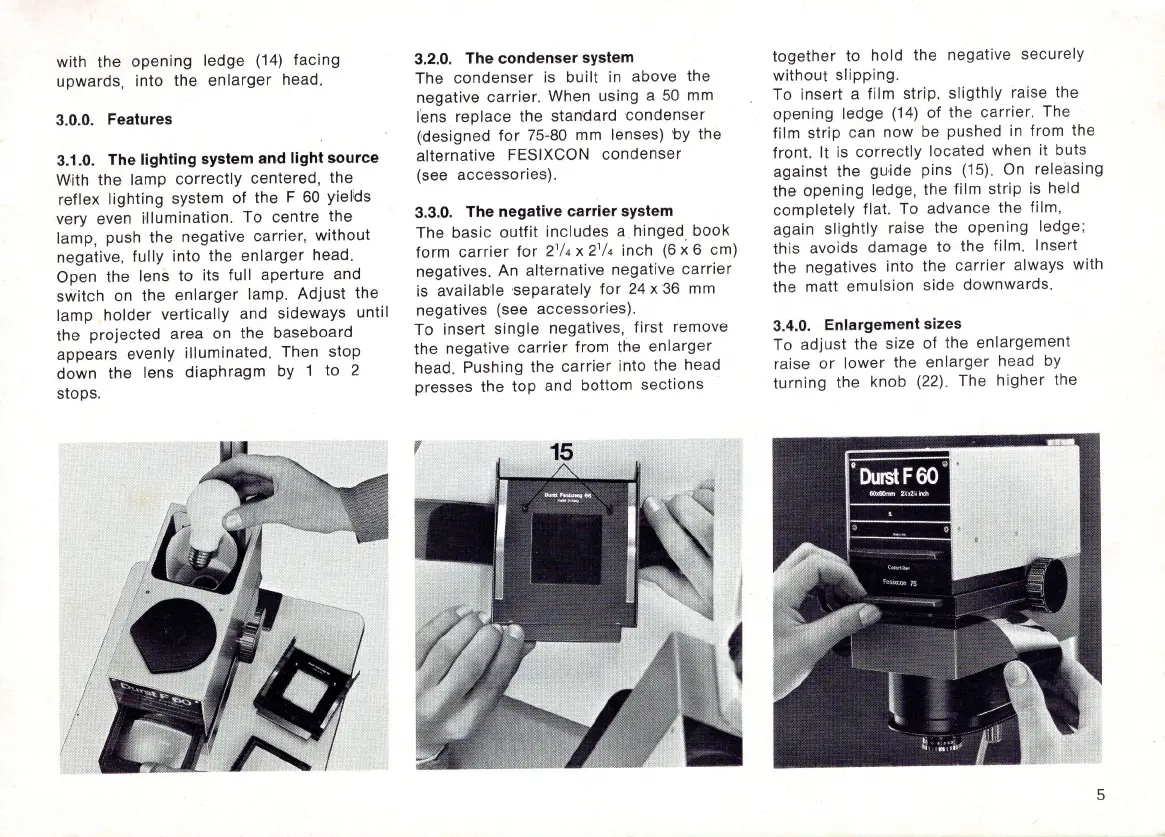
3.1.0. The lighting system and light source
With the lamp
correctly
centered, the
reflex lighting system of the F
60
yie
li
ds
very even Hlumination. To centre the
lamp, push the negative carrier,
without
negative, fully into the
enlarger
head.
Open the lens to its full aperture and
switch
on the
enlarger
lamp.
Adjust
the
lamp
holder
vertically
and sideways until
the
projected
area on the baseboard
appears evenly illuminated. Then
stop
down
the lens
diaphragm
by 1 to 2
stops.
3.2.0. The condenser system
The
condenser
is built in above the
negative
carrier
. When usin'g a
50
mm
fens replace the stan'dard
condenser
('designed
for
75-80 mm lenses)
'by
the
alternative FESIXCON
condenser
(see accessories).
3.3.0. The negative carrier system
The basic
outfit
includes
a hinged
book
form
carrier
for
2'
/4 x 2'/4 inch
(6
x 6 cm)
negatives. An alternative negative
carrier
is availab'le
separately
for
24
x36
mm
negatives (see accessories).
To insert single negatives,
first
remove
the negative
carrier
from
the
enlarger
head. Pushing the
carrier
into the head
presses the
top
and bottom sections
together
to hold the negative securely
without
slipping.
To insert a film strip,
sligthly
raise the
opening
ledge
(14)
of
the carrier. The
film
strip
can
now
be pushed in from the
front. It is
correctly
located
when it buts
against the
gU
'ide pins (15). On releasing
the opening ledge, the film
strip
is held
completely
flat. To advance the film,
again
slightly
raise the opening ledge;
this avoids damage to the film. Insert
the negatives into the
carrier
always with
the matt emulsion
side
downwards.
3.4.0. Enlargement sizes
To
adjust
the size
of
the enlargement
raise
or
lower
the
enlarger
head by
turning
the knob (22) . The
higher
the
5