9
ASSEMBLY INSTRUCTIONS
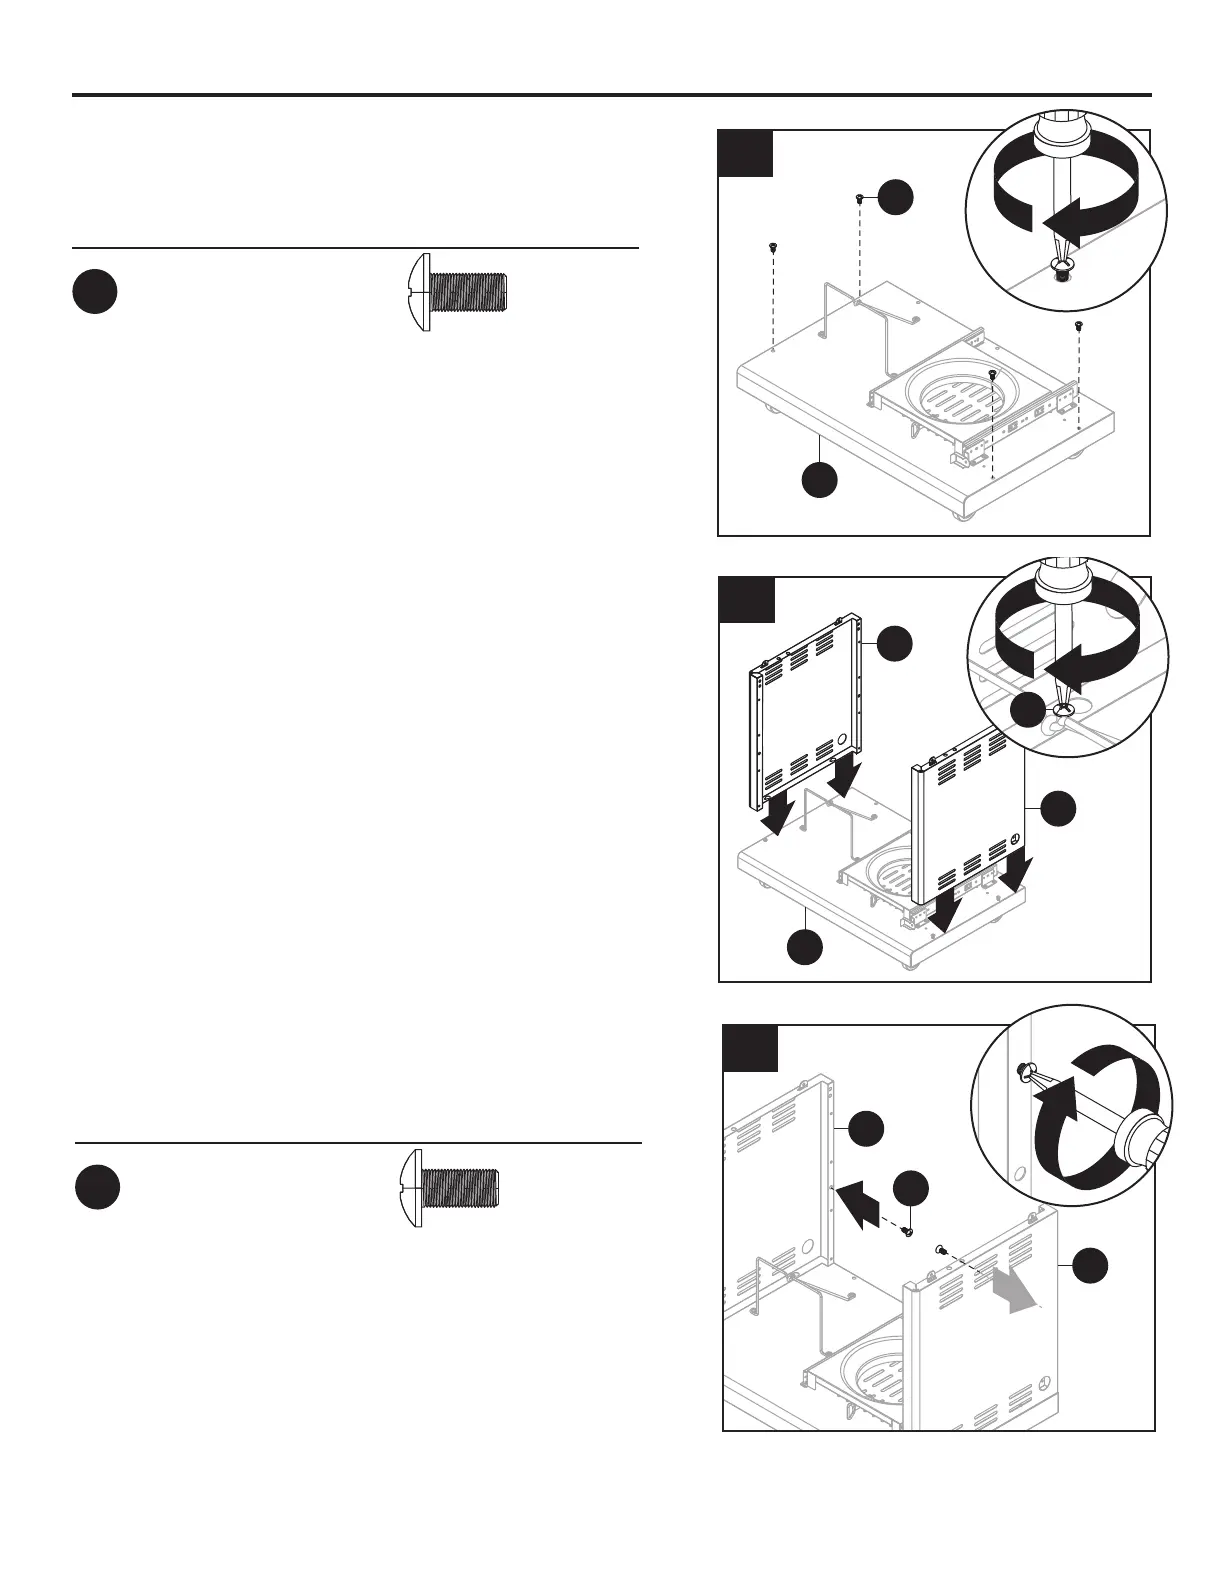
6. Attach the cart left and right side panels (D & E)
by placing the panel keyholes over the screw
heads (AA) on the bottom shelf (A). Slide the
cart side panels (D & E) so that the screw head
is over the smaller part of the keyhole. Thread
the screws (AA) down snug but DO NOT tighten
as some slack will be necessary in following
assembly steps.
5. PartiallyinsertfourM6x12screws(AA)intothe
bottom shelf (A).
1
1
1
1
2
D
E
AA
6
A
AA
A
5
Hardware Used
M6x12Screw
x4
AA
M6x12 Screw
Qty. 40
M4x10 Screw
Qty. 12
M6x20 Screw
Qty. 4
M4x10 Screw
Qty. 4
NOTE:
Preassembled
with door handle.
Plain Washer
Qty. 16
Spring Washer
Qty. 16
M6x25 Screw
Qty. 2
NOTE:
Preassembled
with lid handle.
AA
BB CC
FF
EE
GG
HH
M6x16 Screw
Qty. 10
DD
Hardware Used
M6x12Screw
x2
AA
M6x12 Screw
Qty. 40
M4x10 Screw
Qty. 12
M6x20 Screw
Qty. 4
M4x10 Screw
Qty. 4
NOTE: Preassembled
with door handle.
Plain Washer
Qty. 16
Spring Washer
Qty. 16
M6x25 Screw
Qty. 2
NOTE: Preassembled
with lid handle.
AA
DD
EE
GG
HH
BB
CC
M6x16 Screw
Qty. 10
FF
1
1
AA
D
E
7
7. PartiallyinserttwoM6x12screws(AA)intothe
cart left and right side panels (D & E).
 Loading...