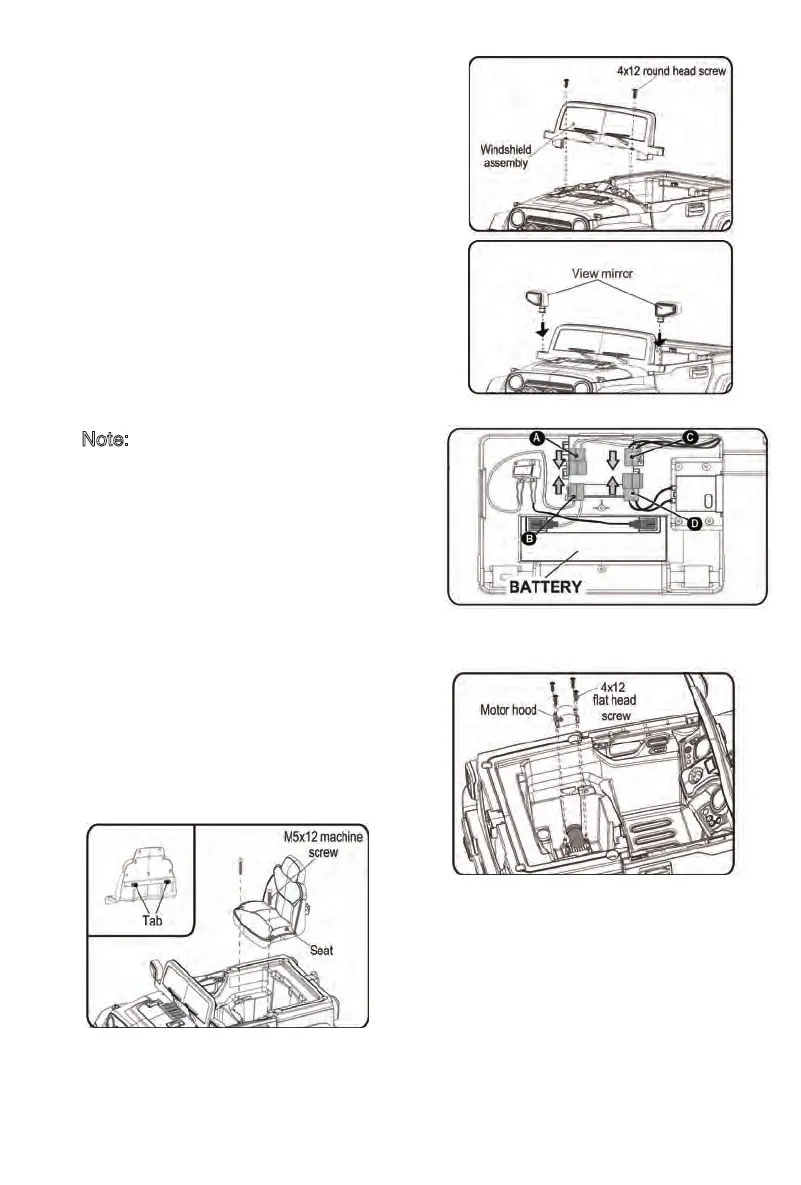
. Fit the tabs on the windshield into slots
located at front of the vehicle as shown.
. Inset two 4 x12 round head screws and
tighten with a screwdriver.
9. Windshiel
. Insert the view mirror into the hole in the
vehicle body as shown and push until you
hear this click into place.
. Repeat for the other side.
10. View Mirror Assembly
d Assembly
12
11. Power Supply Connection
Note: The battery is disconnected for
shipment to prevent the battery from
draining.
. Make sure to plug A connector into B
connector. (They are the same color to
assure correct connection.)
. Make sure to plug C connector into D
connector. (They are the same
color to assure correct connection.)
13. Seat Assembly.
. Insert the tabs at the back of the seat
into the slots in the vehicle body.
. Tighten two
M5x12 machine screws with
a screwdriver.
12. Motorhood Assembly
. Take out the motorhood from polybag.
. Install the motorhood in the proper
position as shown, and secure it with
four 4x12 flat head screws.
 Loading...