EasyManua.ls Logo

Dynaudio BM 6A User Manual

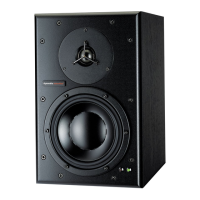
Dynaudio BM 6A
6 pages
To Next Page IconTo Next Page
Page #1 background imageLoading...
Page #1 background image
DA-BM6A
OWNERS MANUAL
Congratulations on your purchase of the Dynaudio Acoustics BM6A monitor system. With the
right care and attention it will give you many years of trouble free audio reproduction. It is
most important, however, that you take a few minutes at this early stage in your BM6A’s life to
read the following paragraphs. They contain essential information to enable you to get the
best from your monitors.
Electrical Safety Warning
This unit is supplied with a 3 wire power cord. Under no circumstances should the
earth wire be disconnected.
To prevent possibility of shock hazard do not expose the unit to moisture
There are no user serviceable parts inside. Do not open cover. Refer servicing to
qualified personnel only
Ensure correct mains voltage and fuse are selected before connection to mains
Question and Answer IconNeed help?

Do you have a question about the Dynaudio BM 6A and is the answer not in the manual?

Dynaudio BM 6A Specifications

Frequency Response IconFrequency Response
frequency response42 Hz to 21 kHz (+/- 2.5dB)
sound pressure level (peak/cont.)116dB / 101dB one cabinet @ 1m
Drive Units IconDrive Units
bass driver size170 mm
high frequency driver size26 mm
Amplification IconAmplification
internal amplifiersDual 100W discrete MOSFET power amps
crossover frequency2.2 kHz
crossover order4th order phase aligned
Dimensions IconDimensions
height338 mm
width216 mm
depth285 mm

Summary

Electrical Safety Warning

Safety Precautions

Essential safety guidelines for operating the unit, including earthing, moisture, and user-serviceable parts.

Setting Up

Mains Power Connections

Details on connecting the unit to the mains power supply, including voltage selection and fuse requirements.

Audio Connections

Information on connecting audio sources using XLR connectors, including balanced and unbalanced signals.

Positioning

Guidance on optimal placement of the monitors for nearfield listening and proper ventilation.

Operation

Controls

Explanation of the unit's controls, including input sensitivity, HF trim, and LF trim adjustments for sound tuning.

Indicators

Description of the front panel LED indicators that signal power status, faults, and clipping.

Running In

Advice on the initial break-in period for the monitor drivers to achieve optimal performance.

Protection

Troubleshooting

Care

Service

Warranty

Technical Specifications

Schematic Diagram

Related product manuals