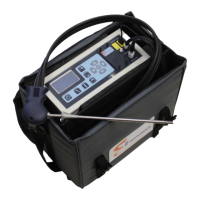
E8500 Instruction & Operations Manual
version 1.017
Page 10 of 49
TROUBLESHOOTING
Symptoms Possible Causes Resolution
Analyzer will not turn
on. (Screen is off)
Battery is dead.
Plug in the charger.
Analyzer should turn on.
Battery is not
charging.
Check the charger and
jack. Check the case for
excessive heat.
Internal initialization
problem.
Reset the analyzer.
Analyzer turns on but
screen is blue or
faded.
Internal initialization
problem.
Reset the analyzer.
Analyzer is
overheating.
Unplug charger.
Check fan.
Turn on & off to reinitialize.
Analyzer locks up or
will not turn off
properly.
Internal initialization
or power problem.
Reset the analyzer.
Display Screen
shows “Connect
Charger”
Battery is completely
discharged. No
power to analyzer.
Connect charger to
analyzer. Confirm charger
provides 12V output.
“Low Flow” on display
screen
Filters are clogged
and/or wet
Check & replace filters
inside analyzer as needed
Probe/Hoses are
blocked or pinched
Check probe & hoses
“High Flow” on
display screen
Gas exhaust at
bottom of analyzer is
blocked
Check exhaust hose to
make sure it is not blocked
or clogged
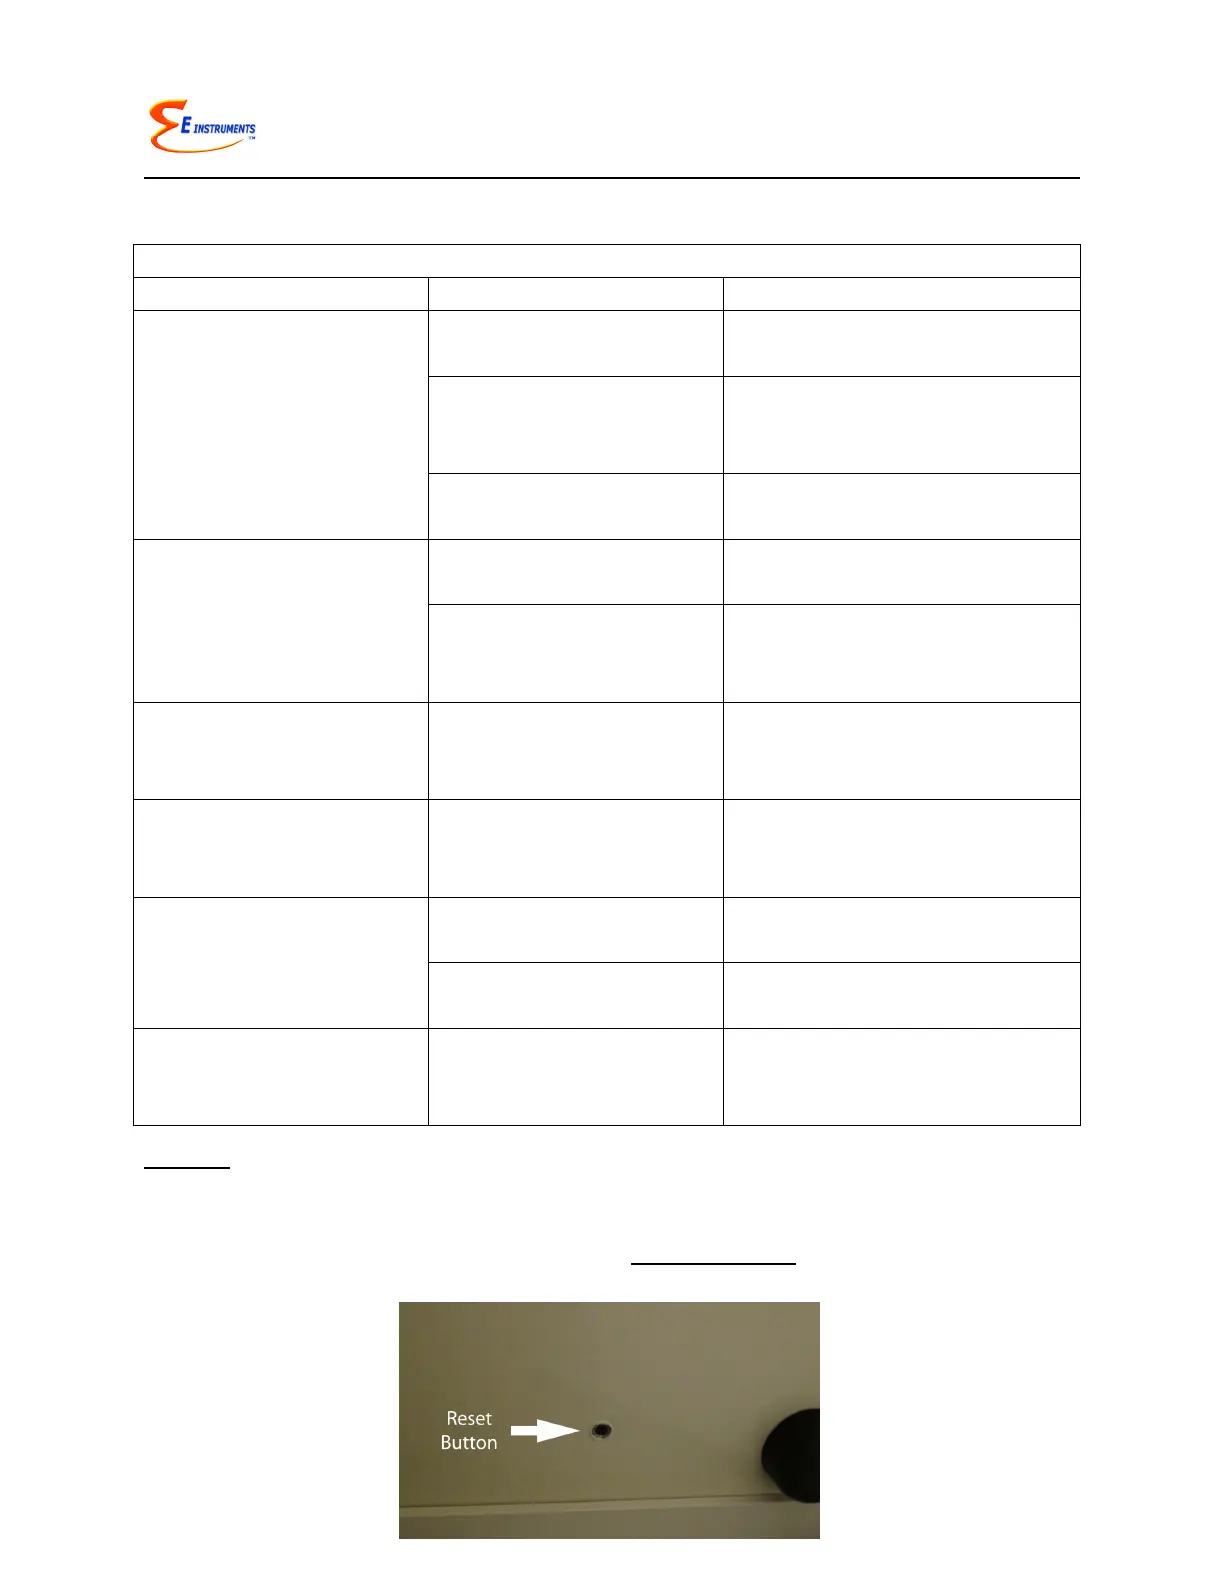
NOTE: The reset button is located on the bottom of the analyzer
approximately 1.5” (4 cm) from one of the four black feet as shown in the
photo below. You will need a pen tip or other small object to press the
reset button. Make sure the charger is disconnected from the analyzer
when pushing the reset button.