Tutorials
36 E-MU Systems
3 - Recording Audio into Ableton Live
1. Select an empty Audio Track with no clips.
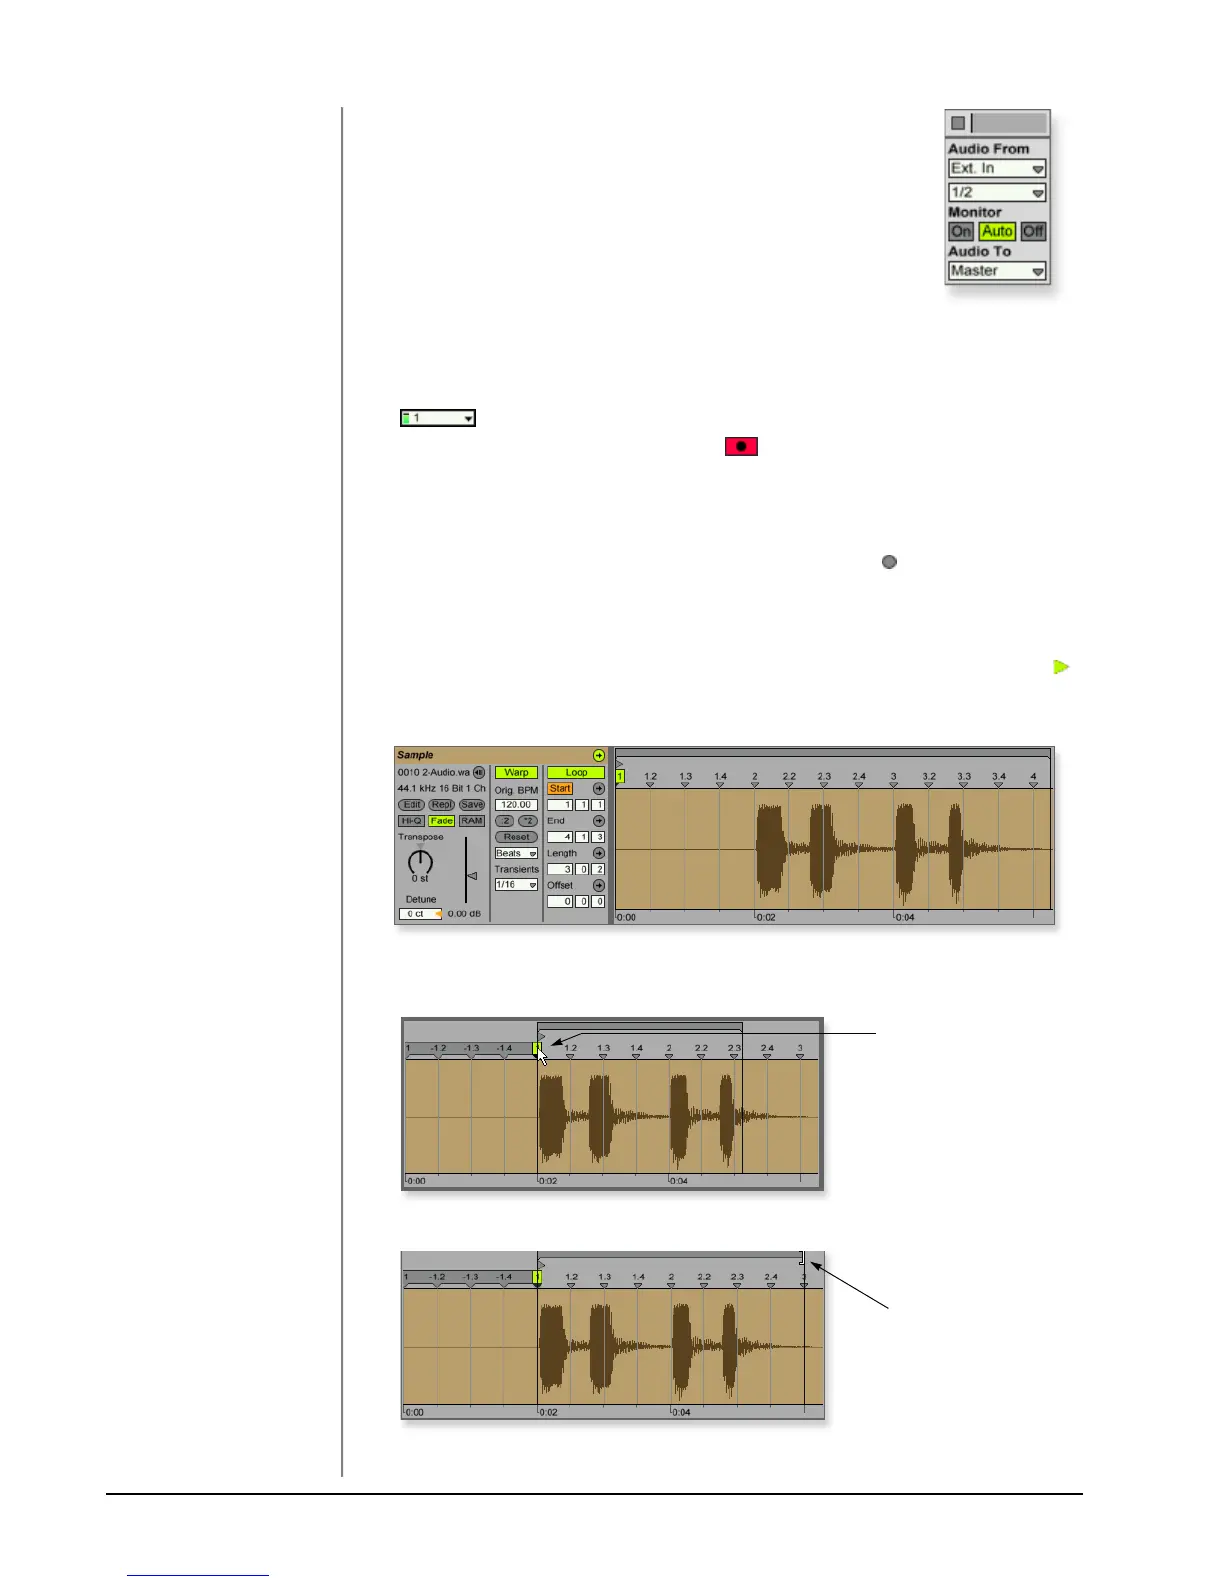
2. From the View Menu on Ableton Live, select In/Out.
(Alternatively, you could also click the “Show/Hide In/Out Section
button” as shown in the diagram on the previous page.) Several
more options now appear in the mixer strips.
3. Input channels 1/2 are selected by default (stereo). If you
want to record a mono track select input 1 or 2 from the
drop-down menu.
4. Feed an input signal into the 0202|USB 2.0 from a guitar, keyboard, CD
player or other audio source. A mini-meter appears in the input selection field.
The mini-meter should appear green. If not, reduce the input level.
NOTE
Direct monitoring can be
turned Off on the 0202 USB
2.0 since we’re monitoring
through Ableton Live
(Auto).
5. Press the Arm Session Record button located at the bottom of the strip.
The button turns red. You should now hear your input signal if Monitor is set
to Auto.
6. Start one of the Drum Clips and practice playing along with a short riff.
7. When you’re ready to record, click on the empty circle in one of the empty
clips in Track 2. Recording begins immediately. After recording a bar or two,
hit the Space Bar to Stop.
8. Double-click on the audio clip you just recorded and it appears below the
mixer section as shown below. Play both clips back by clicking Play button
above the mixer section. Make sure your recorded loop plays in time with the
drums. If not, delete the audio clip and re-record it.
9. Click and drag the 1 Warp Marker over to the beginning of your recording as
shown below.
TIP . . .
If your clip doesn’t loop,
make sure the Loop button
is pressed.
10. Next, drag the Loop End marker to make your loop the desired length.
11. Press Play. Your loop should now play in time with the drum loop.
1 Warp Marker
Loop End Marker