Tutorials
0202 USB 2.0 Owner’s Manual 37
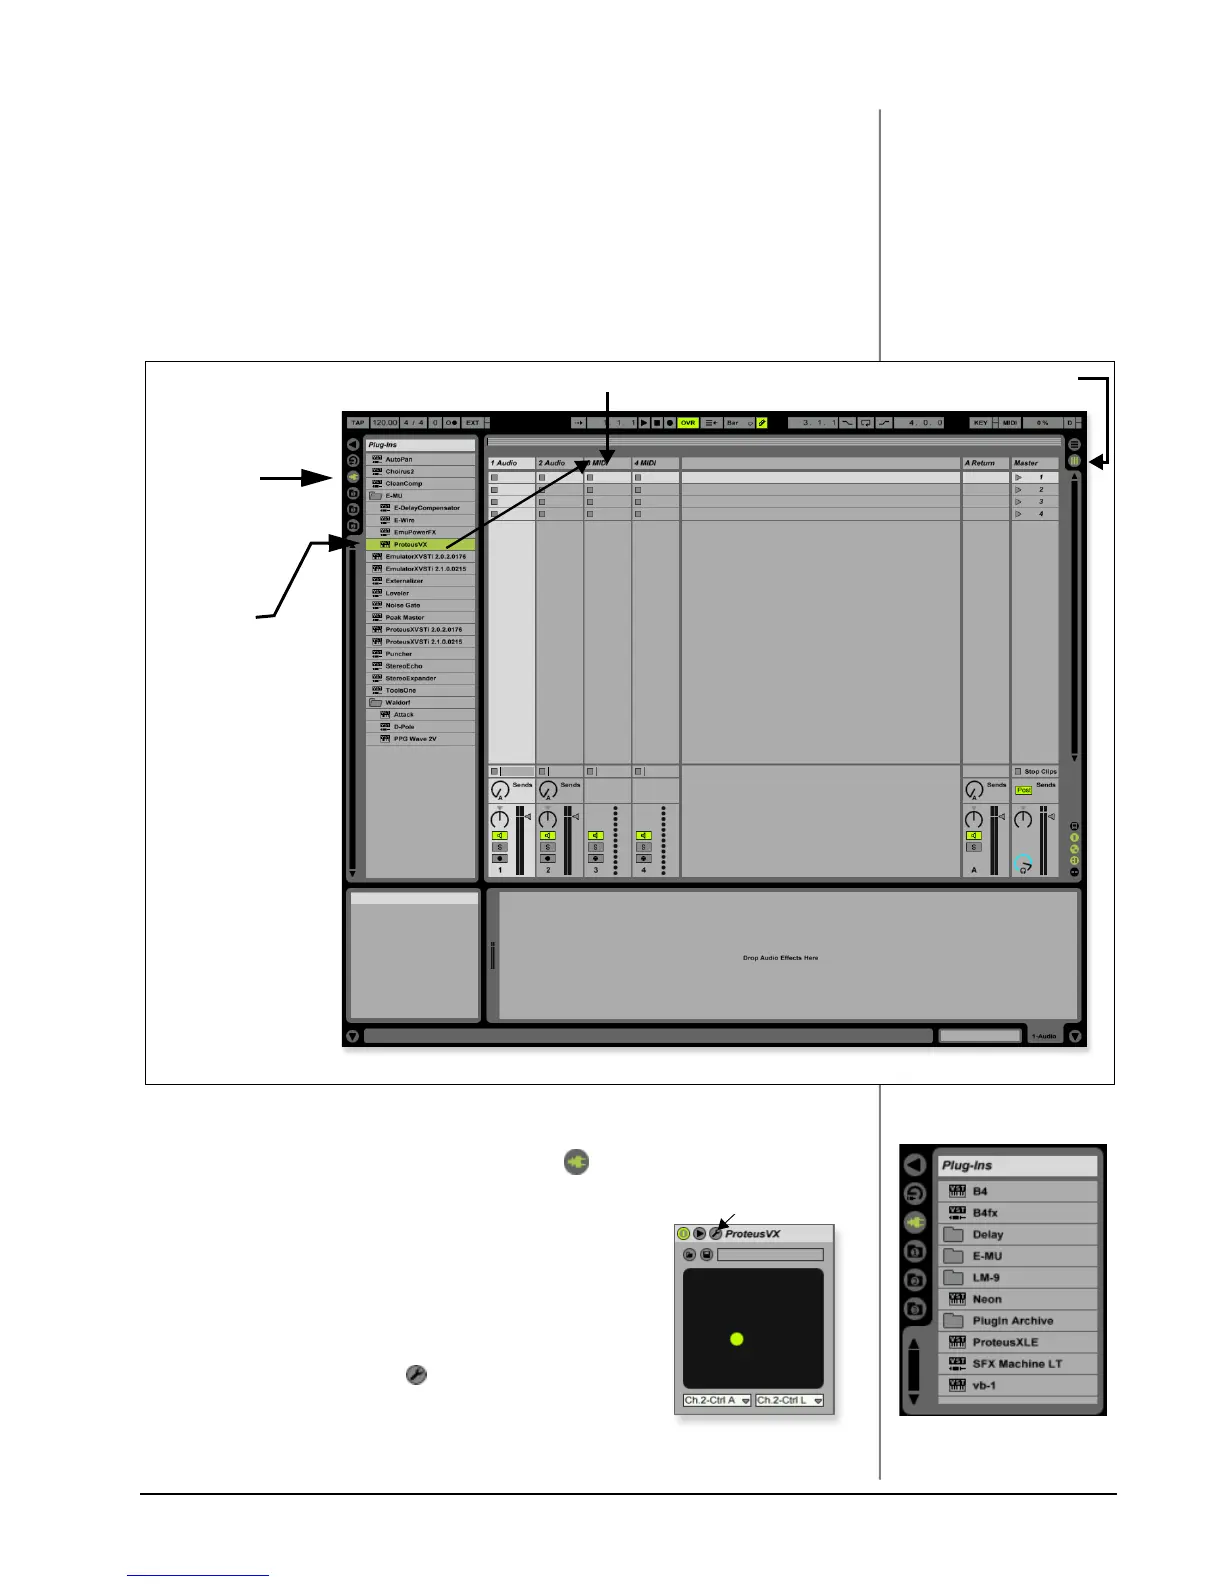
4 - Running Proteus VX VSTi from Ableton Live (Windows only)
NOTE
These instructions also
apply to Proteus X or
Emulator X.
These instructions explain how to run Proteus VX from within Ableton Live Lite 4.
Ableton Live’s forte is making it easy to combine pre-recorded audio and MIDI
clips in new and exciting ways. In this tutorial, you’ll learn how to use a MIDI
keyboard or the pre-recorded MIDI loops that come with Ableton Live Lite 4 to
play Proteus VX.
1. Select New Live Set from the File menu. A new Ableton Live set opens with
two audio tracks and two MIDI tracks such as the one shown below. If the
window doesn’t look like the one below, click the Session View button.
Select Proteus VX as a Virtual Instrument
2. Click on the Plug-in Device Browser button on the left side of the window.
The list of Ableton Plug-ins appears at the left side of the window.
3. Select Proteus VX from the Plug-ins list and drag it
over the MIDI Track heading as shown above. Wait a
second or two, then you’ll see the Proteus VX VSTi
appear in the MIDI Track View area below the mixer.
Load the Proteus VX Bank
4. Click on the wrench icon on Proteus VX in the area
below the mixer. See the image at right.
1. Click
Here
to open
Plug-ins
2. Drag
Proteus VX
3. Drop Here
Session View button
Step 2:
Plug-in Device Browser
Step 4:
Select Wrench Icon