OPERATION AND SERVICE INFORMATION
Page 17
Owner’s Manual and Service Guide
Read all of manual to become thoroughly familiar with this vehicle. Pay particular attention to all Notes, Cautions and Warnings
Checking the Lubricant Level
Clean the area around the check/fill plug and remove
plug. The correct lubricant level is just below the bottom
of the threaded hole. If lubricant is low, add lubricant as
required. Add lubricant slowly until lubricant starts to
seep from the hole. Install the check/fill plug. In the event
that the lubricant is to be replaced, the vehicle must be
elevated and the oil pan removed or the oil siphoned
through the check/fill hole.
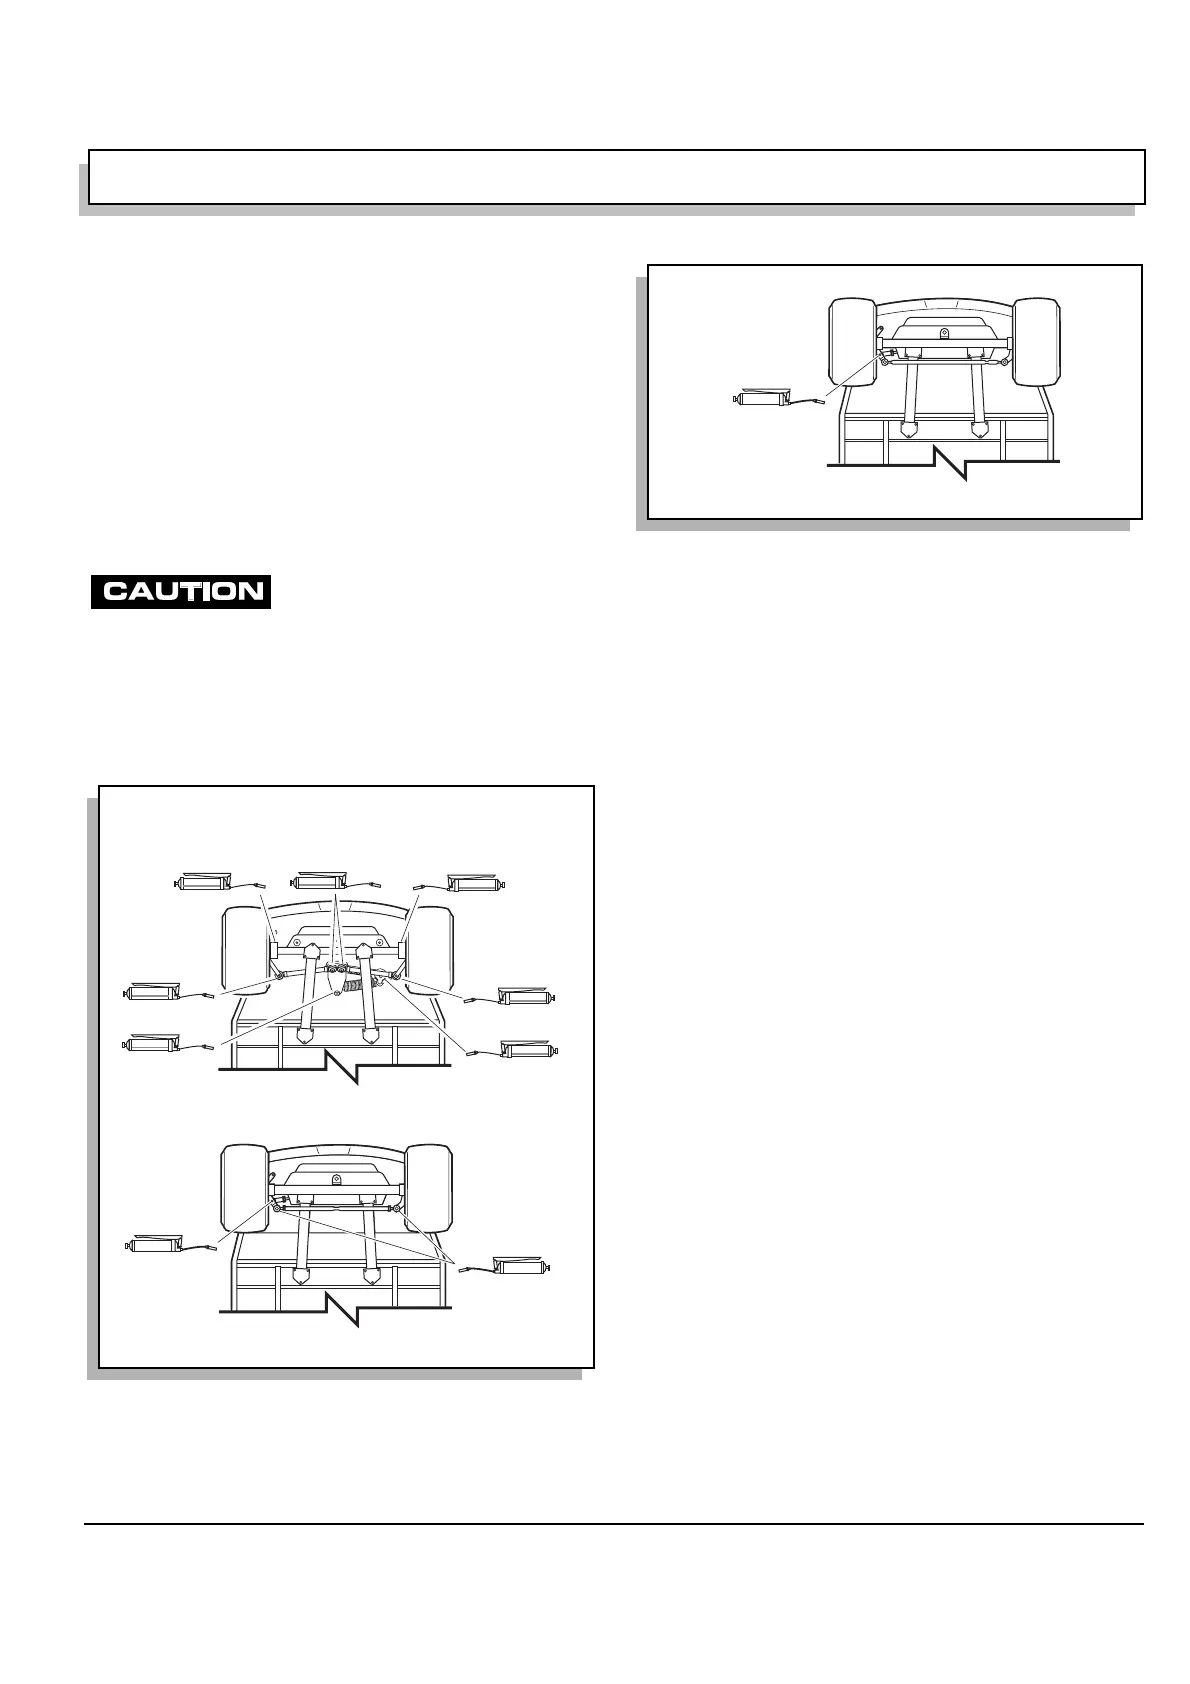
LUBRICATION
Do not use more than three (3) pumps
of grease in any grease fitting at any
one time. Excess grease may cause grease seals to fail or
grease migration into areas that could damage components.
Putting more than three pumps of grease in a grease fit-
ting could damage grease seals and cause premature
bearing failure (Ref Fig. 20 on page 17) (Ref Fig. 21 on
page 17).
PDS SYSTEM TEST
At monthly intervals, test the PDS system by allowing the
vehicle to roll down an incline with the accelerator pedal
released. Braking force should be felt at approximately 2
mph (3 kph) indicating that the PDS system is function-
ing. If vehicle speed continues to rise, apply the service
brake and have vehicle inspected by a trained mechanic.
HARDWARE
Periodically, the vehicle should be inspected for loose
fasteners. Fasteners should be tightened in accordance
with the Torque Specifications table (Ref Fig. 22 on page
18).
Use care when tightening fasteners and refer to the
Technician’s Repair and Service Manual for specific
torque values.
Generally, three grades of hardware are used in the vehi-
cle. Grade 5 hardware can be identified by the three
marks on the hexagonal head and grade 8 hardware is
identified by 6 marks on the head. Unmarked hardware is
Grade 2 (Ref Fig. 22 on page 18).
Fig. 20 Lubrication Points - Early Production
King Pin
Ball Joint
Ball Joint on
Rack and Rod
Ball Joint
Steering Unit
King Pin
Ball Joints (2)
and Idler Arm
View From Underside Of Vehicle
Tie Rod Ends
Rack Ball Joint
Ref Lub 3
Fig. 21 Lubrication Points - Late Production
View From Underside Of Vehicle
Rack Ball Joint
Ref Lub 1
 Loading...