I.B. 17555C
Effective November 1999
Page 27
To save the new settings at any time, press and release
the Save Settings pushbutton. When the Save Settings
pushbutton is pressed and released, the unit will blank
the alphanumeric display for two seconds, and then dis-
play the last setting. At this moment, the unit will use the
new setpoints for protection. After pressing the Save Set-
tings pushbutton, the Program Mode can be exited by
any one of three ways:
1. Press and release the Program Mode On/Off push-
button.
2. Press and release the Reset pushbutton.
3. Perform no programming activity for 2 1/2 minutes.
CAUTION
THE SAVE SETTINGS PUSHBUTTON MUST BE
PRESSED AND RELEASED BEFORE EXITING THE
PROGRAM MODE. OTHERWISE, THE CHANGED SET-
POINTS WILL NOT BE SAVED. IN ADDITION, AFTER
THE PROGRAMMING OF SETTINGS IS COMPLETE,
IT IS VERY IMPORTANT TO VERIFY ALL THE SET-
TINGS BY DEPRESSING THE “VIEW SETTINGS”
PUSHBUTTON AND STEPPING THROUGH THE
SETTINGS.
3-3.3 PROGRAMMING OVERVIEW
An overview of the programming function is presented
here in terms of two flow charts. These flow charts are
intended as quick references after the material presented
in Section 3-3.2 has been reviewed.
The flow chart entitled “Programming Sequence Preview”
(Figure 3-10) presents the general programming steps
the Digitrip 3000 follows, always beginning with the
“Curve Shape” selection. Each time the “Select Settings”
pushbutton is pressed and released, the relay advances
to the next sequential step.
The flow chart entitled “Local Programming Sequence
Flow Chart” (Figure 3-11) presents details of the pro-
gramming function. A specific setting decision is called
for at each DIAMOND SHAPED decision point. After a
decision is made to either accept or change the displayed
setting, the “Select Settings” pushbutton is pressed and
released to move to the next setting in the programming
order. Notes to the right of the flow chart and connected
by dotted lines to the “Select Settings” pushbutton boxes
are used to highlight what displays will be activated and
observed as the relay moves through the programming
steps.
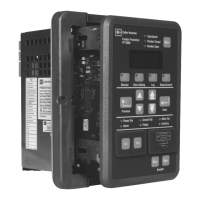
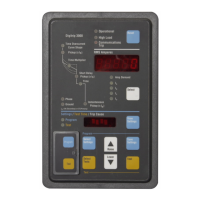
3-3.4 TEST MODE
The Test Mode is not intended for live primary current
interruption. The intent is to permit the periodic perfor-
mance of simple tests that verify the functional perfor-
mance of the relay. To enter the Test Mode, open the
protective access cover. Press and release the Test
Mode On/Off pushbutton. The following should be veri-
fied before proceeding:
1. The word TEST appears in the alphanumeric display.
2. The Test LED is blinking green.
3. The RMS Amperes (numeric display window is blank.
4. An error message (ERR) does not appear in the
alphanumeric display.
If there is greater than 0.1 per unit of current flowing on
either a phase or ground circuit, the error message
(ERR) will appear and there will be an automatic exit from
the Test Mode. This maximum current value can be
determined by multiplying 0.1 times the CT primary cur-
rent amperes rating.
Table 2.4 shows the test matrix that can be performed. A
translation of the test matrix elements is as follows:
a) “P” signifies a phase current test.
b) “G” signifies a ground current test.
c) ‘T’ signifies that the test will initiate closing of the
unit’s trip contacts.
d) The numerical values are the per unit values refer-
enced to the I
n
value, which is determined by the CT
rating setting.
Tests can be done on both phase and ground elements.
For either of these tests a trip or no trip mode can be
selected. A trip test will activate the trip coil while a no trip
test exercises the trip function without activating the trip
coil.
When in the Test Mode, the Select Tests pushbutton is
pressed and released to step between the four groups of
settings shown vertically in Table 2.4.
The Raise and Lower pushbuttons will move the display
between the setpoints for each of the four groups. Within
a group, the setpoints move horizontally (Table 2.4).
Pressing and releasing the Test pushbutton will initiate
the selected test.
When the initiated test is complete, the appropriate front
panel LEDs will be red to indicate the cause of the trip.
 Loading...