Product information
Introduction
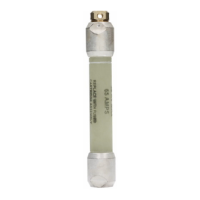
Eaton manufacturers its Cooper Power™ series EZ II™
splice in accordance with the IEEE Std 404™-1993 standard
for cable joints.
The splice provides a permanent, fully shielded, fully
submersible cable joint. The EPDM peroxide-cured rubber
provides a highly reliable cable joint that can be used for the
repair or extension of underground feeders in direct burial,
conduit, or vault applications.
The splice is designed to accept wide cable ranges. The
2-1/8" (54 mm) long aluminum compression connector
is sized to ensure maximum current transfer and a cool
running connection. The connector is a field proven design
that accepts copper or aluminum conductors.
Read this manual first
Read and understand the contents of this manual and follow
all locally approved procedures and safety practices before
installing or operating this equipment.
Additional information
These instructions cannot cover all details or variations
in the equipment, procedures, or process described nor
provide directions for meeting every possible contingency
during installation, operation, or maintenance. For additional
information, contact your representative.
Acceptance and initial inspection
Each splice is in good condition when accepted by the
carrier for shipment. Upon receipt, inspect the shipping
container for signs of damage. Unpack the splice and
inspect it thoroughly for damage incurred during shipment.
If damage is discovered, file a claim with the carrier
immediately.
Handling and storage
Be careful during handling and storage of the splice to
minimize the possibility of damage. If the splice is to be
stored for any length of time prior to installation, provide a
clean, dry storage area.
Standards
ISO 9001 Certified Quality Management System
Installation
Installation requires standard cable stripping and crimp
tools. After cables are prepared, the splice body is posi-
tioned onto cable #1 of the prepared cables.
The conductors are then crimped together with the supplied
compression connector. The splice body is then centered
using the raised areas on the cable entrances as centering
guides.
Tie off a concentric neutral to the drain wire tab on each
side of the splice and jumper the remaining concentric
neutral wires across the splice body, using the appropriate
crimp connector. (A jacketed concentric neutral cable may
require jacket replacement across the splice.)
Complete splice kit includes:
•
Splice Body
•
Compression Connector
•
Silicone Lubricant
•
Installation Instructions
Tool/accessories needed:
•
Tape Measure • Cable Cutters
•
Wire Brush • Emery Cloth
•
Knife • Tape
•
Cable Stripping Tool • Hand File
•
Crimping Tool • Lint-free Cloths
•
Cable Cleaner
115 KV AND 25 KV CLASS EZ II SPLICE INSTALLATION INSTRUCTIONS MN650007EN January 2016

 Loading...