35
CLUTCH SYSTEM
CS-370ES
CS-420ES
5 CLUTCH SYSTEM
5-1 Inspecting clutch parts
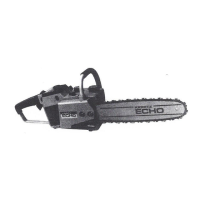
1. Remove sprocket guard (A) and cleaner lid (B).
2. Disconnect spark plug cap and remove spark
plug.
NOTE: If starter assembly is installed, pull starter
rope out about 20 cm (8 in), and make a temporary
knot (C) to prevent starter damage when installing
clutch assembly.
3. Install piston stopper 897537-30130 (D) in spark
plug hole to stop crankshaft rotation.
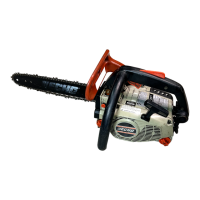
4. Rotate clutch assembly clockwise by hand until it
cannot be rotated further.
5. Loosen clutch assembly (Left-hand thread)
rotating clockwise with clutch tool 897505-16133 (E)
and remove it.
NOTE: Do not use power tools. Otherwise, piston
damage may occur.
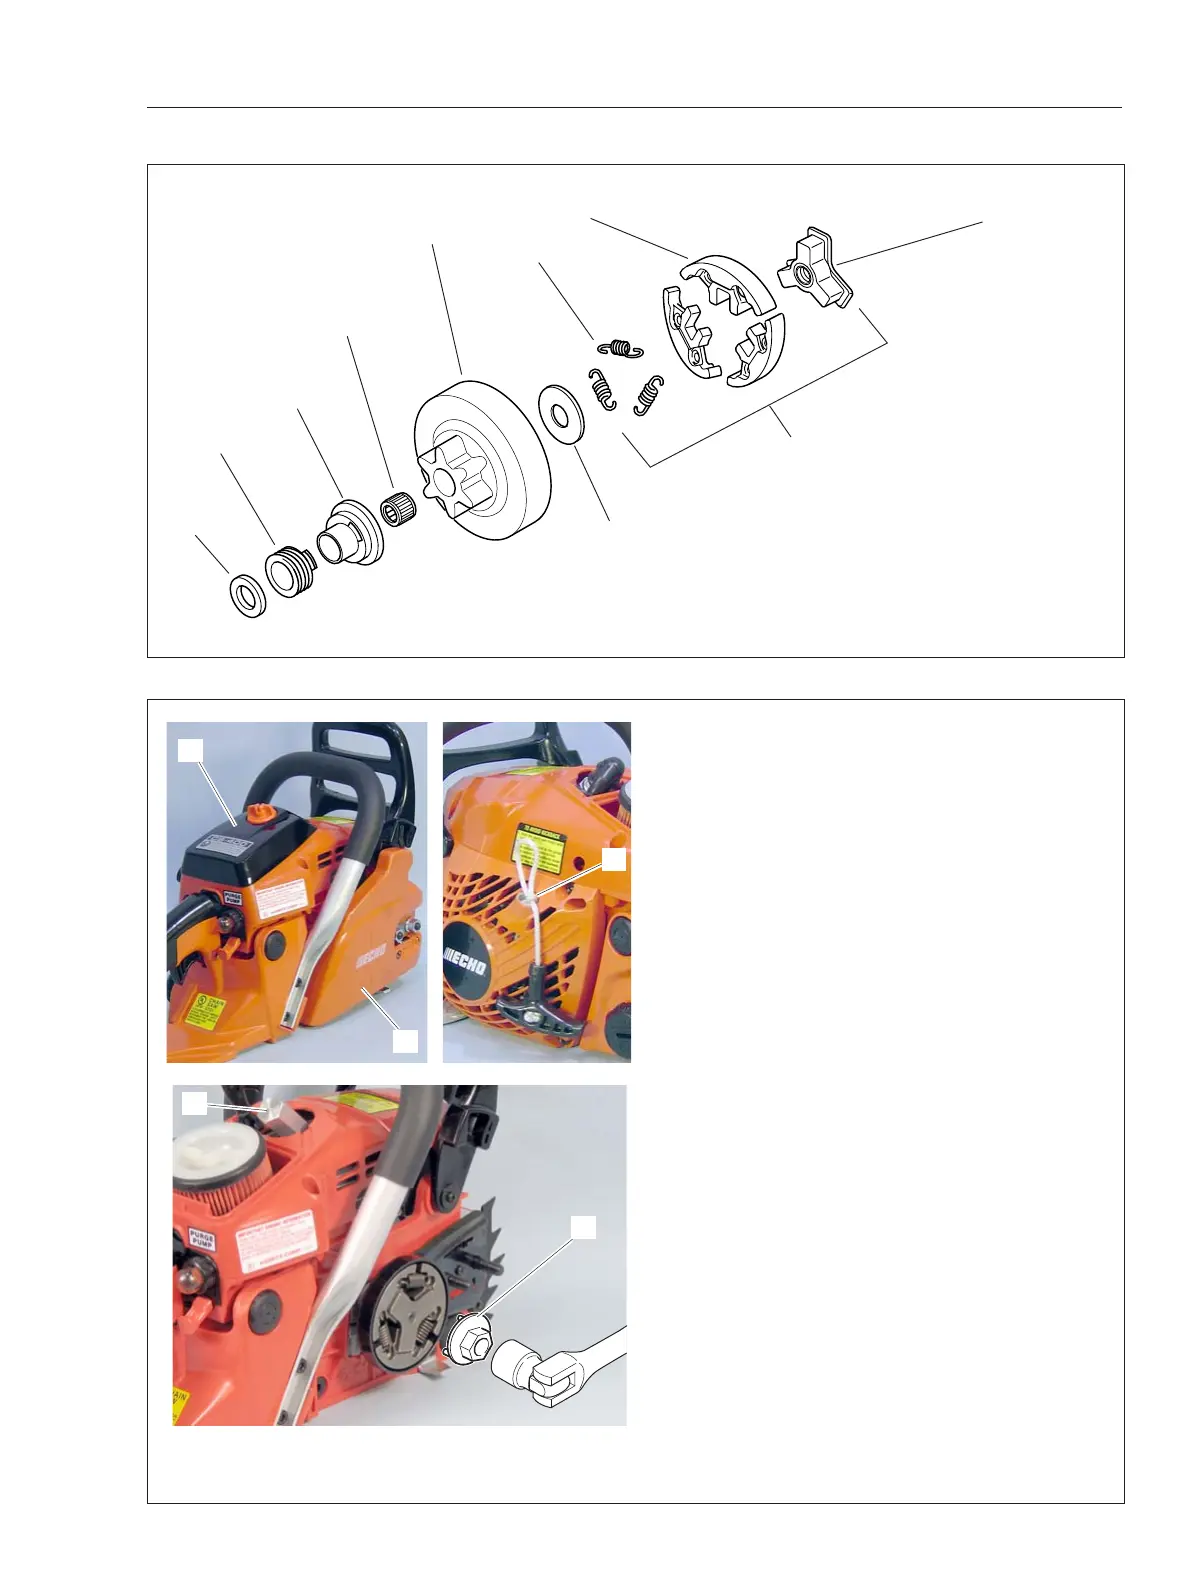
6. Remove clutch drum, clutch plate, needle bearing,
collar, worm gear and circular washer.
7. Inspect clutch shoes for wear and spring for weak-
ness or damage. Replace clutch parts as required.
8. Inspect clutch drum and sprocket. Replace if
deformed or worn out.
9. Inspect needle bearing, collar and worm gear for
damage, discoloration or deformation. Replace as
required.
(A) Clutch assembly
(B) Clutch plate
(C) Clutch drum
(D) Needle bearing
(E) Collar
(F) Worm gear
(G) Circular washer
(H) Clutch hub
(I) Clutch shoe
(J) Spring
(A)
(H)
(I)
(J)
(B)
(C)
(D)
(E)
B
A
C
D
E
(F)
(G)