10
A
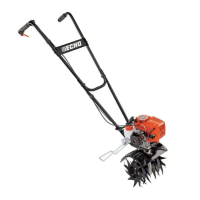
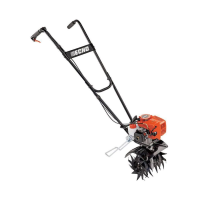
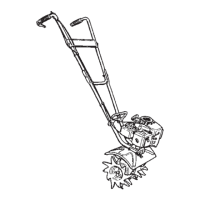
ASSEMBLY
Tools Required: (2) 7/16 in. Wrenches
1. Support powerhead assembly upright on tines. Place top handle
assembly to rear.
NOTE
Make sure inside curves at handle ends are facing each other.
2. Loosely assemble lower handles using short 1/4 in. x 3 in. long hex
head shoulder bolt (A), eye plates (B), lockwasher (C), and locknut
(D) in front handle end mounting hole as shown.
3. Slide lower handle assembly under power head and throttle
linkage/ignition wires, and position in mounting groove.
4. Assemble using long 1/4 in. x 3-1/4 in. hex head shoulder bolt (E),
eye plate (B), lockwasher (C), and locknut (D) in rear handle
mounting holes. DO NOT TIGHTEN BOLTS.
5. Slide plastic carry handle onto lower handle tubes.
6. Remove (2) 10mm x 30mm carriage bolts (F), (2) lockwashers (G),
and (2) nuts (H) from top handle assembly.
7. Place top handle assembly between lower handles, align mounting
holes and install (2) 10mm x 30mm carriage bolts (F), (2)
lockwashers (G), and (2) nuts (H). Carriage bolts must be installed
from the outside through square holes in the lower handle, then
through upper handle tube.
8. Securely tighten lower handle bolts first, then the upper handle
bolts.
9. Secure throttle linkage and stop switch lead midway on right lower
handle with cable tie.
C,D
B
C,D
F
G, H
F
G, H
B
E