10
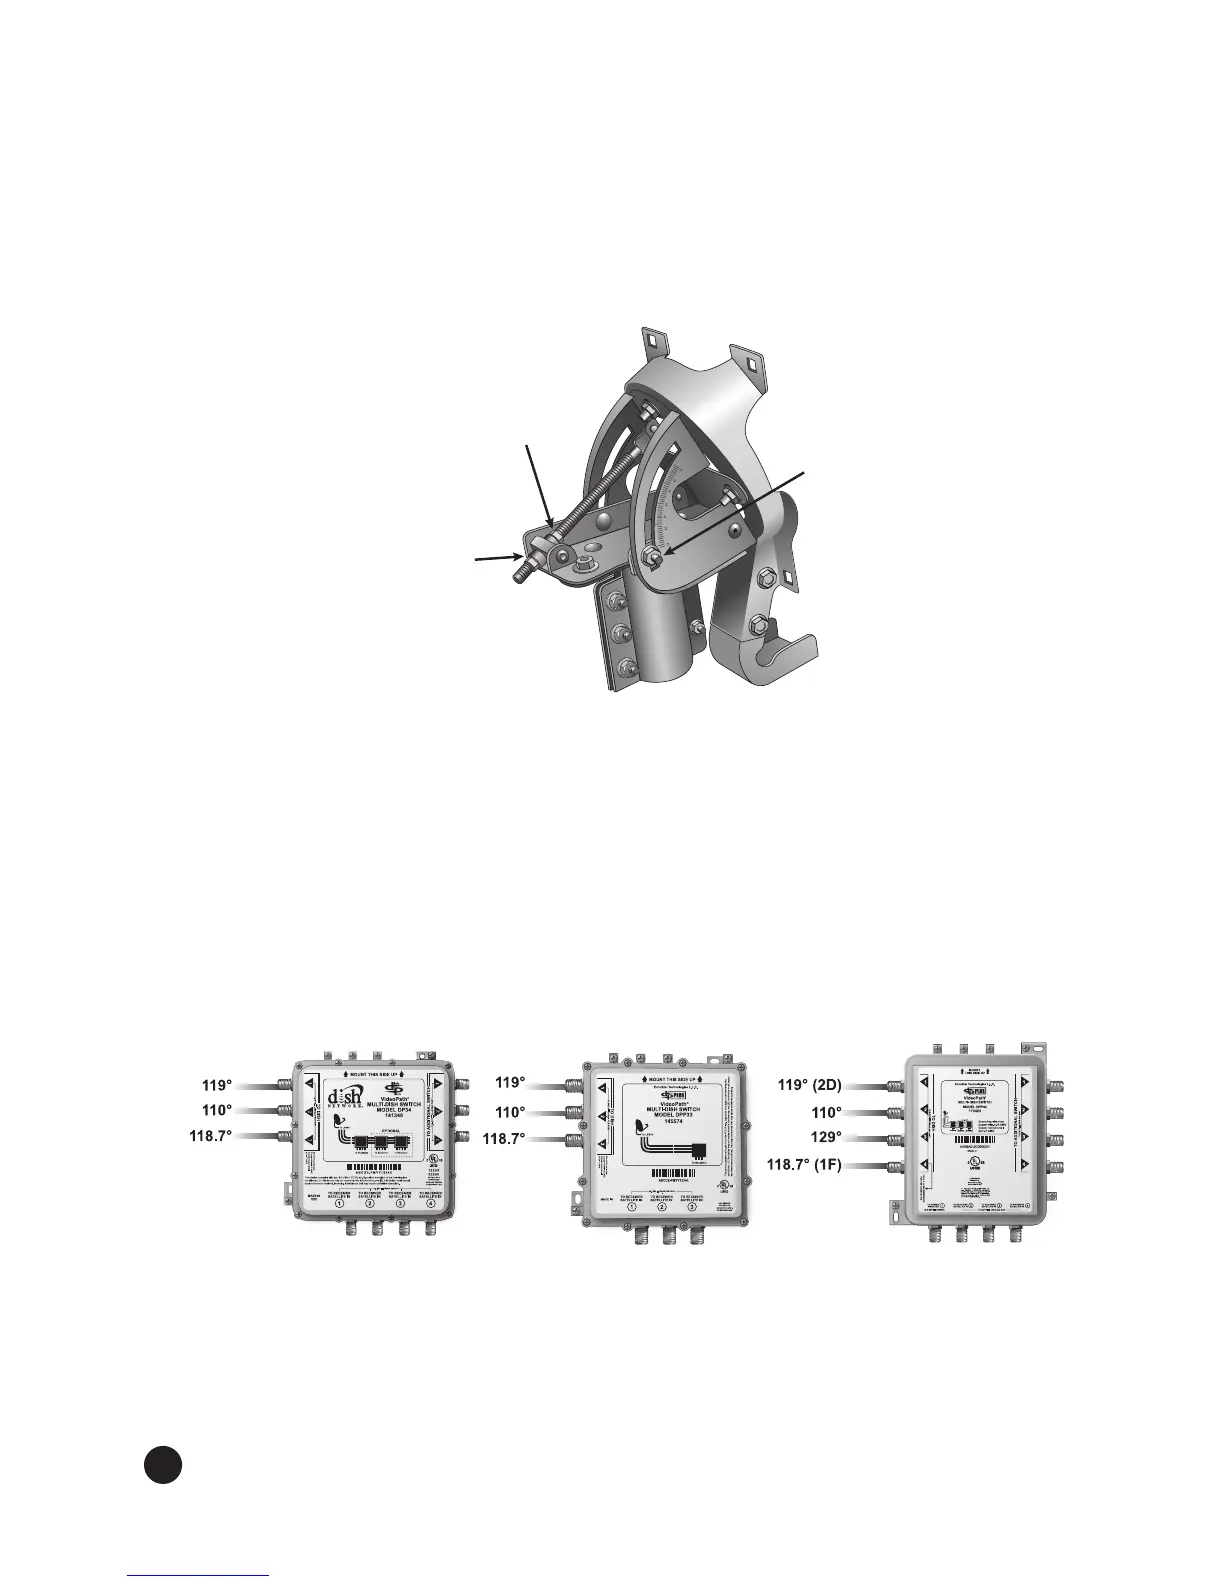
Fine-tune elevation angle.Usingthepeakingmeter,ne-tunetheelevationangle.Usinga
1/2”wrench,loosenthetopelevationnutontheelevationrodtoallowthereectortobemoved
up and down in elevation. Move the bottom elevation nut along the elevation rod to adjust
thereector’selevationangleandtoacievemaximumsignal,usingthe118.7°Wsatelliteand
transponder 13. After obtaining maximum signal, tighten the top elevation nut on the elevation
rod, then tighten the elevation bolts labeled with a T to the recommended torque value given in
Table 1 on page 9 (see Figure 9).
Figure 9. Fine tuning the elevation angle
Connect cables to LNBF and/or swtich, if a switch is being used. Remove the
temporarycableusedforpeakingthereector.
For switch installation with DISH Pro 500+ LNBF. Connect a cable from Port 2D (119°W) to
Port 1 of the switch. Connect a cable from Port 1F (118.7°W) of the DISH Pro 500+ LNBF to
the switch (see Figure 10). If a DP Single or a DP Dual LNBF(s) is being used (DISH Pro 1000+),
connect a cable(s) from the LNBF to the switch (see Figure 5). See Figure 10 for DISH Pro 500+
recommended connection order to a DP34 or DPP33 switch and for DISH 1000+ recommended
connection order to a DPP44 switch. Refer to the switch’s instlalation instructions for additional
details. Leave a service loop around the elevation and skew bracket. Attach the cables to the
bottom of the LNBF support using the included cable clips.
Figure 10. DISH Pro 500+ to DP34 Switch, DISH Pro 500+ to DPP33 Switch, and
DISH Pro 1000+, DISH Pro Plus 500+, and DISH Pro Plus 1000+ to DPP44 Switch
6.
Top
Elevation
Nut
Elevation
Bolt
Bottom
Elevation
Nut
7.