10
SETTING UP AND FILLING YOUR NEW
See Page 17 for Model E6
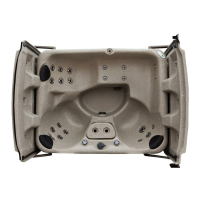
Location of Jets, Components & Equipment
1. Ensure that your ECO SPA’s electrical power cord is NOT plugged in or that power to the
spa is turned OFF.
Do not turn on power to the spa until it is full to the proper water
level.
2. Check that your ECO SPA drain valve is closed and capped securely so as to prevent
leaking.
3. Connect a Pre-Filter to your standard garden hose to ensure that you start out with
cleaner water.
4. Open the spa covers, remove the filter cover tray-top, unscrew and remove only 1 of
the 2 filter cartridges, leaving the other in place to secure the filter cover housing.
5. Make sure that the spa’s 2 Air Control knobs are in the OPEN position and that the
Diverter Valve is pointed to center.
6. Turn all Jets counter-clockwise to the full OPEN position. Doing so will minimize the
amount of air in the water lines to help avoid causing a potential ‘airlock’ and will make
priming the pump easier.
7. Fill your ECO SPA to an approximate water level of 2" above the top of the highest jet.
Once the spa is filled to this level, power can then be supplied to your ECO SPA.
8. Carefully re-install the filter cartridge and re-install the filter cover tray-top.
9. Plug in the GFCI unit of the 110 Volt power cord and depress the reset button on it or, if
applicable, connect the power for 220 Volt operation.
10. Once the water temperature has reached at least 80°F (27°C) so that chemicals can
dissolve properly you can now test and balance the pH Level of your water and sanitize
it per the chemistry guidelines supplied by your dealer.
11. ECO SPA is not responsible for damage to the spa from improper or excessive chemical
use. ECO SPA recommends that you read and understand the spa chemistry guidelines
supplied by your dealer or consult with a local spa supply retailer.