Do you have a question about the EcoWater ECR3700R20 and is the answer not in the manual?
Follow installation instructions, check codes, handle with care, and note operational limits like temperature and pressure.
Ensure proper electrical connections and be aware of FCC and European Directive requirements.
Details coverage, duration for specific parts like tanks, valve body, and electronic faceplate.
Information on how to get service, replacement part warranty, and optional extended warranties.
Specific guarantee for Series 3700 & 3702, including replacement policy for first-year issues.
Details softening capacity, efficiency, and water usage during regeneration for various models.
Information on flow rates, pressure, temperature, and maximum hardness/iron levels for system operation.
Explanation of efficiency ratings, demand initiated regeneration (DIR), and NSF/ANSI standards.
Specific claims for reducing chlorine taste and odor, and chloramines.
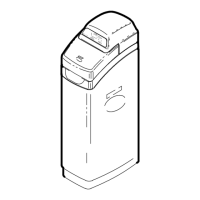
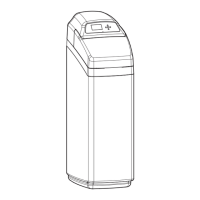
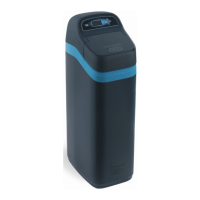
Detailed measurements for cabinet units and resin tank sizes for specific models.
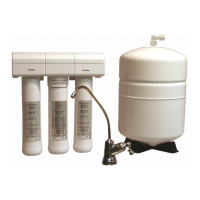
Detailed measurements for two-tank configurations, including overall dimensions.
Table detailing resin tank sizes and overall dimensions for two-tank models.
Illustrations of typical setups and requirements for bypass valves.
Considerations for outside installation, electrical needs, and drain connection types.
Steps for unpacking the conditioner/refiner and assembling the brine tank.
Instructions for installing bypass valves and safely turning off the water supply.
Details for connecting copper, threaded, or CPVC pipes to the unit.
Proper installation of drain hoses, grounding, and brine tank overflow.
Steps for pressure testing, programming the controller, and initial system rinse.
Procedures for sanitizing the unit, restarting the water heater, and initial remote setup.
Setting the system language and choosing between WPS or browser for wireless setup.
Step-by-step guide for connecting the softener to the wireless router using WPS.
Connecting via browser to the softener's network and then to the home Wi-Fi.
Setting system units (English/Metric) and configuring the current time.
Setting the water's iron level and finalizing the initial system setup.
Steps for dealers to register a customer's system on the EcoWater web site.
Guide to creating an online account, including email verification.
Steps to link the softener to your account and share access with a dealer.
Setting the display language and system units (English/Metric) for non-Wi-Fi units.
Configuring current time, water hardness, and iron levels for the system.
Procedures for unpacking the remote and installing its support stand.
Instructions for installing batteries and optionally mounting the remote on a wall.
Steps to access the remote connection menu on the conditioner/refiner.
Guide to finding and successfully connecting the remote device.
Step-by-step instructions for adding the conditioner/refiner and other devices to the remote.
Overview of the remote's startup, conditioner/refiner, and drinking water status menus.
Explanation of the HydroLink system and how to cycle through status screens.
Information on the wireless communication system and how active alerts are displayed.
How to check and improve the wireless signal strength for optimal remote performance.
Instructions for changing the display language on the HydroLink remote.
Customizing the displayed message for drinking water systems.
Procedure for manually starting a recharge cycle using the remote control.
Adjusting the scheduled time for automatic recharge cycles.
Selecting and configuring which data items appear on the remote's status screens.
Choosing which specific data points are shown on the conditioner/refiner status screens.
Adjusting the sequence in which data items are displayed on the remote.
Selecting which device functions are controllable via the remote.
Customizing the names of connected devices for easier identification on the remote.
Steps to remove a connected water treatment device from the remote's list.
Explanation of normal operating displays, Wi-Fi status, and rolling screen sequences.
Overview of different messages, alerts, and flashing display conditions.
Accessing key operations like Recharge, Salt settings, and Basic settings.
List of all adjustable features and settings accessible through the menu system.
Steps to activate the lockout to prevent unauthorized parameter changes.
Steps to deactivate the lockout and allow access to settings.
Setting up notifications for low salt levels and customizing alert timing.
Choosing between Sodium Chloride (NaCl) and Potassium Chloride (KCI) for regeneration.
Procedure for manually starting a recharge cycle to ensure sufficient conditioned water.
Adjusting the system clock after power loss or for accurate operation timing.
Adjusting the automatic recharge schedule and the water hardness parameter.
Inputting the water supply's iron content for optimal treatment and control.
Selecting which operational status screens are displayed during normal operation.
Changing the display language for the unit's interface from available options.
Adjusting the clock format (12/24-hour) and volume units (gallons/liters).
Selecting measurement units for weight (e.g., pounds or kilograms).
Viewing model details, wireless status, and water availability.
Tracking daily average, total water used, and current water flow.
Configuring the duration for backwash and fast rinse cycles.
Activating an optional second backwash cycle for specific water conditions.
Adjusting efficiency modes and maximum days between automatic recharges.
Configuring the 97% recharge feature and auxiliary output options.
Selecting operational modes for the auxiliary output, such as chlorine or chemical feed.
Configuring chemical feed volume and timer settings for auxiliary control.
Enabling/disabling the sensor for detecting potential water flow issues.
Programming notifications for scheduled maintenance or service checks.
Accessing diagnostic screens and understanding system error codes.
Repeating setup, restoring defaults, and calibrating the salt level sensor.
Guidance on adding salt, recommended types, and usage of Potassium Chloride.
Identifying the causes of salt bridges and methods for breaking them.
Instructions for cleaning the nozzle and venturi assembly for proper brine suction.
Procedure for cleaning the resin bed to prevent iron buildup.
Steps to safely relieve water pressure before removing parts from the valve or tank.
Procedures for operating 3-valve and EcoWater Systems bypass valves.
A matrix of common problems, their causes, and recommended corrections.
Essential preliminary checks for common issues like blank display or incorrect settings.
Using the unit's self-diagnostic function and interpreting error codes.
Procedures to check the turbine's operation and test the sensor.
Step-by-step checks of valve position, brine draw, and flow rates.
Addressing issues like hard water bypass, drain leaks, and salty taste.
Diagram of the electronic control board, power supply, and sensor connections.
Illustration showing wiring for turbine sensor, salt level sensor, and valve motor.
Exploded view illustrating all components of the cabinet model assembly.
Detailed list of part numbers and descriptions for cabinet assembly components.
Exploded view illustrating all components of the two-tank model assembly.
Detailed list of part numbers and descriptions for two-tank assembly components.
Exploded view illustrating all components of the valve assembly for all models.
Detailed list of part numbers and descriptions for the valve assembly.
| Type | Water Softener |
|---|---|
| Salt Storage Capacity | 200 lbs |
| Grain Capacity | 37, 000 grains |
| Regeneration Type | Metered |
| Resin Tank Size | 10" x 35" |
| Brine Tank Size | 18 x 33 inches |
| Salt Usage | Varies based on settings |
| Water Usage | Varies based on settings |
| Power Supply | 120V AC |