Do you have a question about the ECS H67H2-1 and is the answer not in the manual?
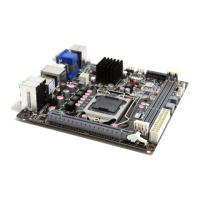
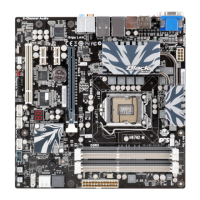
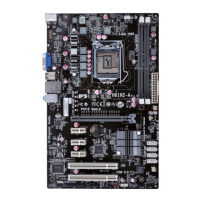
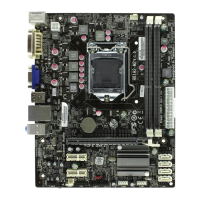
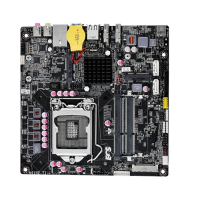
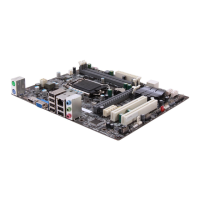
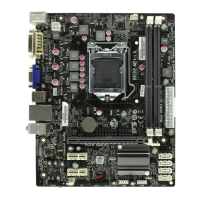
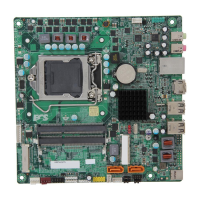
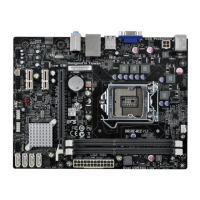
Identifies major components on the motherboard layout using numbered labels.
Details the features of the LGA1155 Intel Sandy Bridge processor supported by the motherboard.
Describes the Intel H67 Express Chipset, highlighting its single-chip, highly integrated design and performance.
Specifies support for DDR3 SDRAM, dual-channel architecture, and DIMM capacity.
Explains the AMI BIOS features, allowing configuration of system parameters like power management and CPU settings.
Provides essential safety guidelines to prevent damage from static electricity and improper handling.
Describes the process of physically installing the motherboard into the computer case, including bracket alignment.
Covers the installation of hardware like the processor, memory modules, and expansion cards.
Details the procedure for installing the CPU, including precautions and automatic frequency detection.
Outlines steps to recover the system if it fails after attempting over-clocking.
Illustrates and describes the step-by-step process for installing the CPU and its cooler.
Guides users on how to correctly install DDR3 SDRAM modules into the DIMM slots.
Provides instructions on how to install SATA hard drives, including connecting cables.
Guides on connecting various external I/O devices like LAN, USB, HDMI, DVI, and audio ports.
Details how to connect internal case components like CPU fan, power supply, and front panel headers.
Explains the connection of the ATX_POWER 24-pin connector for ATX v2.x power supplies.
Introduces the BIOS Setup Utility, its purpose in configuring system parameters, and its capabilities.
Provides instructions on how to access the BIOS Setup Utility by pressing the DEL key during POST.
Explains how to reset BIOS settings to factory defaults, often needed after hardware changes or CMOS errors.
Guides users on navigating the BIOS Setup Utility, including using cursor keys and Enter to select options.
Introduces the Advanced menu, which allows modification of CPU and other system settings.
Allows monitoring of critical voltages, temperatures, and fan speeds for system health.
Enables or disables smart fan control, allowing adjustment of fan speed based on temperature.
Configures system power management operations, including resume options and EUP support.
Displays detailed information about the installed CPU, including speed, stepping, and technology support.
Allows users to configure serial SATA operation modes, such as IDE, AHCI, or RAID.
Displays and allows configuration of USB settings, including all USB devices and specific controllers.
Allows modification of settings for the North chipset, South chipset, and other system components.
Provides access to system clock speed and bus settings determined by the installed processor.
Allows tuning of system performance, including CPU ratio, power limits, and turbo mode settings.
Provides access to detailed CPU configuration settings within the BIOS.
Provides access to chipset configuration settings, including memory multipliers, timings, and graphics settings.
Enables setting the keyboard NumLock state and configuring boot option priorities.
Allows setting up administrator and user passwords to secure system access.
Details how to set an administrator password to limit access to the BIOS setup.
Provides options to exit BIOS setup after saving changes, discarding changes, or resetting defaults.
Exits the system setup after saving the made changes.
Provides instructions on downloading and installing updated BIOS for improved performance or bug fixes.
Guides on the auto-installation process for drivers and software under Windows XP/Vista/7.
Provides step-by-step instructions for initiating the device driver and software installation process.
Guides users on manually installing drivers by locating the PATH.DOC file and specific OS subfolders.
Guides on installing eJIFFY via the DVD utility and completing activation through BIOS setup.
Details the steps for activating eJIFFY by installing it from the DVD and configuring BIOS settings.
Addresses common startup problems encountered during initial PC assembly, focusing on power and fan issues.
Provides tips for resolving startup problems that may occur after prolonged PC use, like device breakdown.
Offers basic care tips to prolong motherboard life, including ventilation, cleaning, and environmental considerations.
Presents a visual flowchart to diagnose and resolve common PC startup and operational issues.
| Brand | ECS |
|---|---|
| Model | H67H2-1 |
| Category | Motherboard |
| Language | English |