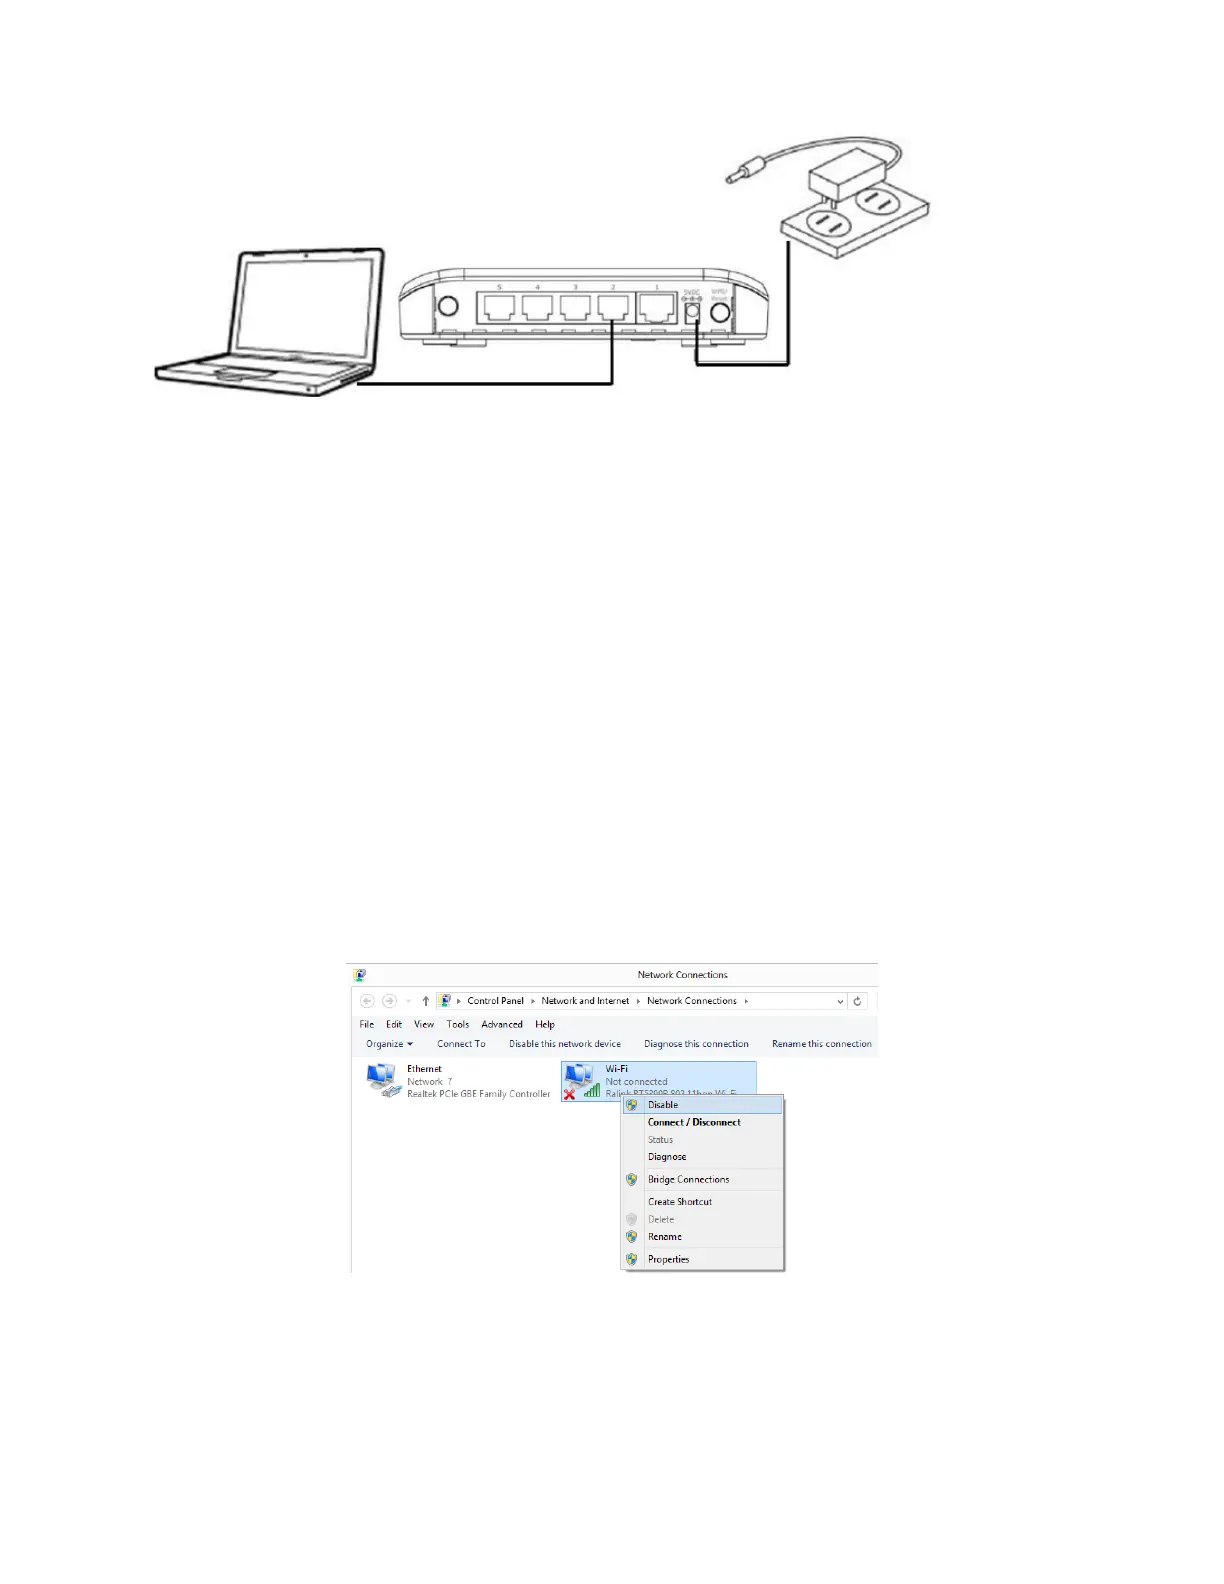
1. Connect one end of an Ethernet cable (included in the package contents) to the Ethernet port on your
computer. Connect the other end to an LAN port on the wireless bridge.
2. Plug the power adapter into the device’s 5V power port, and plug the adapter into a wall socket. The PWR
LED should light up.
3. Power on your computer if your computer is off.
For Windows 8 or Windows 7 computers:
Go to Control Panel. Go to Network and Internet. Go to Network and Sharing Center. Click on “Change
Adapter Settings” on the left menu. You are in “Network Connections” window.
For Windows Vista computer:
Go to Control Panel. Go to Network and Internet. Go to Network and Sharing Center. Click on “Manage
Network Connections” on the left menu. You are in “Network Connections” window.
For Windows XP computer:
Click on Start menu button. Click on Run. Type in “ncpa.cpl” hit Enter. You are in “Network Connections”
window.
4. If you see Wireless Network Connection (called Wi-Fi in Windows 8), your computer is WiFi capable and
you need to temporarily disable it. Right click on Wireless Network Connection icon and click on “Disable”.
5. Left click twice on Local Area Connection icon (the Ethernet icon for Windows 8) to get into Local Area
Connection Status window.
For Windows 8/ Windows 7/ Windows Vista computer: Click on Details button. Verify the IPv4 address. The
IPv4 address should be 192.168.9.10x. Click on Close. Click on Close again.
For Windows XP computer: Click on Support tab. The IP Address should be 192.168.9.10x. Click on Close.
 Loading...