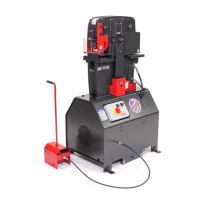
12
26 ga. (.0179) 0.18 0.27 0.36 0.45 0.54 0.63 0.72 0.81 0.90 0.99 1.07 1.16 1.25 1.34 1.43
24 ga. (.0239) 0.24 0.36 0.48 0.60 0.72 0.84 0.96 1.08 1.20 1.31 1.43 1.50 1.67 1.89 1.91
22 ga. (.0299) 0.30 0.45 0.60 0.75 0.90 1.05 1.20 1.35 1.50 1.65 1.80 1.95 2.10 2.24 2.39
20 ga. (.0359) 0.36 0.54 0.72 0.90 1.08 1.26 1.44 1.62 1.80 1.98 2.15 2.33 2.51 2.69 2.87
18 ga. (.0478) 0.48 0.72 0.96 1.20 1.43 1.67 1.91 2.15 2.39 2.63 2.87 3.11 3.34 3.58 3.82
16 ga. (.0598) 0.60 0.90 1.20 1.50 1.79 2.09 2.39 2.69 2.99 3.29 3.59 3.89 4.19 4.49 4.78
14 ga. (.0747) 0.75 1.12 1.49 1.87 2.24 2.61 2.99 3.36 3.73 4.11 4.48 4.86 5.23 5.60 5.97
12 ga. (.1046) 1.05 1.57 2.09 2.62 3.14 3.66 4.18 4.71 5.23 5.75 6.28 6.80 7.32 7.85 8.57
10 ga. (.1345) 2.02 2.69 3.36 4.04 4.71 5.38 6.05 6.73 7.40 8.07 8.74 9.42 10.09 10.76
3/16 (.187) 2.81 3.74 4.68 5.61 6.50 7.48 8.42 9.35 10.29 11.22 12.16 13.09 14.03 14.96
1/4 (.250) 5.00 6.25 7.50 8.75 10.00 11.25 12.50 13.75 15.00 16.25 17.50 18.75 20.00
3/8 (.375) 11.25 13.13 15.00 16.88 18.75 20.63 22.50 24.38 26.25 28.13 30.00
1/2 (.500) 20.00 22.50 25.00 27.50 30.00 32.50 35.00 37.50 40.00
5/8 (.625) 31.25 34.38 37.50 40.63 43.75 46.88 50.00
3/4 (.750) 45.00 48.75 52.50 56.25 60.00
7/8 (.875) 61.25 65.63 70.00
1” (1.000) 80.00
1/8 3/16 1/4 5/16 3/8 7/16 1/2 9/16 5/8 11/16 3/4 13/16 7/8 15/16 1”
Stock Thickness Hole Diameter
Figure 1 - Punch Tonnage Requirements
Punch Operation
1. Clear the punch station of any tools or debris prior to powering the
machine on.
2. Place the material to be punched between the punch and die.
Check to see that your material is spanning the stripper plate and
that adequate material is available to safely position the material.
3. Clear your hands from the working area and depress the foot pedal
to move the punch through the material and into the die.
4. When the punch is complete, release the foot pedal to automati-
cally strip the material from the punch and return the punch to its
neutral position.
Punch and Die Operating Clearances
Maintain the following clearance between punch and die.
Material Thickness Total Clearance
16 gauge and lighter .006”
15 gauge - 13 gauge .010”
3/32” - 5/32” 1/64”
3/16” - 15/32” 1/32”
1/2” - 23/32” 1/16”
3/4” and heavier 3/32”
Punching Capacities
You can determine the tonnage required to punch A36 mild steel (yield
strength 36,300 psi, 65,000 psi tensile) by applying the following for-
mulas for round or shaped holes. For materials other than mild steel
please refer to the multiplier table.
Round Holes
Punch Dia. x Material Thickness x 80 = Tons of pressure required
Example: How many tons of force do I need to punch a
3/8” hole in 1/4” mild steel?
.375 x .25 x 80 = 7.5 tons
Punch Tonnage Requirement (Figure 1)
Shaped Holes
1/3 Punch Perimeter x Material thickness x 80 =
Tons of pressure required
Example: How much force do I need to punch a 3/8” x 1”
rectangular hole in 1/4” mild steel?
(.33 x 2.75) x .25 x 80 = 18.1 tons
Material Multiplier
When punching materials other than mild steel rst calculate tonnage as
shown above then apply the multiplier for the listed material.
Aluminum(2024-0) 0.36
Brass (1/4 hard) 0.70
Copper (1/2 hard) 0.52
Steel (50% carbon) 1.60
Steel (cold rolled) (1018) 1.24
Stainless Steel (303) 1.50

 Loading...