11
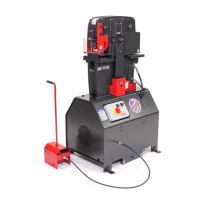
Your Ironworker may include a Brake assembly as an optional
tool. Brake tooling is in a 7” assembly for your 25 Ton Edwards
Ironworker. When maintained within tolerance, Brake tooling will
allow for the graduated bending of 1/16”, 3/16”, 1/8” and 1/4”
at, bar or angle stock up to 90 degrees.
Your Brake tooling is equipped with one mounting bracket to
secure the “punch” to the moving center of the machine, one
“4-way die”, and two bottom brackets that secure the “die” to
the base table. The moving “center” of the Ironworker, pushes
the top punch into the shaped die to bend the speci ed material.
Brake tooling will wear over time and will need to be replaced.
Observe the following procedures when maintaining or replacing
components of the Ironworker Brake station.
Turn off power to machine by depressing the red stop/off
button and lockout upstream power at the main electrical
panel.
Remove and replace moving Punch:
1. While supporting the punch, carefully remove the allen screws that
secure the punch to the punch holder. Remove the punch.
2. If the punch holder requires replacement, remove the two 1/2”
socket head cap screws from the punch holder assembly. Remove
punch holder.
3. Clean the keyway in the moving center of any dirt or debris.
4. Install the new punch holder with the two 1/2” socket head cap
screws. The 1/2” tapped hole is positioned to the outside of the
machine. Tighten the assembly into the moving center.
5. Position punch in the holder so that the milled relief in the keyway
slips over the holder bolt. Tighten set screws in the holder to secure
the punch.
Remove and replace stationary Four-Way Die:
1. Remove four 1/2” bolts, nuts and washers from the die support
brackets.
2. Remove support brackets.
3. Remove old die assembly.
4. Place new die assembly on the Ironworker support table.
5. Loosely secure the two support brackets to the support table from
the underside of the base with four 1/2” bolts, nuts and washers
(provided).
6. Check for punch and die alignment by powering on the machine
and slowly inching down the punch to meet the bottom die with the
foot pedal. Power the machine off.
7. In the event that the punch and die are not aligned, simply loosen
the bolts under the table allowing the die block to be moved to
center the punch. When aligned, tighten the table bolts to secure
the table.
8. Select 1/16”, 3/16”, 1/8” or 1/4” test material for bending. Rotate
your four-way die to your selected material thickness. Power the
machine on and jog the center down till the punch pushes the
sample material into the die. If the punch stops before the material
has been formed to a 90 degree angle, a small steel shim must be
placed between the die and support table.
9. Re-install all guarding to the machine prior to machine use.
Optional Tooling - Brake Tooling
 Loading...