14
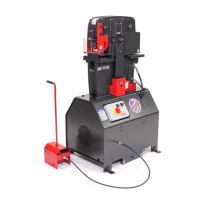
Brake tooling is available in a 7” assembly for your 25 Ton Edwards
Ironworker. Brake tooling will allow for the graduated bending of 1/16”,
3/16”, 1/8” and 1/4” at stock up to 90 degrees.
Setup
Brake tooling can be accommodated in either the open or punch station
of the machine. Brake tooling includes one mounting bracket to secure
the “punch” to the center of the machine, one “punch”, one “4-way die”,
and two bottom brackets that secure the “die” to the base table. The
moving “center” of the Ironworker, pushes the top punch into the shaped
die to bend the speci ed material. If ordered as a factory installed option,
your Brake assembly is setup for immediate operation. If ordered as an
option, the open or punch station must be cleared of any existing tooling,
material or debris prior to tooling installation. To setup your Brake, please
observe the following steps.
Install the punch holder:
1. Remove all tooling and guarding from the open or punch station.
2. Secure the punch holder to the moving “center” with bolts
provided. The 1/2” tapped hole is positioned to the outside of the
machine.
3. Position punch in the holder so that the milled relief in the keyway
slips over the holder bolt. Tighten set screws in the holder to
secure the punch.
Install the 4-way die:
1. Place the die assembly on the Ironworker support table.
2. Loosely secure the two support brackets to the support table from
the underside of the base with four 1/2” bolts, nuts and washers
(provided).
3. Check for punch and die alignment by powering on the machine
and slowly inching down the punch to meet the bottom die with
the foot pedal. Power the machine off.
4. In the event that the punch and die are not aligned, simply loosen
the bolts under the table allowing the die block to be moved to
center the punch. When aligned, tighten the table bolts to secure
the table.
5. Select 1/16”, 3/16”, 1/8” or 1/4” test material for bending. Rotate
your four-way die to your selected material thickness. Power the
machine on and jog the center down till the punch pushes the
sample material into the die. If the punch stops before the mate-
rial has been formed to a 90 degree angle, a small steel shim
must be placed between the die and support table.
6. Re-install all guarding to the machine prior to machine use.
Safe Operation
Observe the following guidelines when operating the Brake Station.
• Never exceed the capacities of the machine or tooling as
described in the Ironworker speci cations or listed at the tooling
station.
• Keep the brake tooling clean.
• Check Brake clearance and alignment at every tooling change,
maintenance cycle or extended Brake operation. Failure to
maintain proper clearance may damage punch, die and support
brackets or adjacent tooling.
• Brake material towards the center of the brake length.
• Do not stack material in the Brake station.
• Use Brake aids when working with small items at the Brake sta-
tion.
• When not in use, remove the Brake die from the holder.
Brake Operation
1. Clear the station of any tools or debris prior to powering the
machine on.
2. Turn the Ironworker on and place the material to be “broken” on
top of the bottom die.
3. Center your material within the length of the bottom die. Bending
material to the front or back of the brake die may damage your
Ironworker.
4. Position your material for the desired brake. Clear your hands from
the working area and depress the foot pedal to activate the brake
station. When the brake operation is complete, release the foot
pedal to return the punch to the neutral position.
Optional Tooling - Brake
 Loading...