8
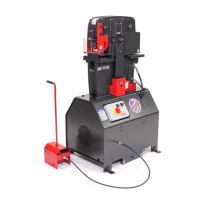
Your Ironworker may include an Angle Notcher as an optional tool.
When maintained within tolerance, the notcher will provide a dis-
tortion and burr free two-sided, 92 degree notch cut to mild steel
bar, plate or angle iron.
Angle Notcher tooling is equipped with one, two-sided top notcher
blade and two, four-sided bottom blades. The top blade is mounted
to the base table with two pin and return spring assemblies. This
‘bump-die’ housing allows the moving “center” (with push block)
of the Ironworker to push or ‘bump’ the top blade to bypass the
bottom stationary blades. Notcher blades are wearing parts and
need to be maintained or replaced over time. Observe the follow-
ing procedure when maintaining the Ironworker Angle Notcher
station.
Turn off power to machine by depressing the red stop/off button and
lockout upstream power at the main electrical panel.
Remove and replace moving blade:
1. Remove the Angle Notcher guard assembly from the notcher table.
2. Remove the two 1/2” socket head cap screws that secure the
Angle Notcher push block to the moving center.
3. Clean the keyway in the moving center of any dirt or debris.
4. With the push block removed, lift the moving top blade from the
guide pin assembly. Clean and lubricate the guide pins and reinstall
new moving top blade.
Remove and replace stationary blades:
1 The Angle Notcher base table includes two blades secured within
the table housing. Remove the four 1/2” socket head cap screws
that secure the blades into the blade supports of the base table
housing.
2. Clean the blade pockets of any dirt or debris.
3. The bottom shear blades have multiple cutting surfaces. Either ro-
tate/ ip the existing blade set to the new cutting surfaces or install
new cutting blades into the blade pockets. Re-install the four 1/2”
socket head cap screws and tighten. The blades should be planar
to eachother at the top surface of the working table.
4. Reinstall the push block to the moving center with the two 1/2”
socket head cap screws provided
5. Check for top and bottom blade alignment by powering up the ma-
chine and slowly inching down the top blade to meet the bottom
blades with the foot pedal. Power the machine off.
6. Using a feeler gauge, con rm the clearance between the perimeter
of the top and bottom blades to allow for .010 clearance on two
sides.
7. Periodically lubricate the Angle Notcher assembly with the grease
ttings supplied as indicated on the tooling.
Optional Tooling - Angle Notcher
 Loading...