20
Optional Tooling - 241 Punch
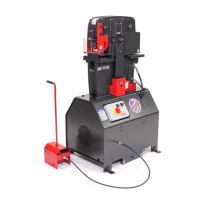
Your Ironworker is capable of punching materials as listed in the
Ironworker Speci cations as well as described on the capacity la-
bels positioned at the Punch Station.
Setup
241 Punch tooling ts within the open or standard punch station of the
machine. 241 Punch tooling includes an oversize punch stripper, punch
holder assembly, die table and wrench. Punch and dies are wearing
parts and will need to be maintained or replaced over time. Refer to the
Maintenance Manual for removal and replacement instructions. When
installing 241 punch and die tooling please observe the following steps.
Turn off power to machine by depressing the red stop / off button
or lockout upstream power at the main electrical panel.
Install the punch holder:
1. Clear any tooling or debris from the tooling installation site.
2. Secure the 241 punch holder to the operating center by rst re-
moving the stud from the holder. Place the holder to the operating
center with the tapped hole positioned to the outside of the center.
Install holder with two 1/2” SHCS bolts and tighten. Install stud to
holder with four 3/8” SHCS bolts and tighten.
Install the die table:
1. Place the 241 die table and slug chute on the support table base
and loosely install four 1/2” bolts (provided) through the underside
of the support table into the 241 die table.
2. Install new oversize die and tighten set screw. If loading a shaped
die, align the whistle spot with the set screw and tighten.
3. Install new 241 punch and tighten with spanner wrench. If using
a shaped punch, align the locating keystock (not provided) of the
punch with the corresponding slot within the punch stem assem-
bly and tighten the punch nut with the wrench.
4. Check for punch and die alignment by powering up the machine
and slowly inching down the punch to meet the die with the foot
pedal. Check to see that the punch is centered in the die. Turn off
power to machine.
5. In the event that the punch and die are not aligned, simply loosen
the bolts under the table allowing the table to be moved to center
the die. When aligned, tighten the table bolts to secure the table.
6. Install and secure the 241 stripper bar to the ironworker frame
allowing for minimal clearance between the top of the material to
be punched and the bottom of the stripper.
Safe Operation
Observe the following guidelines when operating the 241 Punch Station.
• Follow manufacturers punch and die clearance recommendations
as shown (Figure1, Punch Operation) in this manual.
• Never exceed the capacities of the machine or tooling as
described in the Ironworker speci cations or listed at the tooling
station.
• The thickness of the material you are punching should not exceed
the diameter of the punch being used
• Check punch and die alignment after every tooling change or
extended punch operation.
• Adjust the punch stripper supplied with your 241 tooling to allow
for material positioning and material stripping.
• Do not stack material to punch in the punching station.
• Use one or two drops of oil at the punch to aid in stripping mate-
rial from the punch as well as to extend the life of the punch
tooling.
• Punch complete holes only – partial holes will side load the punch
tooling and could result in punch breakage and operator injury.
• Use punching aids when working with small items at the punch
station.
241 Punch Operation
1. Clear the punch station of any tools or debris prior to powering the
machine on.
2. Turn the Ironworker on and place the material to be punched
between the punch and die. Adjust the punch stripper for mini-
mum clearance between stripper plate and material. Check to see
that your material is spanning the stripper plate and that adequate
material is available beyond the stripper area to safely position the
material.
3. Clear your hands from the working area and press the foot pedal
to move the punch through the material and into the die. When the
punch is complete, release the foot pedal to automatically strip
the material from the punch and return the punch to its neutral
position.
 Loading...